Integrative Assignment using Galaxy
Galaxy
The purpose of this integrative assignment is to help you familiarize yourself with the Galaxy environment by performing a differential expression experiment between a set of carnioma samples and normal samples. In order to run a differential expression analysis, we have three major steps:
- Alignment of the sequence data onto our reference
- Quantification of the transcripts based on our alignment
- Normalization and differential expression based on the quantified transcripts
More in depth information is provided on the Galaxy website as well as the notes in Module 6.
To accomplish this goal, we’re going to be using the softwares Hisat for alignment of the reads, Cufflinks for efficient transcript quantification, Cuffmerge to combine transcript counts, and finally CuffDiff to determine differenially expressed genes.
Note: The tools used for RNA-Sequencing pipelines do vary, so the above tools can be swapped out with others provided that the outputs from one program are compatible with another.
Some configuration for our data
To be able to upload our data onto the Galaxy server, we need to make a few modifications. Login into the AWS instance through either terminal or PuTTy, and make a soft link to where the data is stored:
cd workspace
ln -s /home/ubuntu/CourseData/CG_data/IntegrativeAssignment/
Now to be make the reference accessible, we need to change the permissions of the reference files by running the following command:
chmod ugo+wr IntegrativeAssignemnt/refs
chmod ugo+wr IntegrativeAssignemnt/refs/*
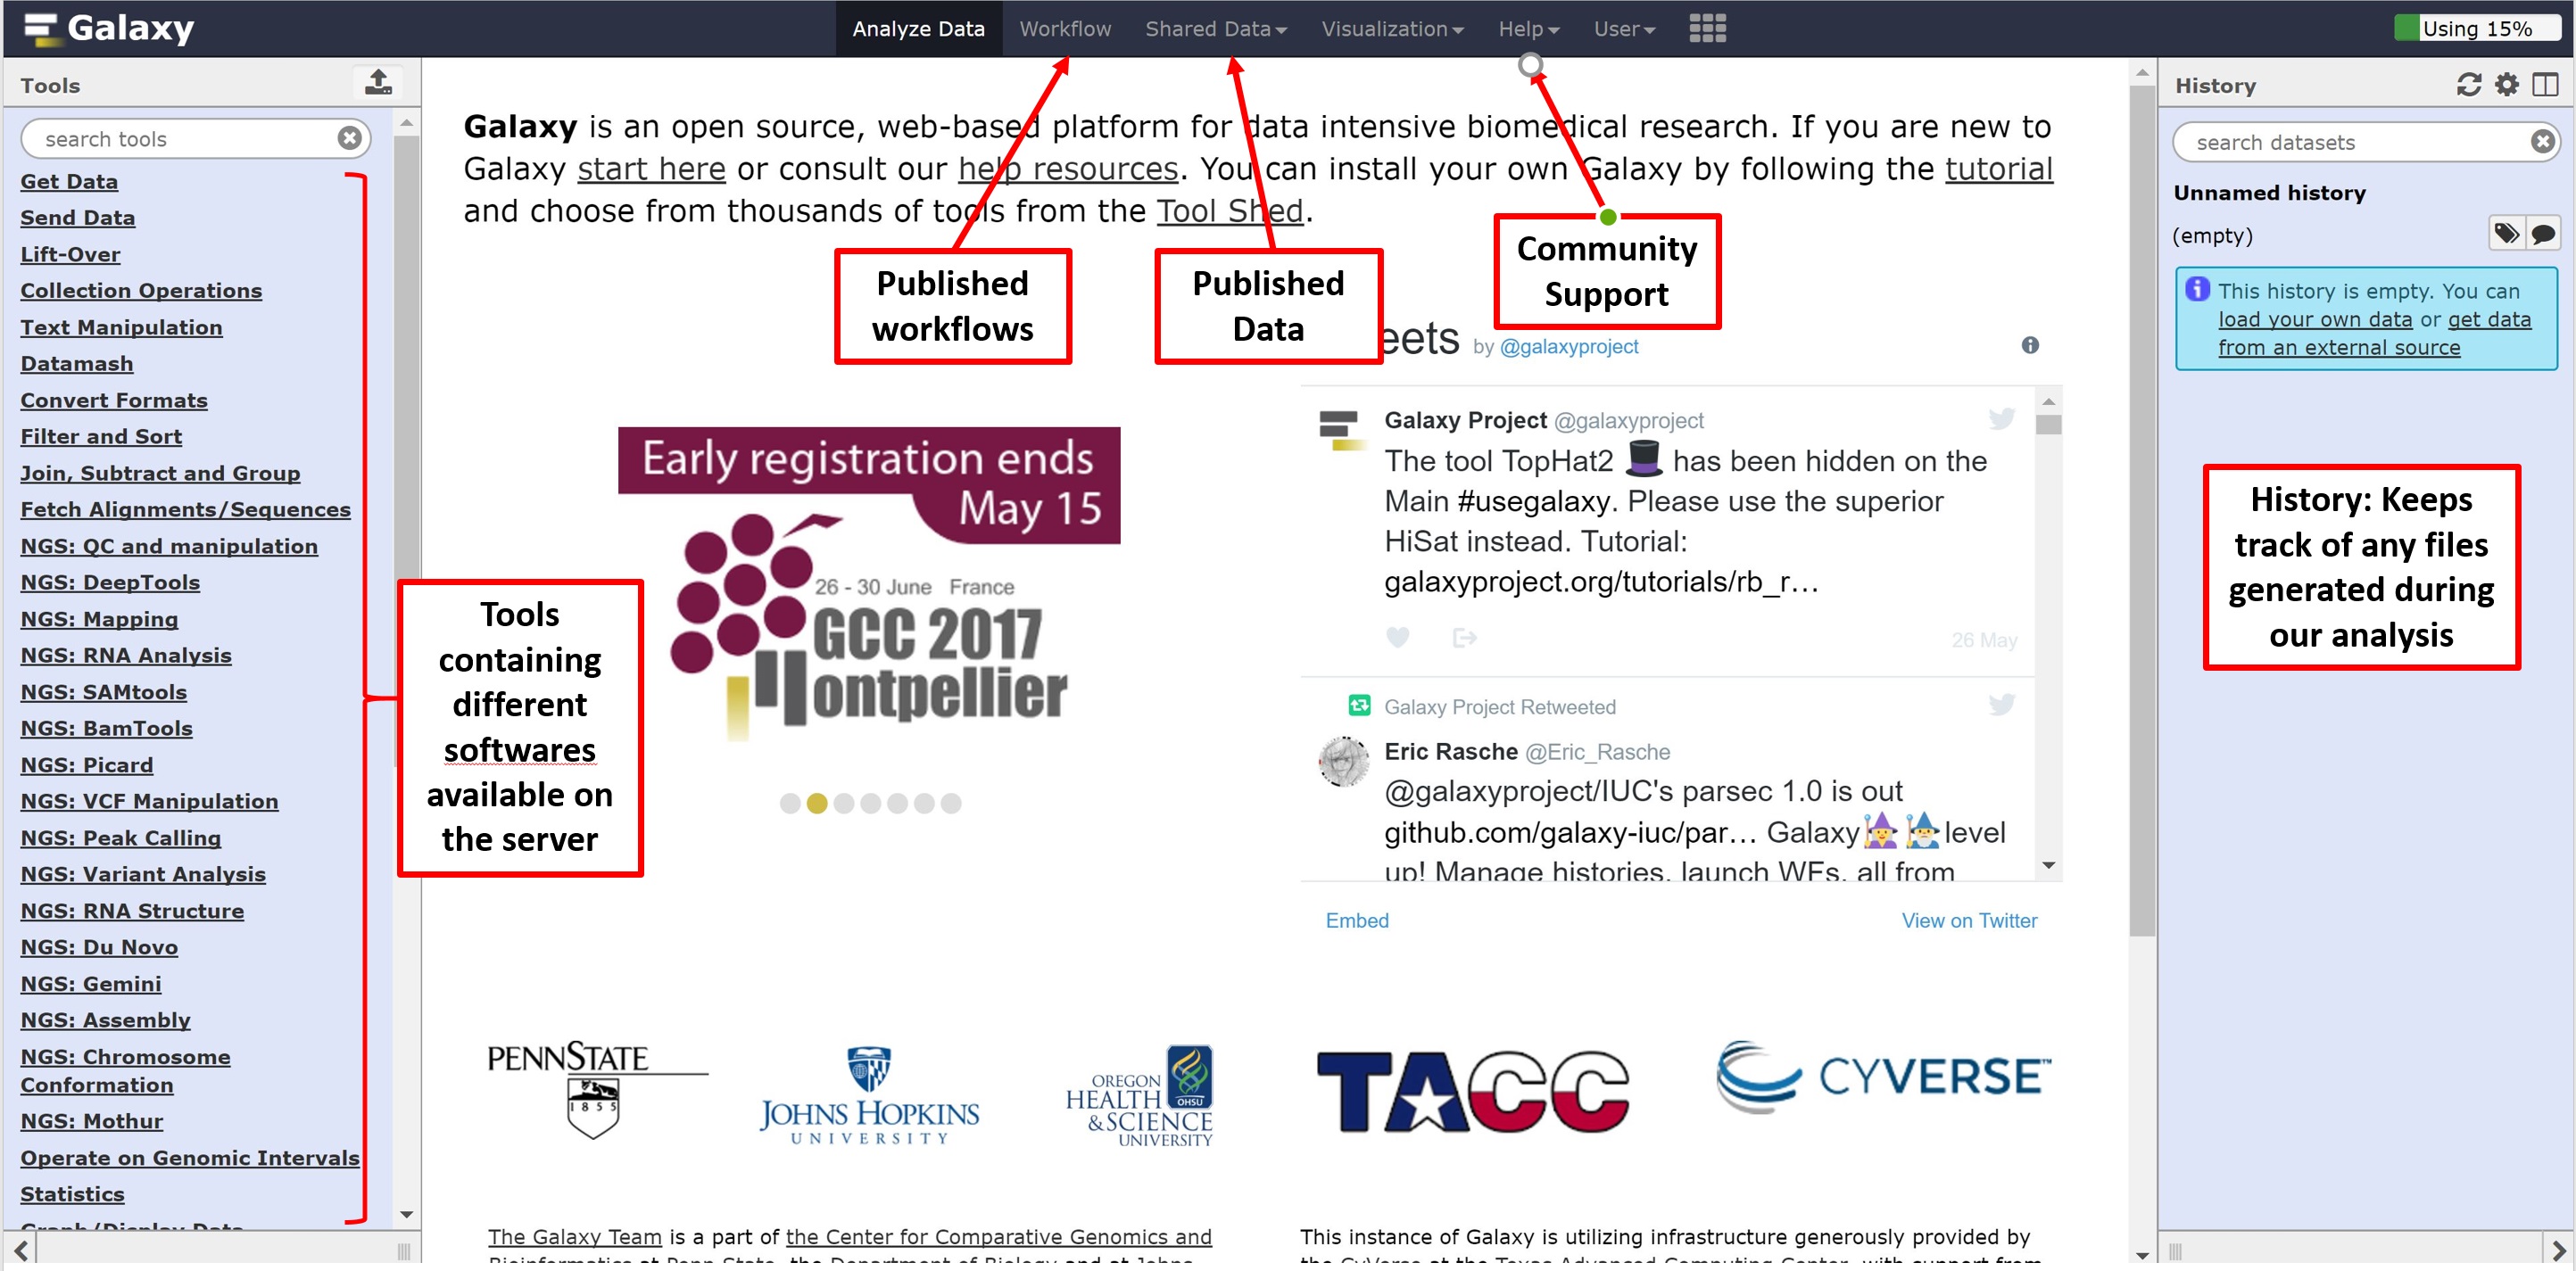
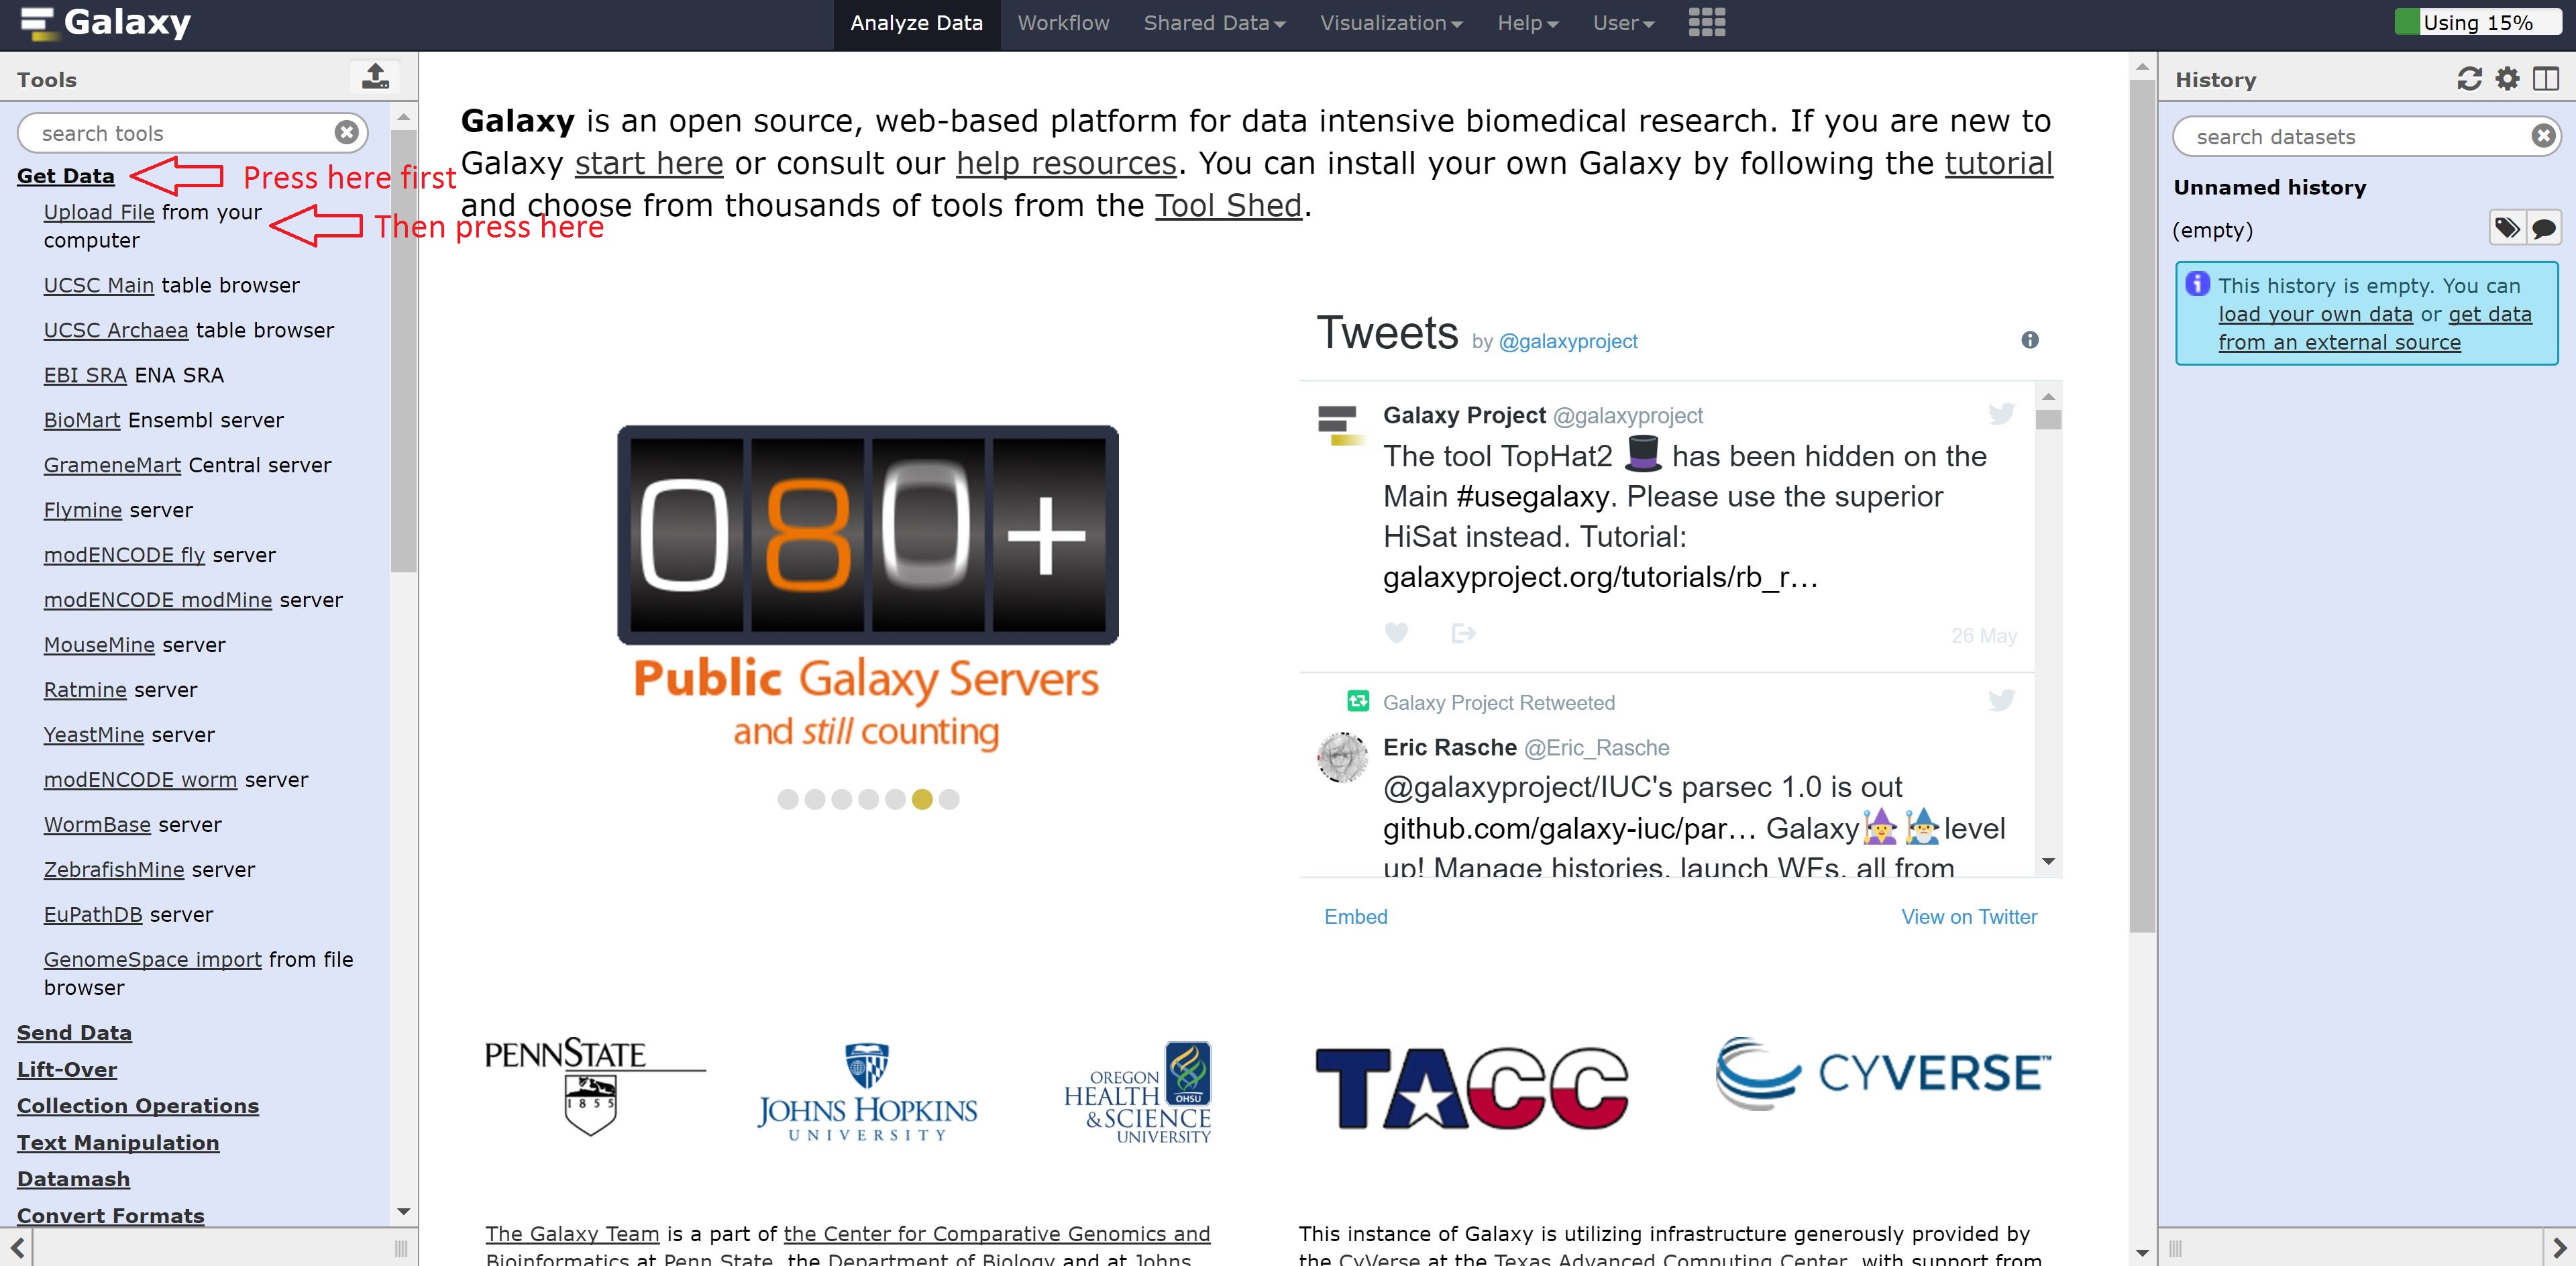
We can now navigate to Galaxy server by following the link: https://usegalaxy.org. You’ll be greeted by the following page, the main contents of which are as follows:
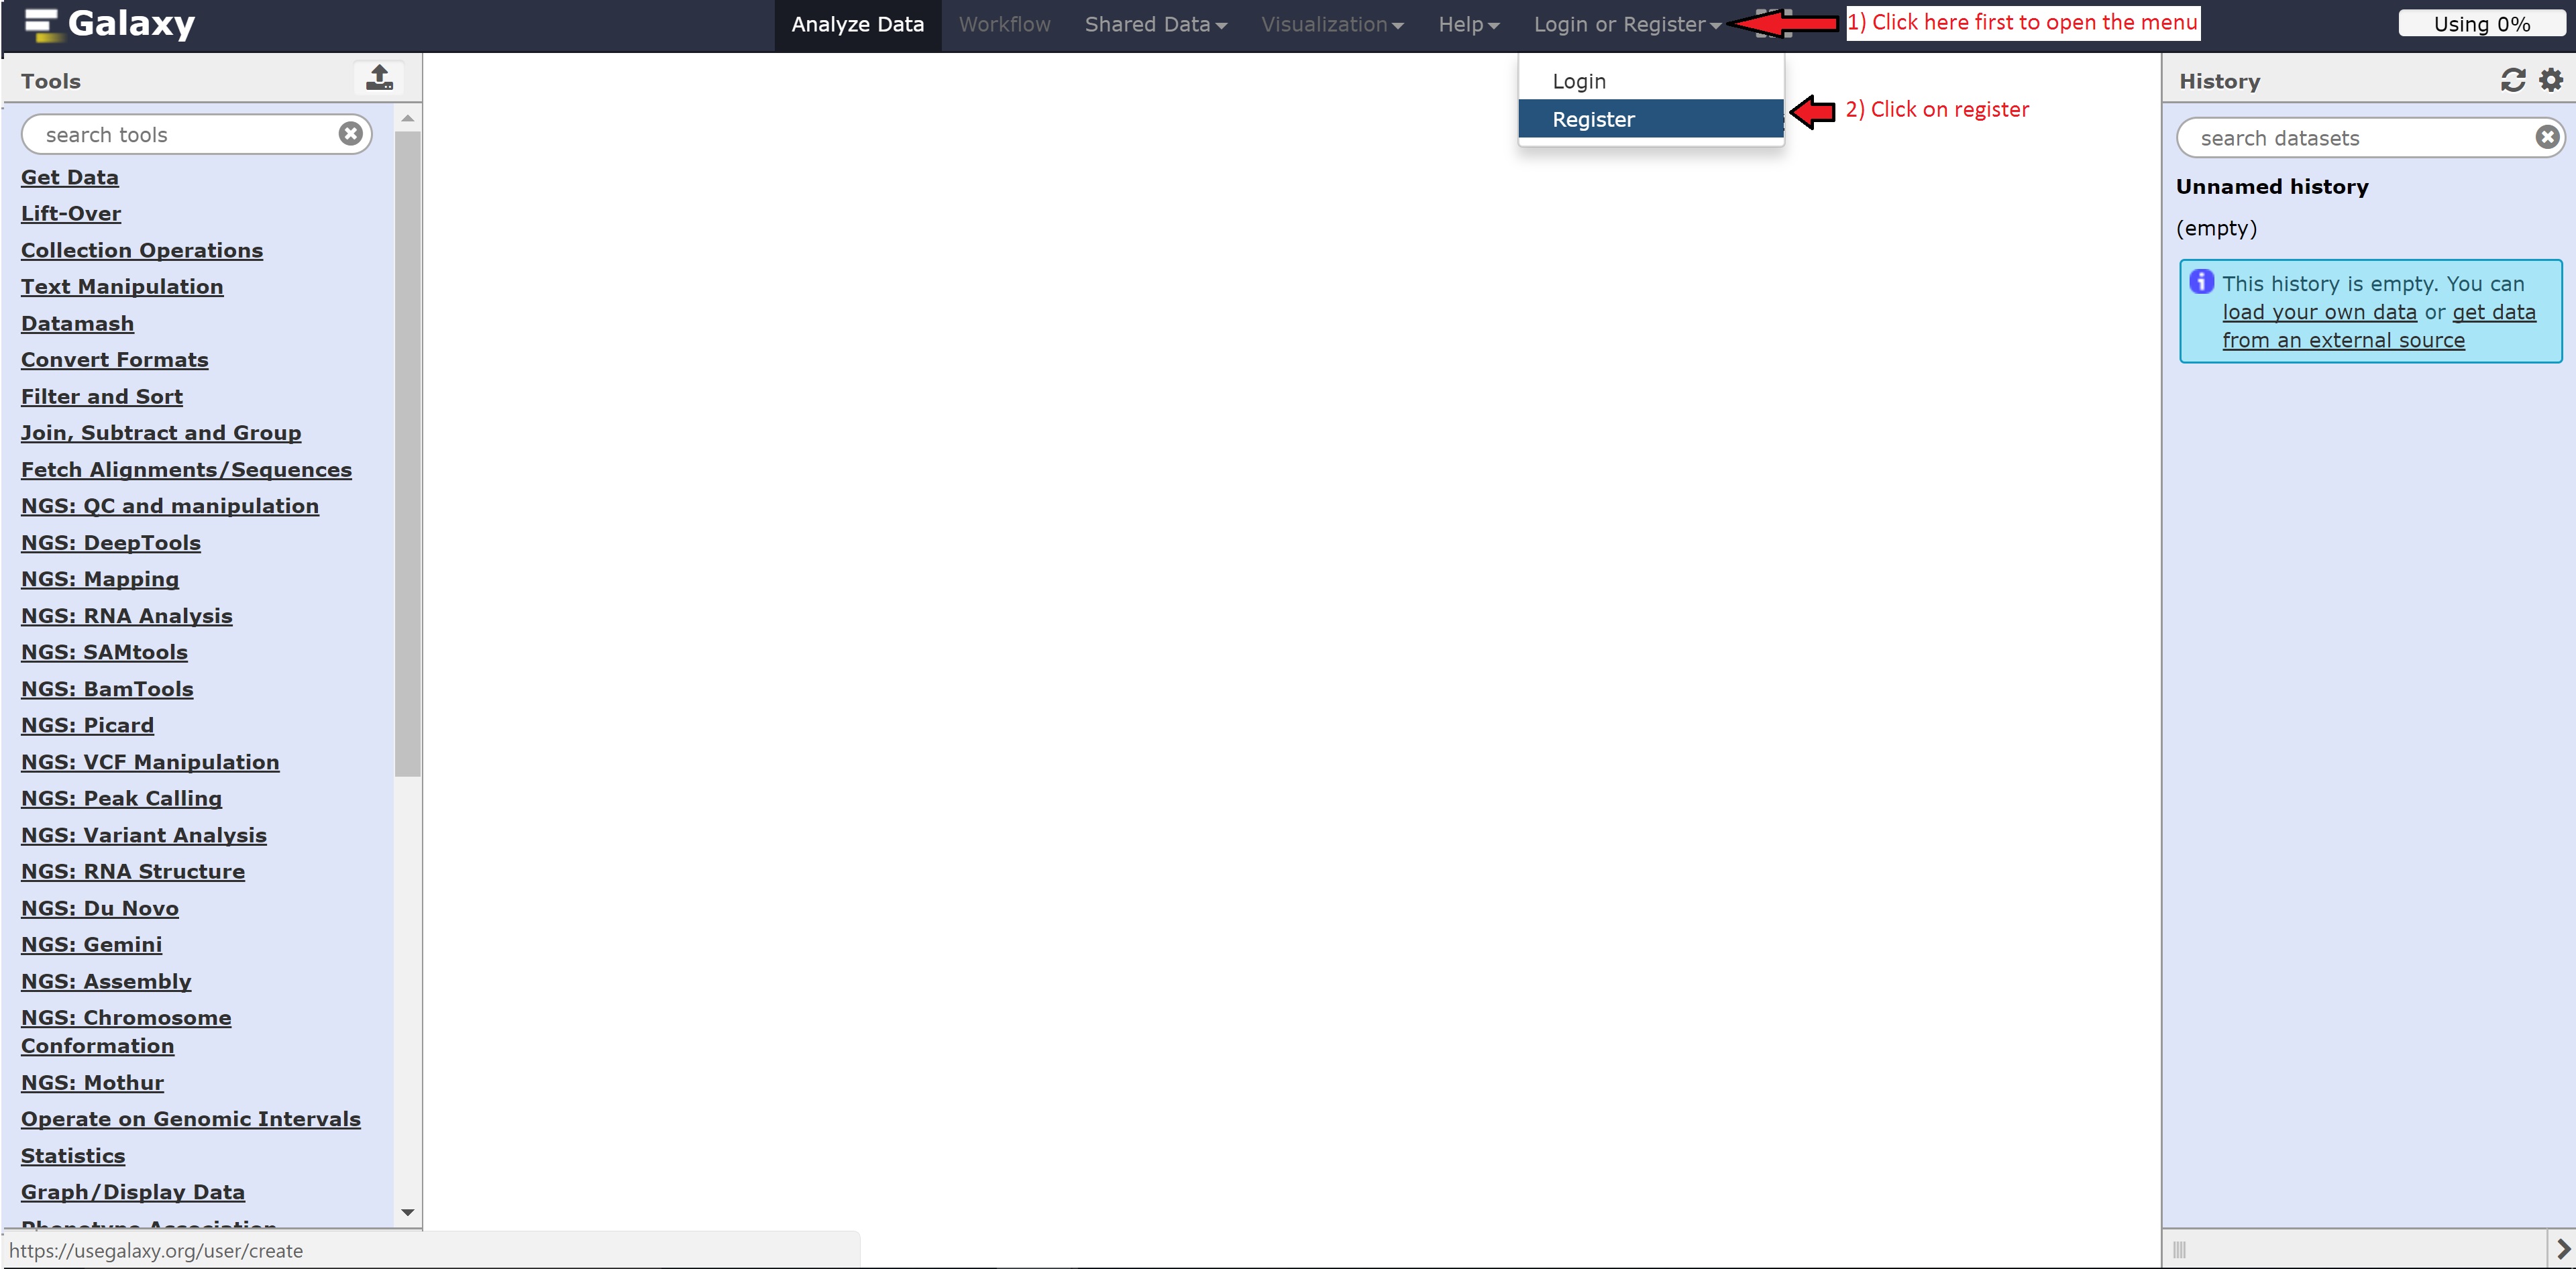
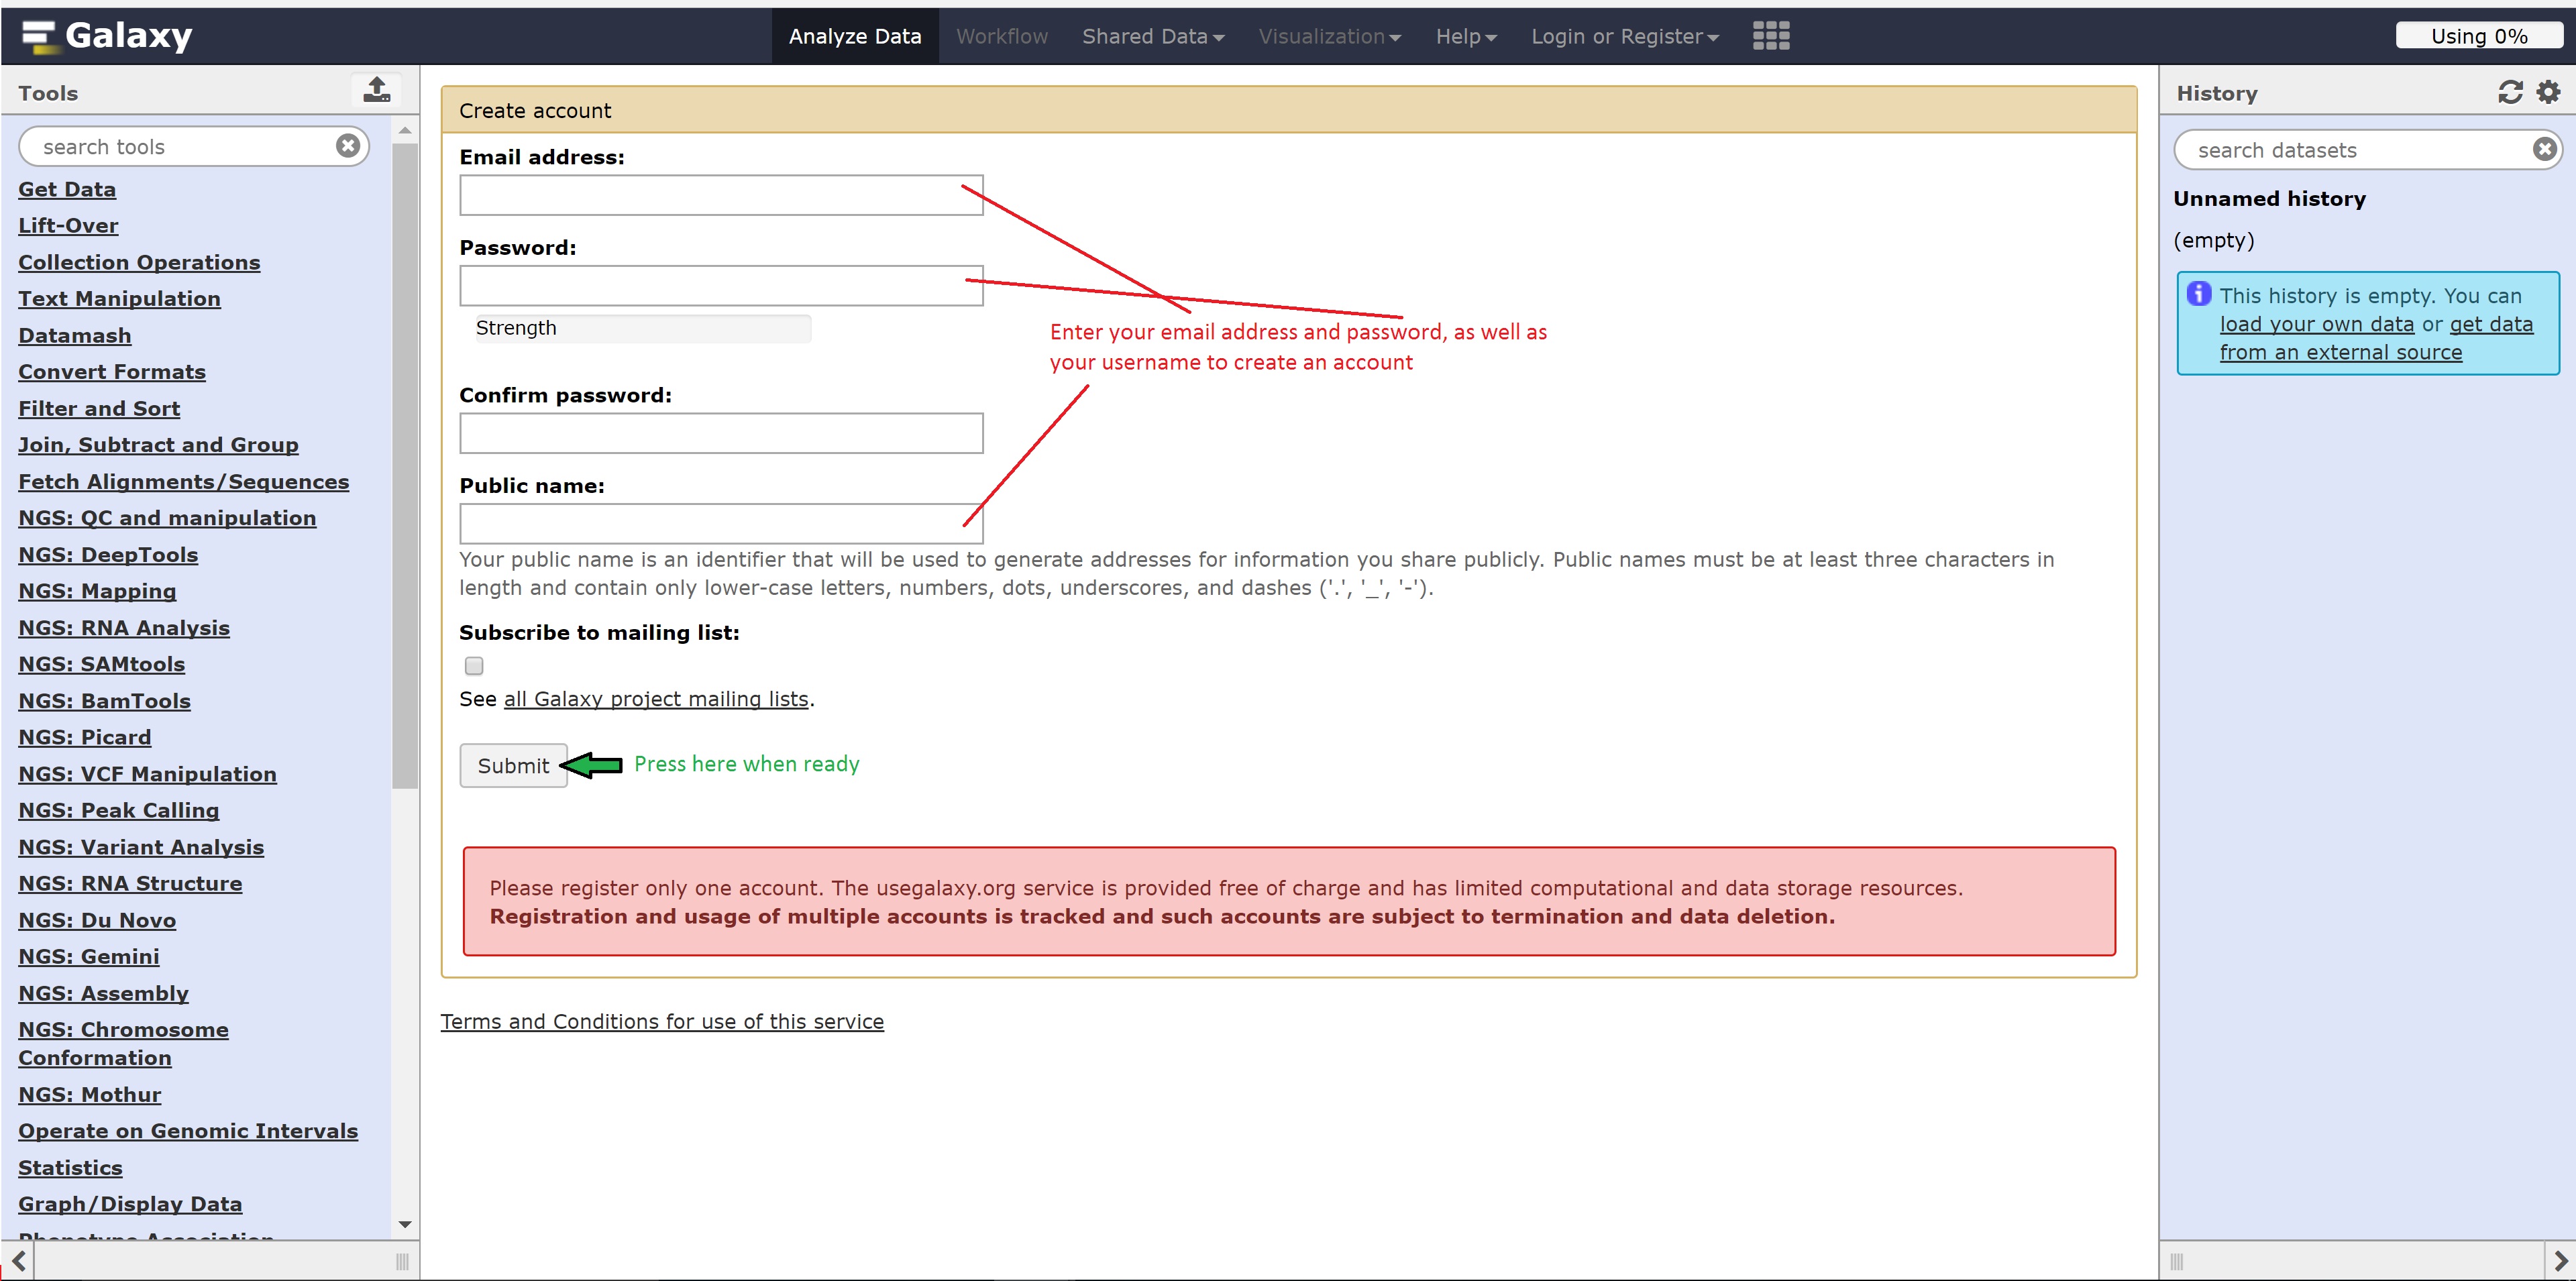
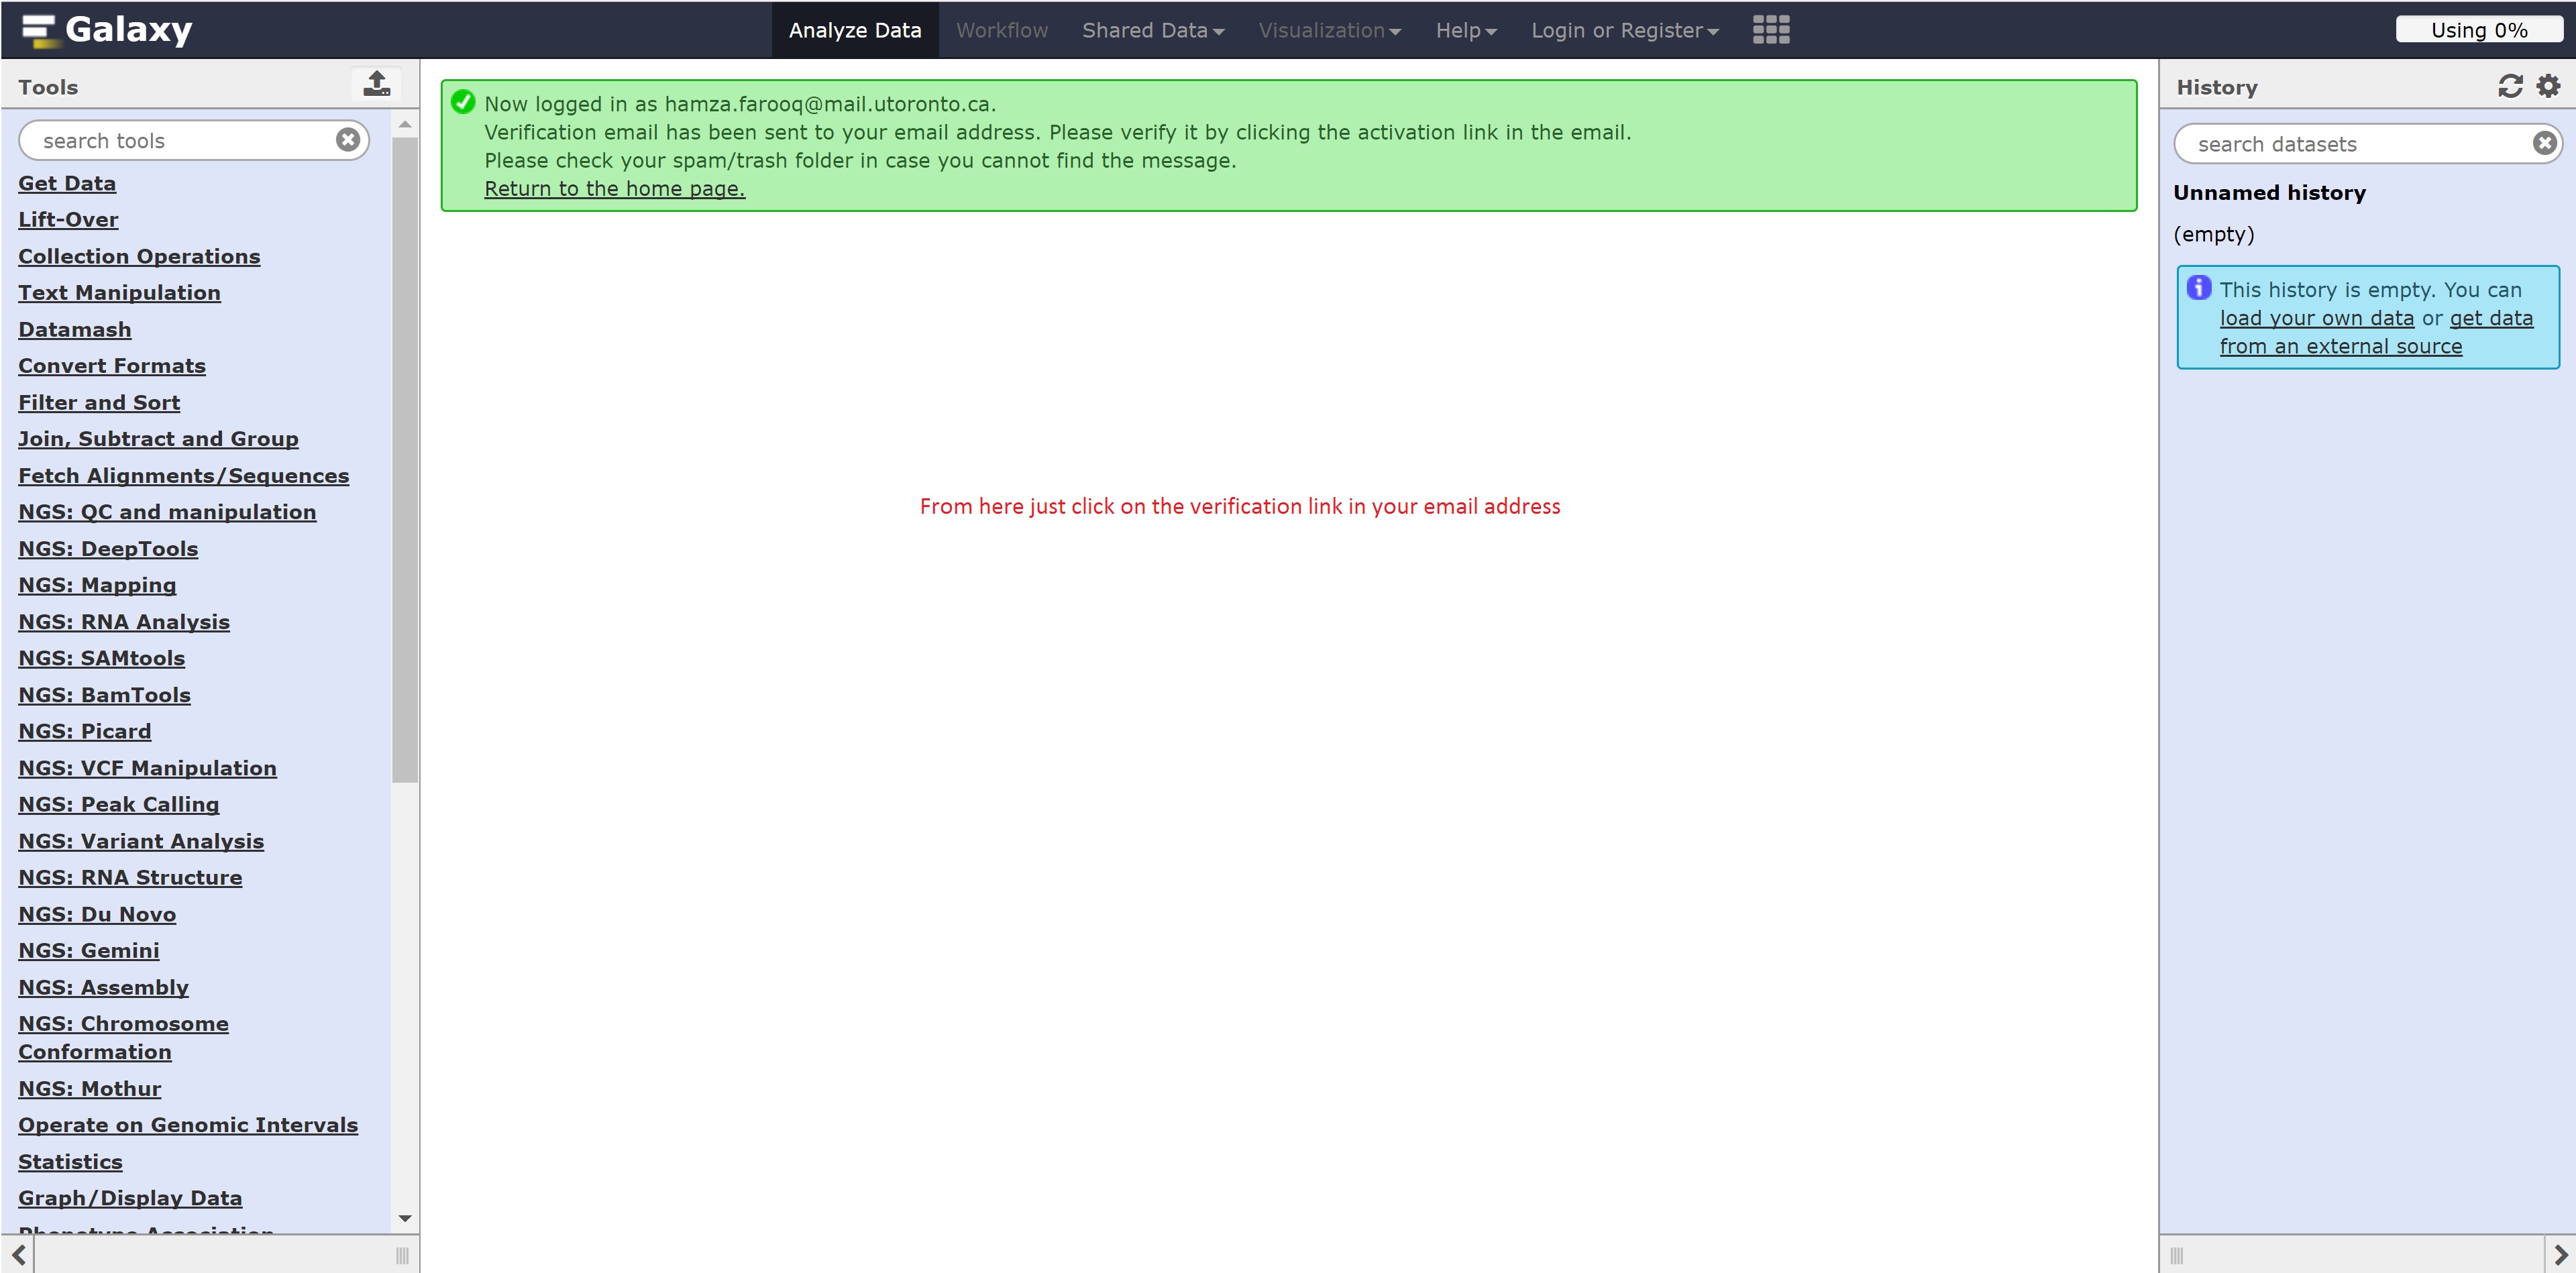
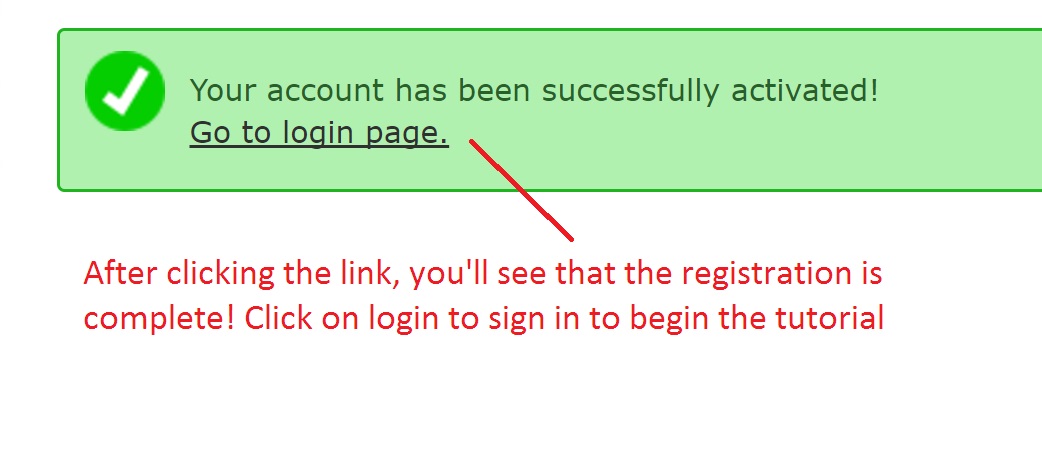
Registering for Galaxy
Follow the following steps below to register for Galaxy:
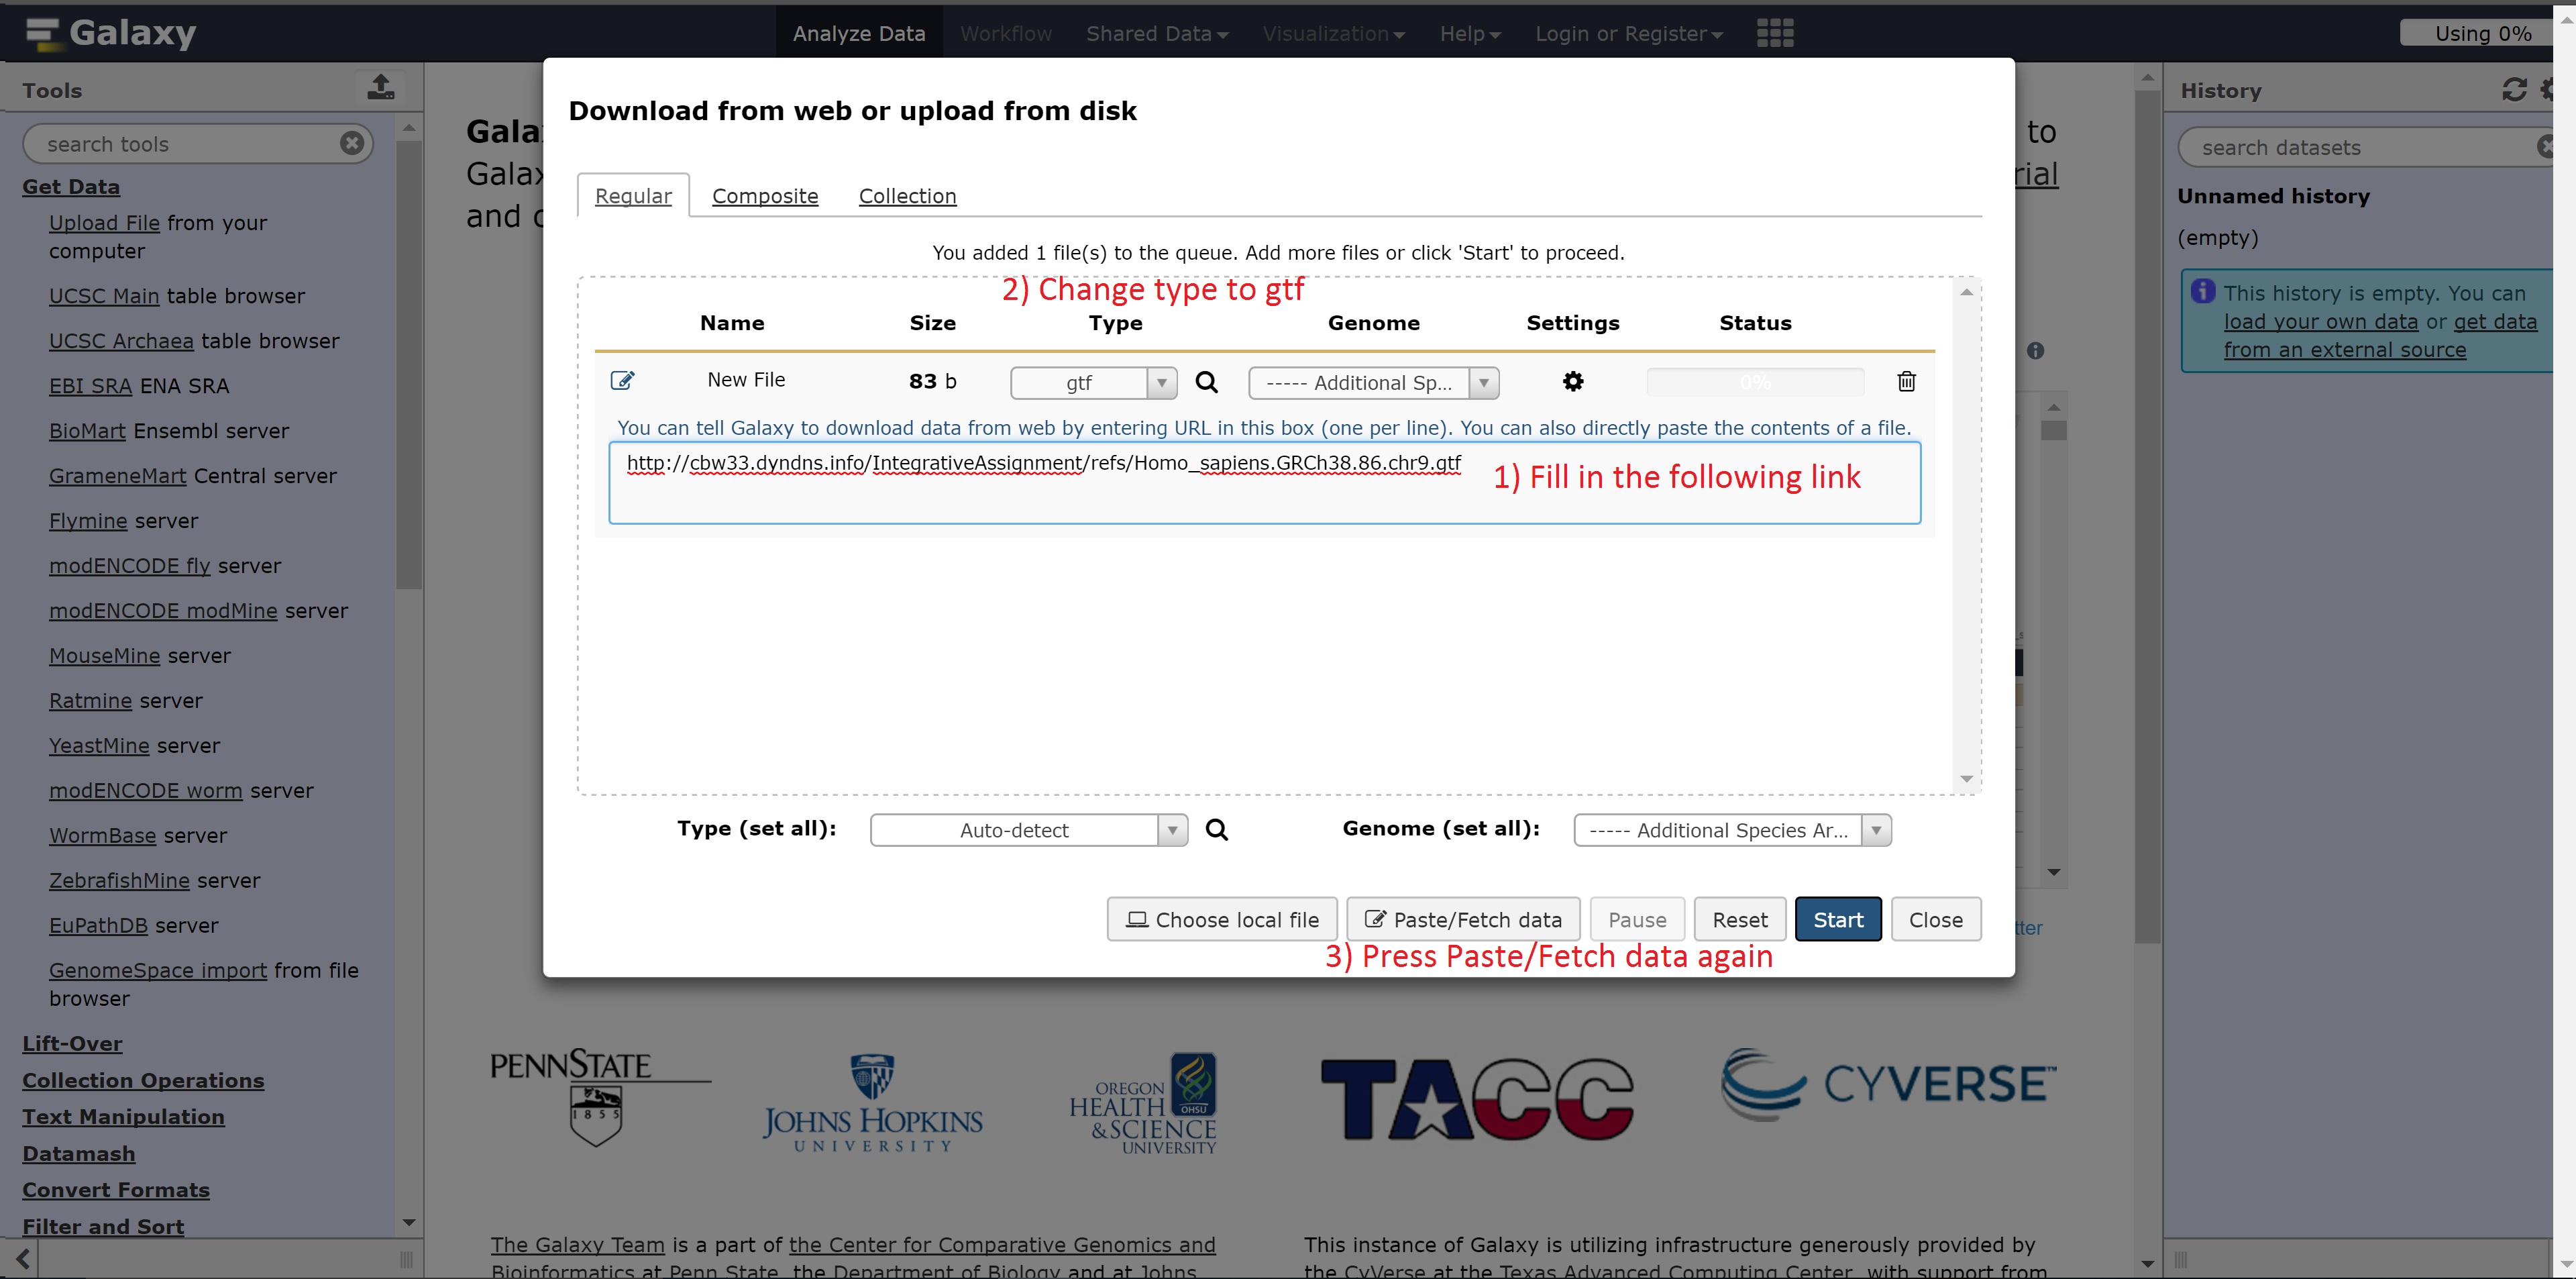
Uploading data
To compensate on time, we’re going to upload our data directly from the AWS to the Galaxy server by going through the following steps:
The link needed for the next step is:
- http://cbwXX.dyndns.info/IntegrativeAssignment/refs/Homo_sapiens.GRCh38.86.chr9.gtf
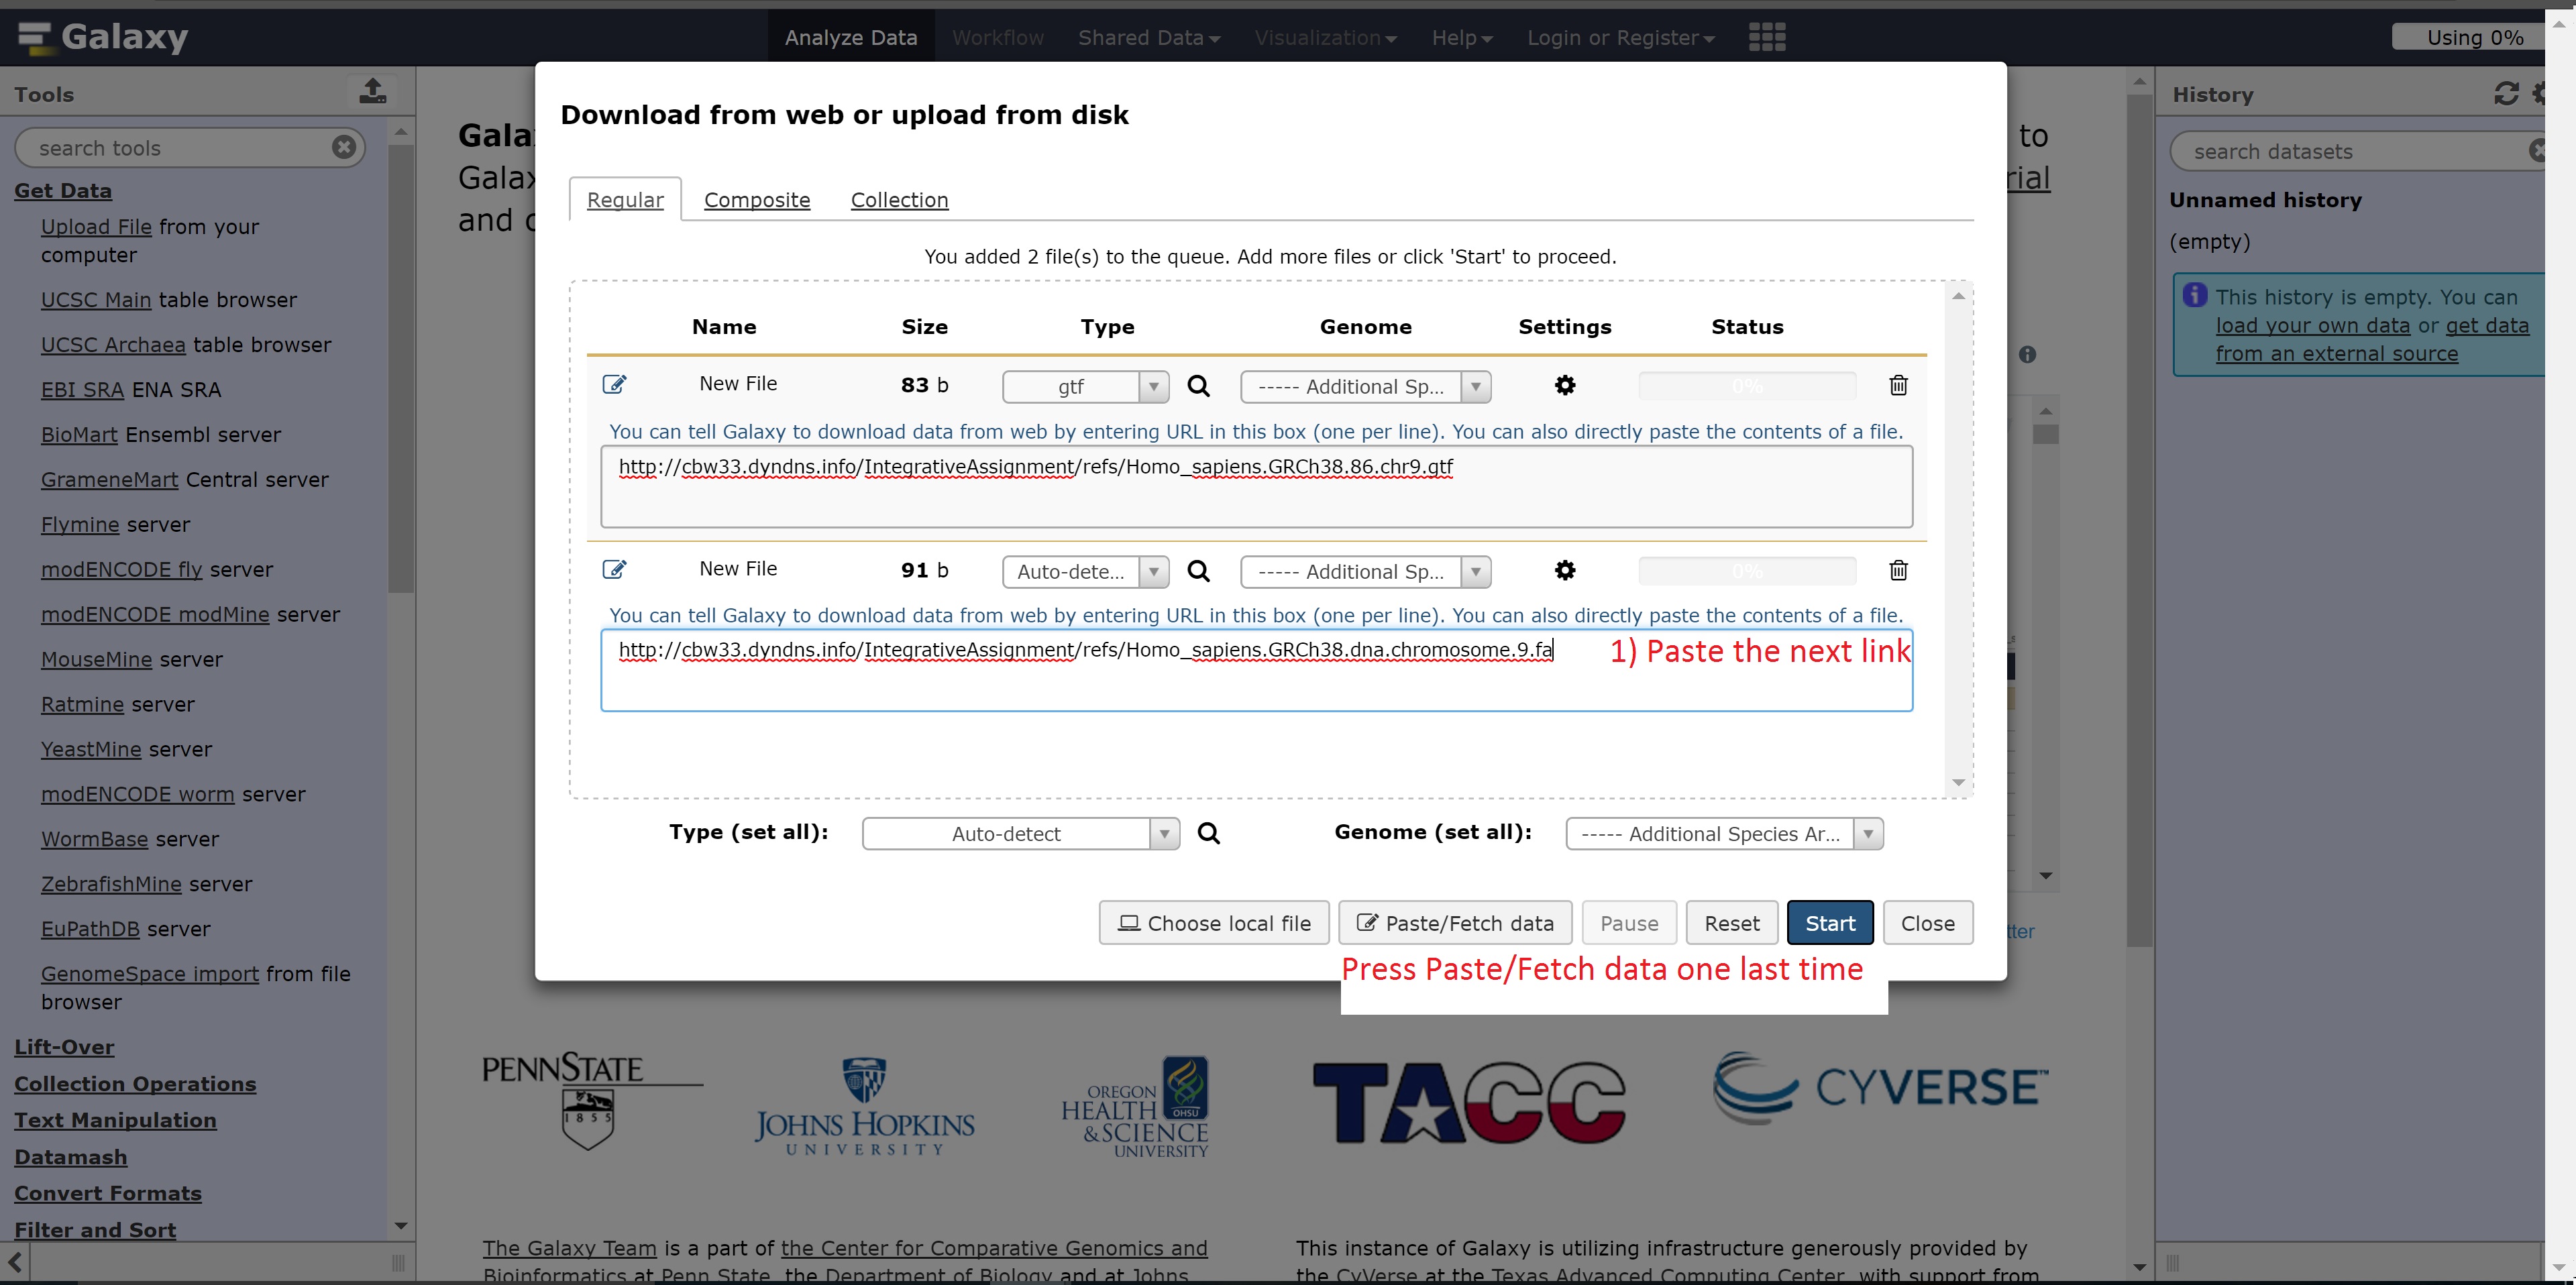
 The next link needed is:
- http://cbwXX.dyndns.info/IntegrativeAssignment/refs/Homo_sapiens.GRCh38.dna.chromosome.9.fa
 Finally, the following links are needed for the next step:
- http://cbwXX.dyndns.info/IntegrativeAssignment/fasta/carcinoma_C02_read1.fasta
- http://cbwXX.dyndns.info/IntegrativeAssignment/fasta/carcinoma_C02_read2.fasta
- http://cbwXX.dyndns.info/IntegrativeAssignment/fasta/carcinoma_C03_read1.fasta
- http://cbwXX.dyndns.info/IntegrativeAssignment/fasta/carcinoma_C03_read2.fasta
- http://cbwXX.dyndns.info/IntegrativeAssignment/fasta/carcinoma_C06_read1.fasta
- http://cbwXX.dyndns.info/IntegrativeAssignment/fasta/carcinoma_C06_read2.fasta
- http://cbwXX.dyndns.info/IntegrativeAssignment/fasta/normal_N02_read1.fasta
- http://cbwXX.dyndns.info/IntegrativeAssignment/fasta/normal_N02_read2.fasta
- http://cbwXX.dyndns.info/IntegrativeAssignment/fasta/normal_N03_read1.fasta
- http://cbwXX.dyndns.info/IntegrativeAssignment/fasta/normal_N03_read2.fasta
- http://cbwXX.dyndns.info/IntegrativeAssignment/fasta/normal_N06_read1.fasta
- http://cbwXX.dyndns.info/IntegrativeAssignment/fasta/normal_N06_read2.fasta

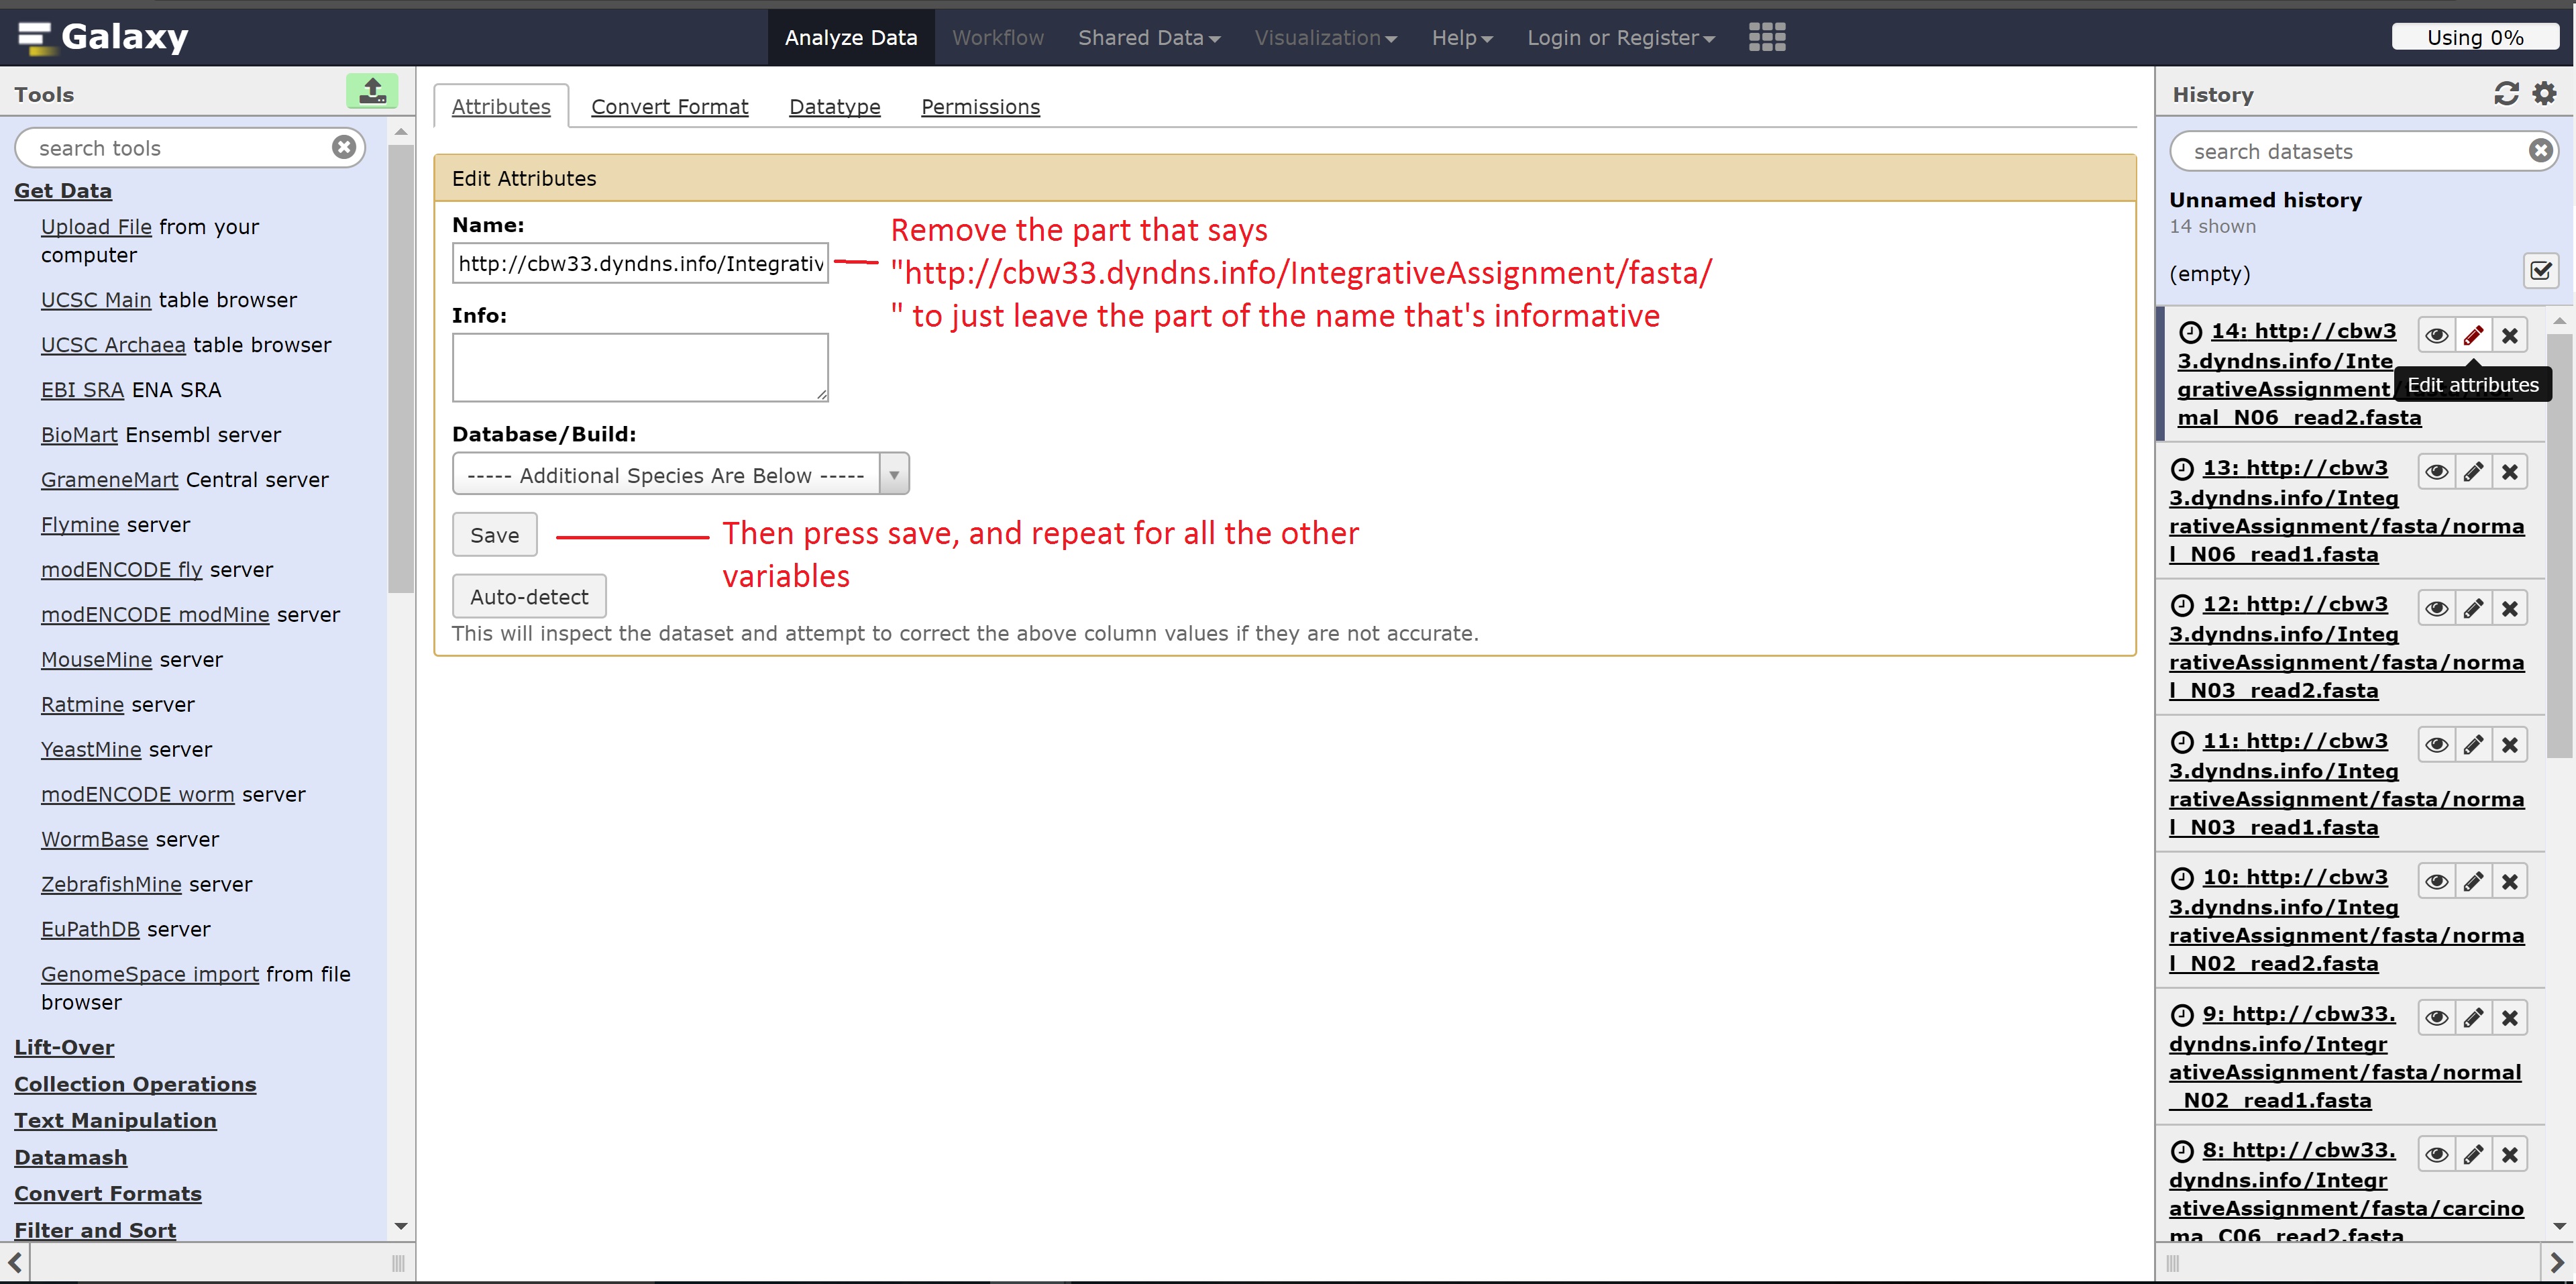
Optionally, we can change the name of the files shown as follows for easier use:
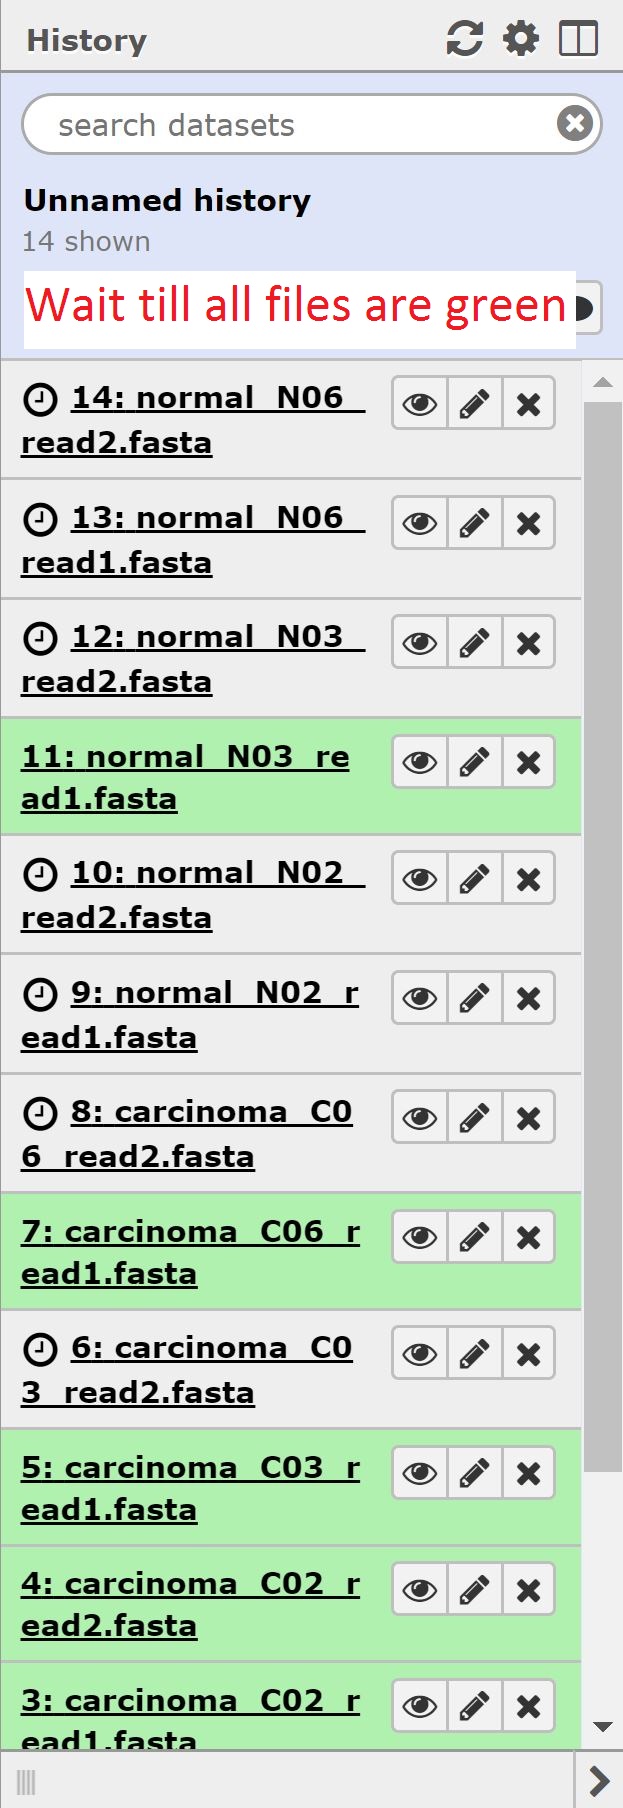
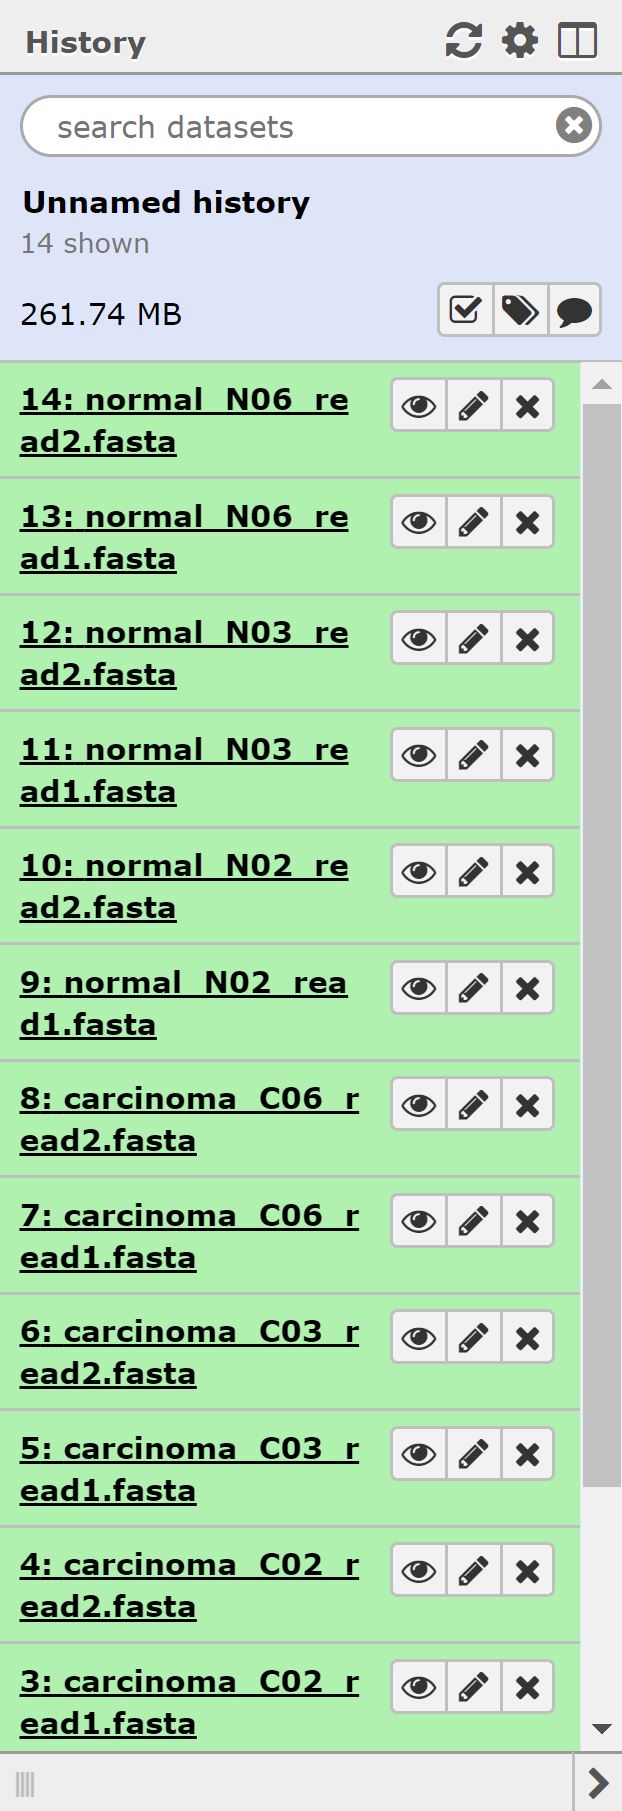
At the end of this section, we should see 14 files in our history.
Now that our data is uploaded, we can begin our analysis. Normally we’d begin with doing some QC on our rna-sequencing data; unfortunately however, our data is in fasta format, and so we have to forego that step
Transcript alignment using Hisat
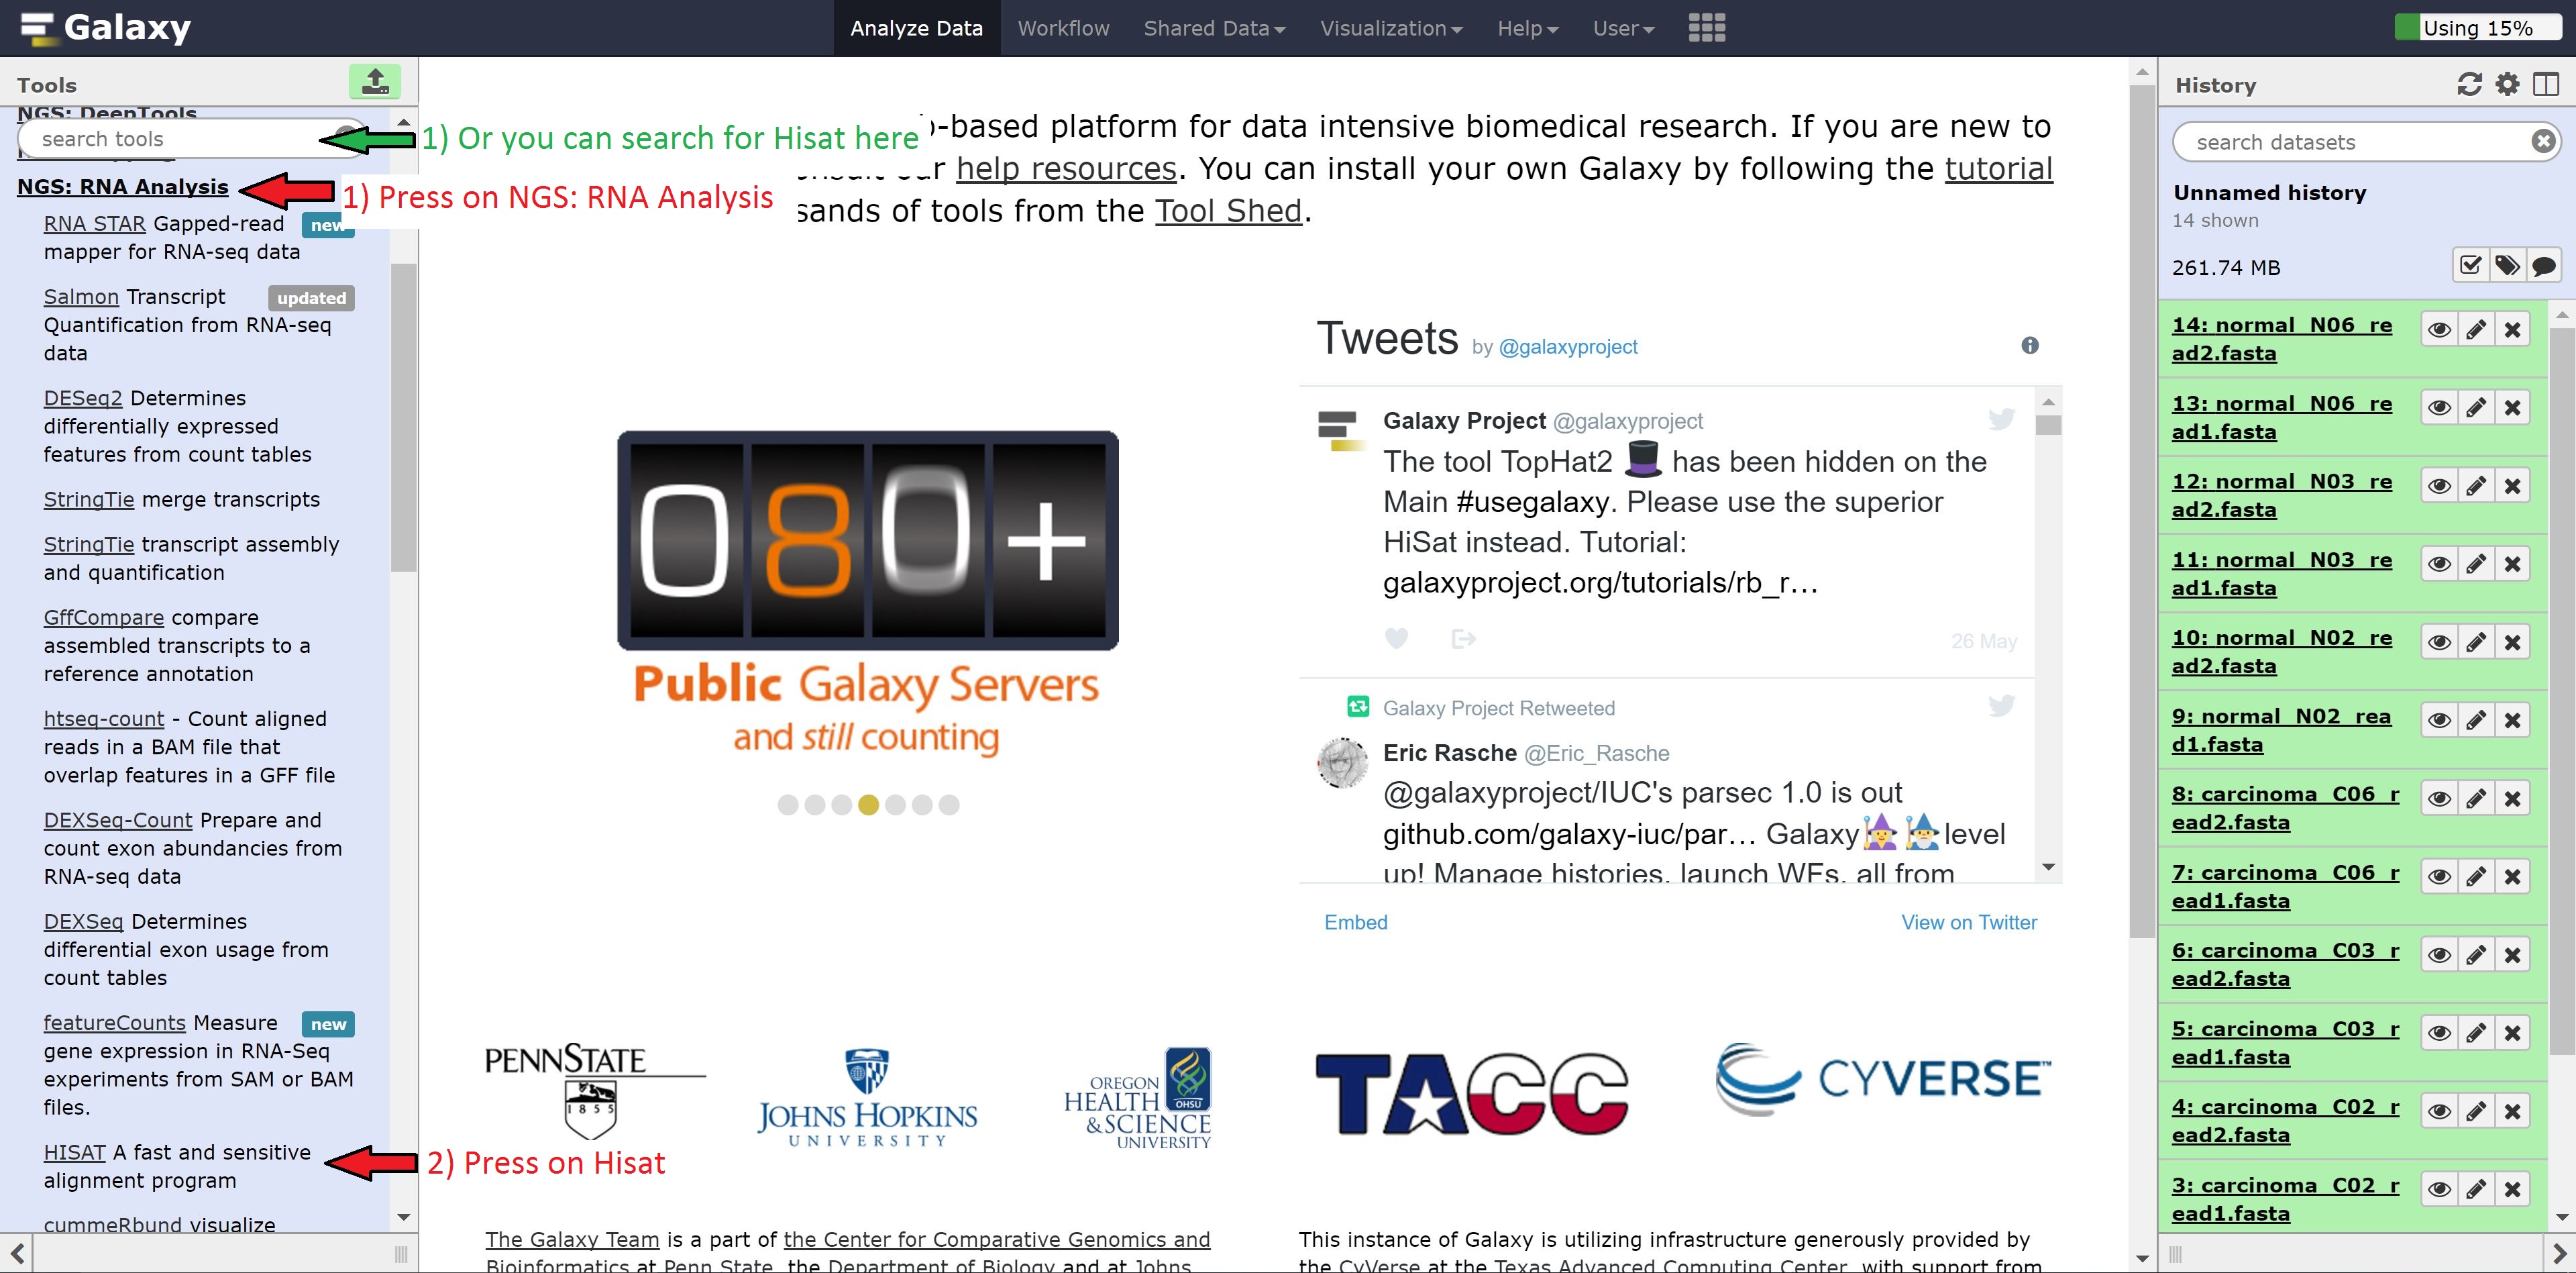
Let’s begin with our transcript alignment/assembly using Hisat. Navigate to the NGS: RNA Analysis button on the left hand side, click it, find Hisat, and click on that. Alternatively, you can search for Hisat in the search tools bar.
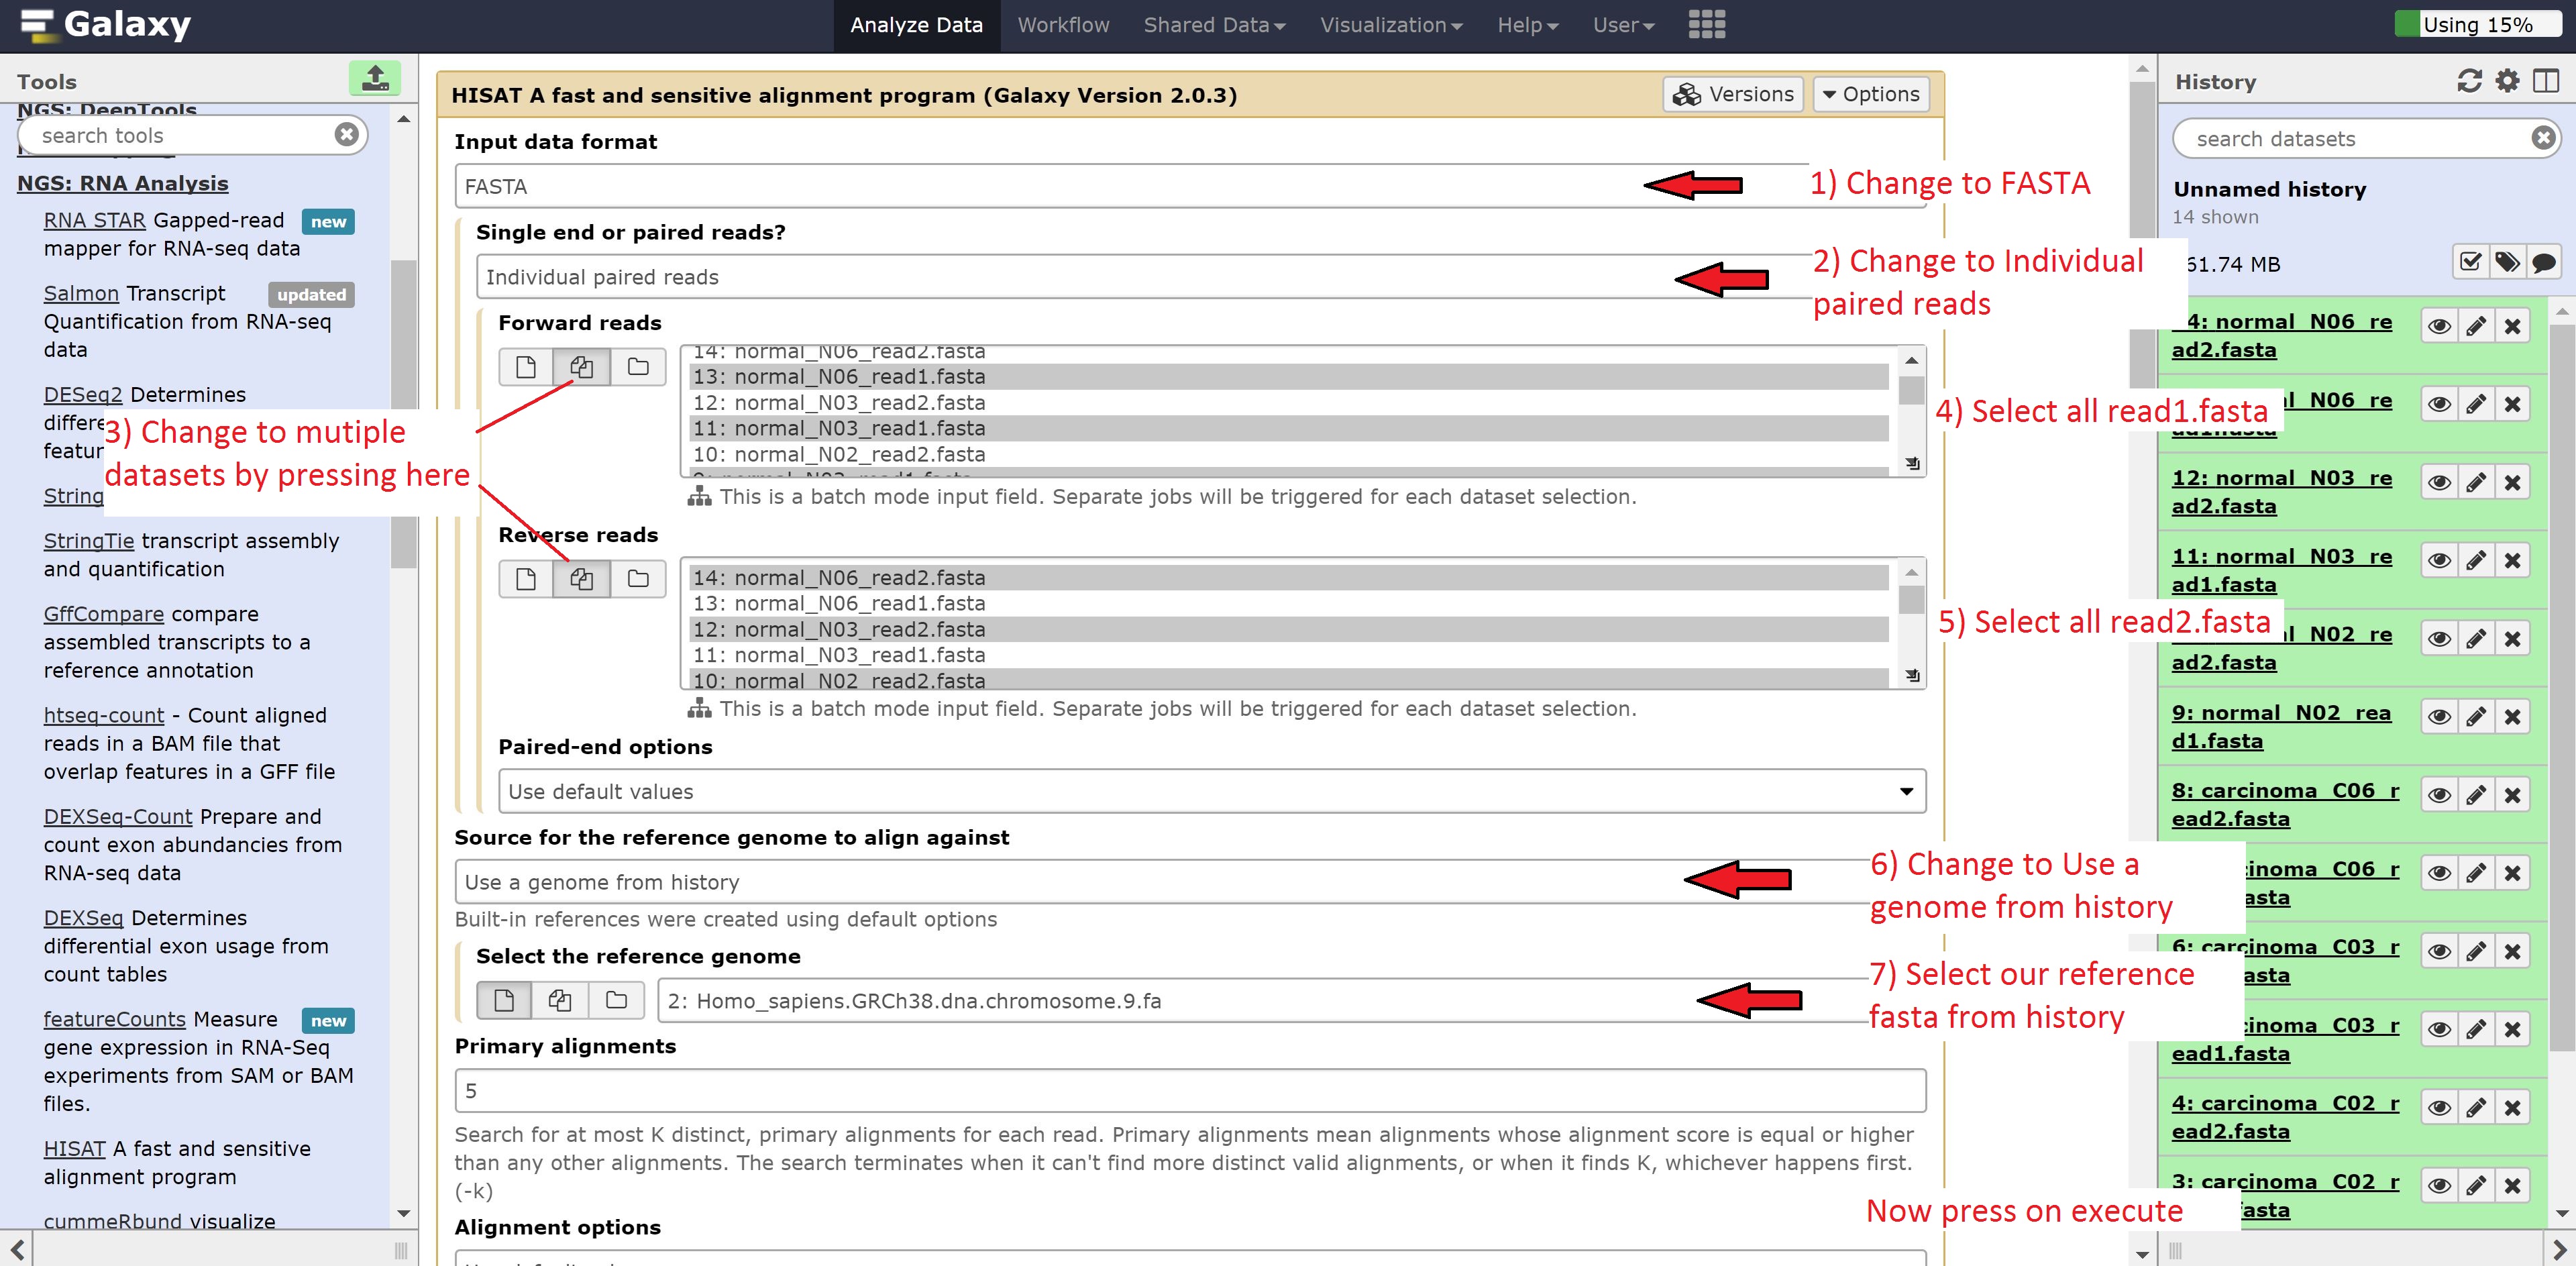
Now to run Hisat, we’re going to make a few modifications. Change:
- Input data format to FASTA
- Single end or paired end? to Individual paired reads
- Forward reads to multiple datasets
- Reverse reads to multiple datasets
- Source for the reference genome to align against to Use a genome from history
- Select the reference genome to 14: Homo_sapiens.GRCh38.dna.chromosome.9.fa
Now in the forward reads, we’re going to go ahead and select all our read1 reads. For the reverse reads, we’re going to select the read2 reads. The screen should look as follows:
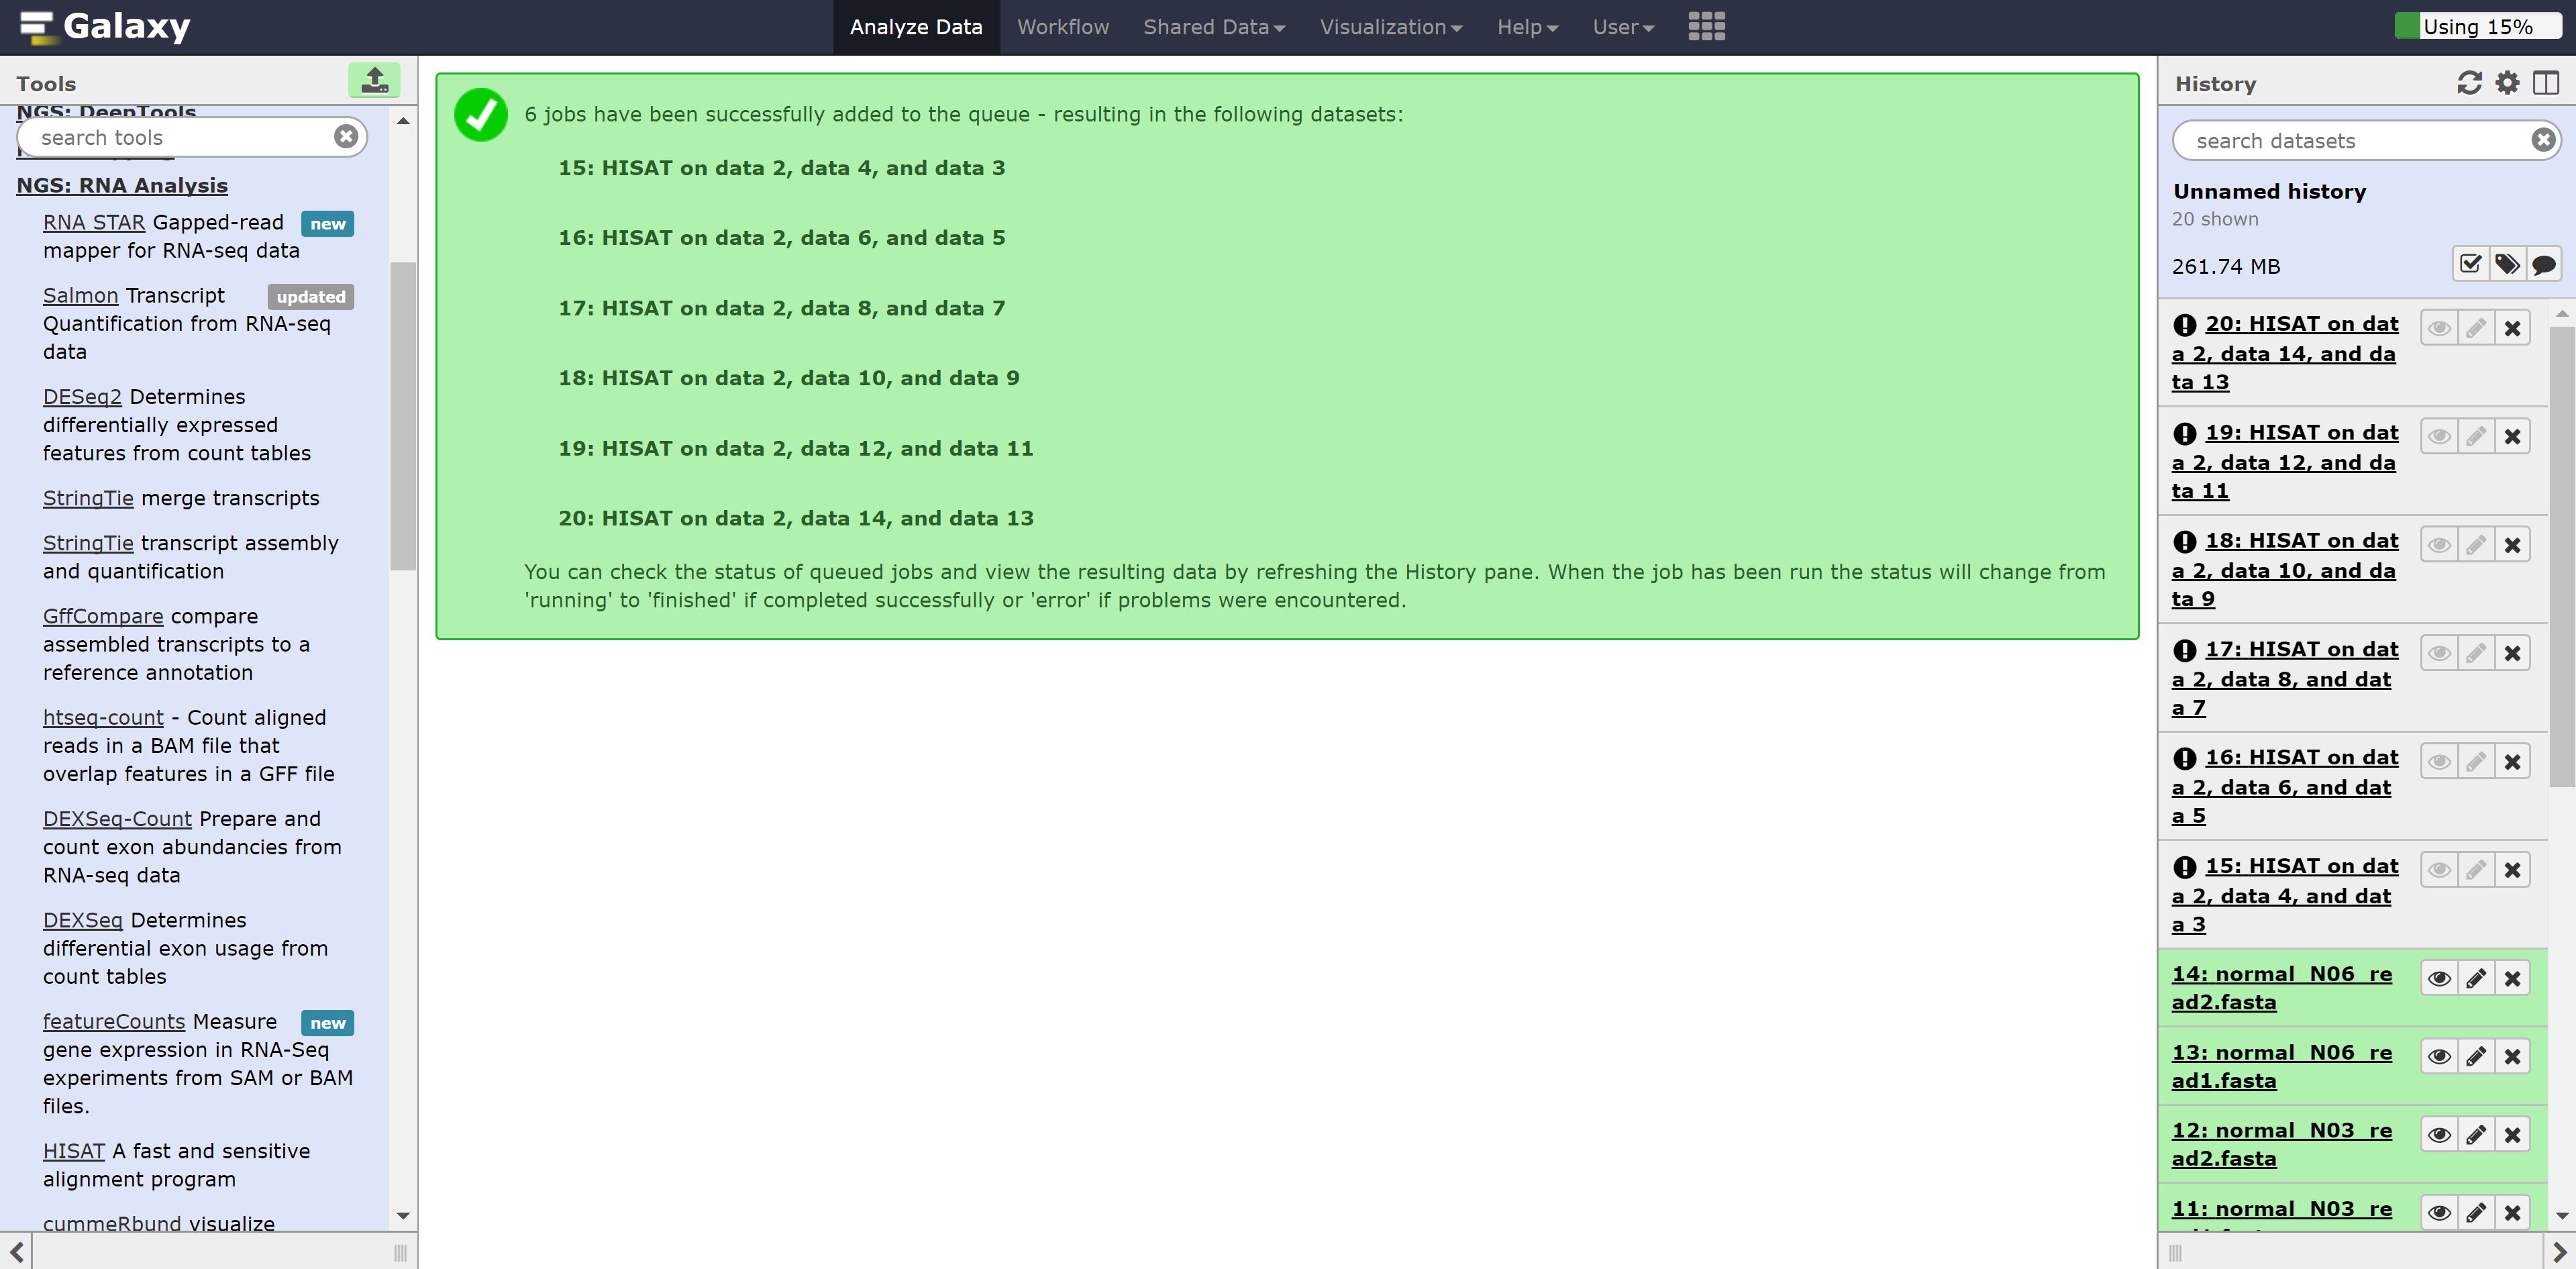
Now just press run. You should see the following:
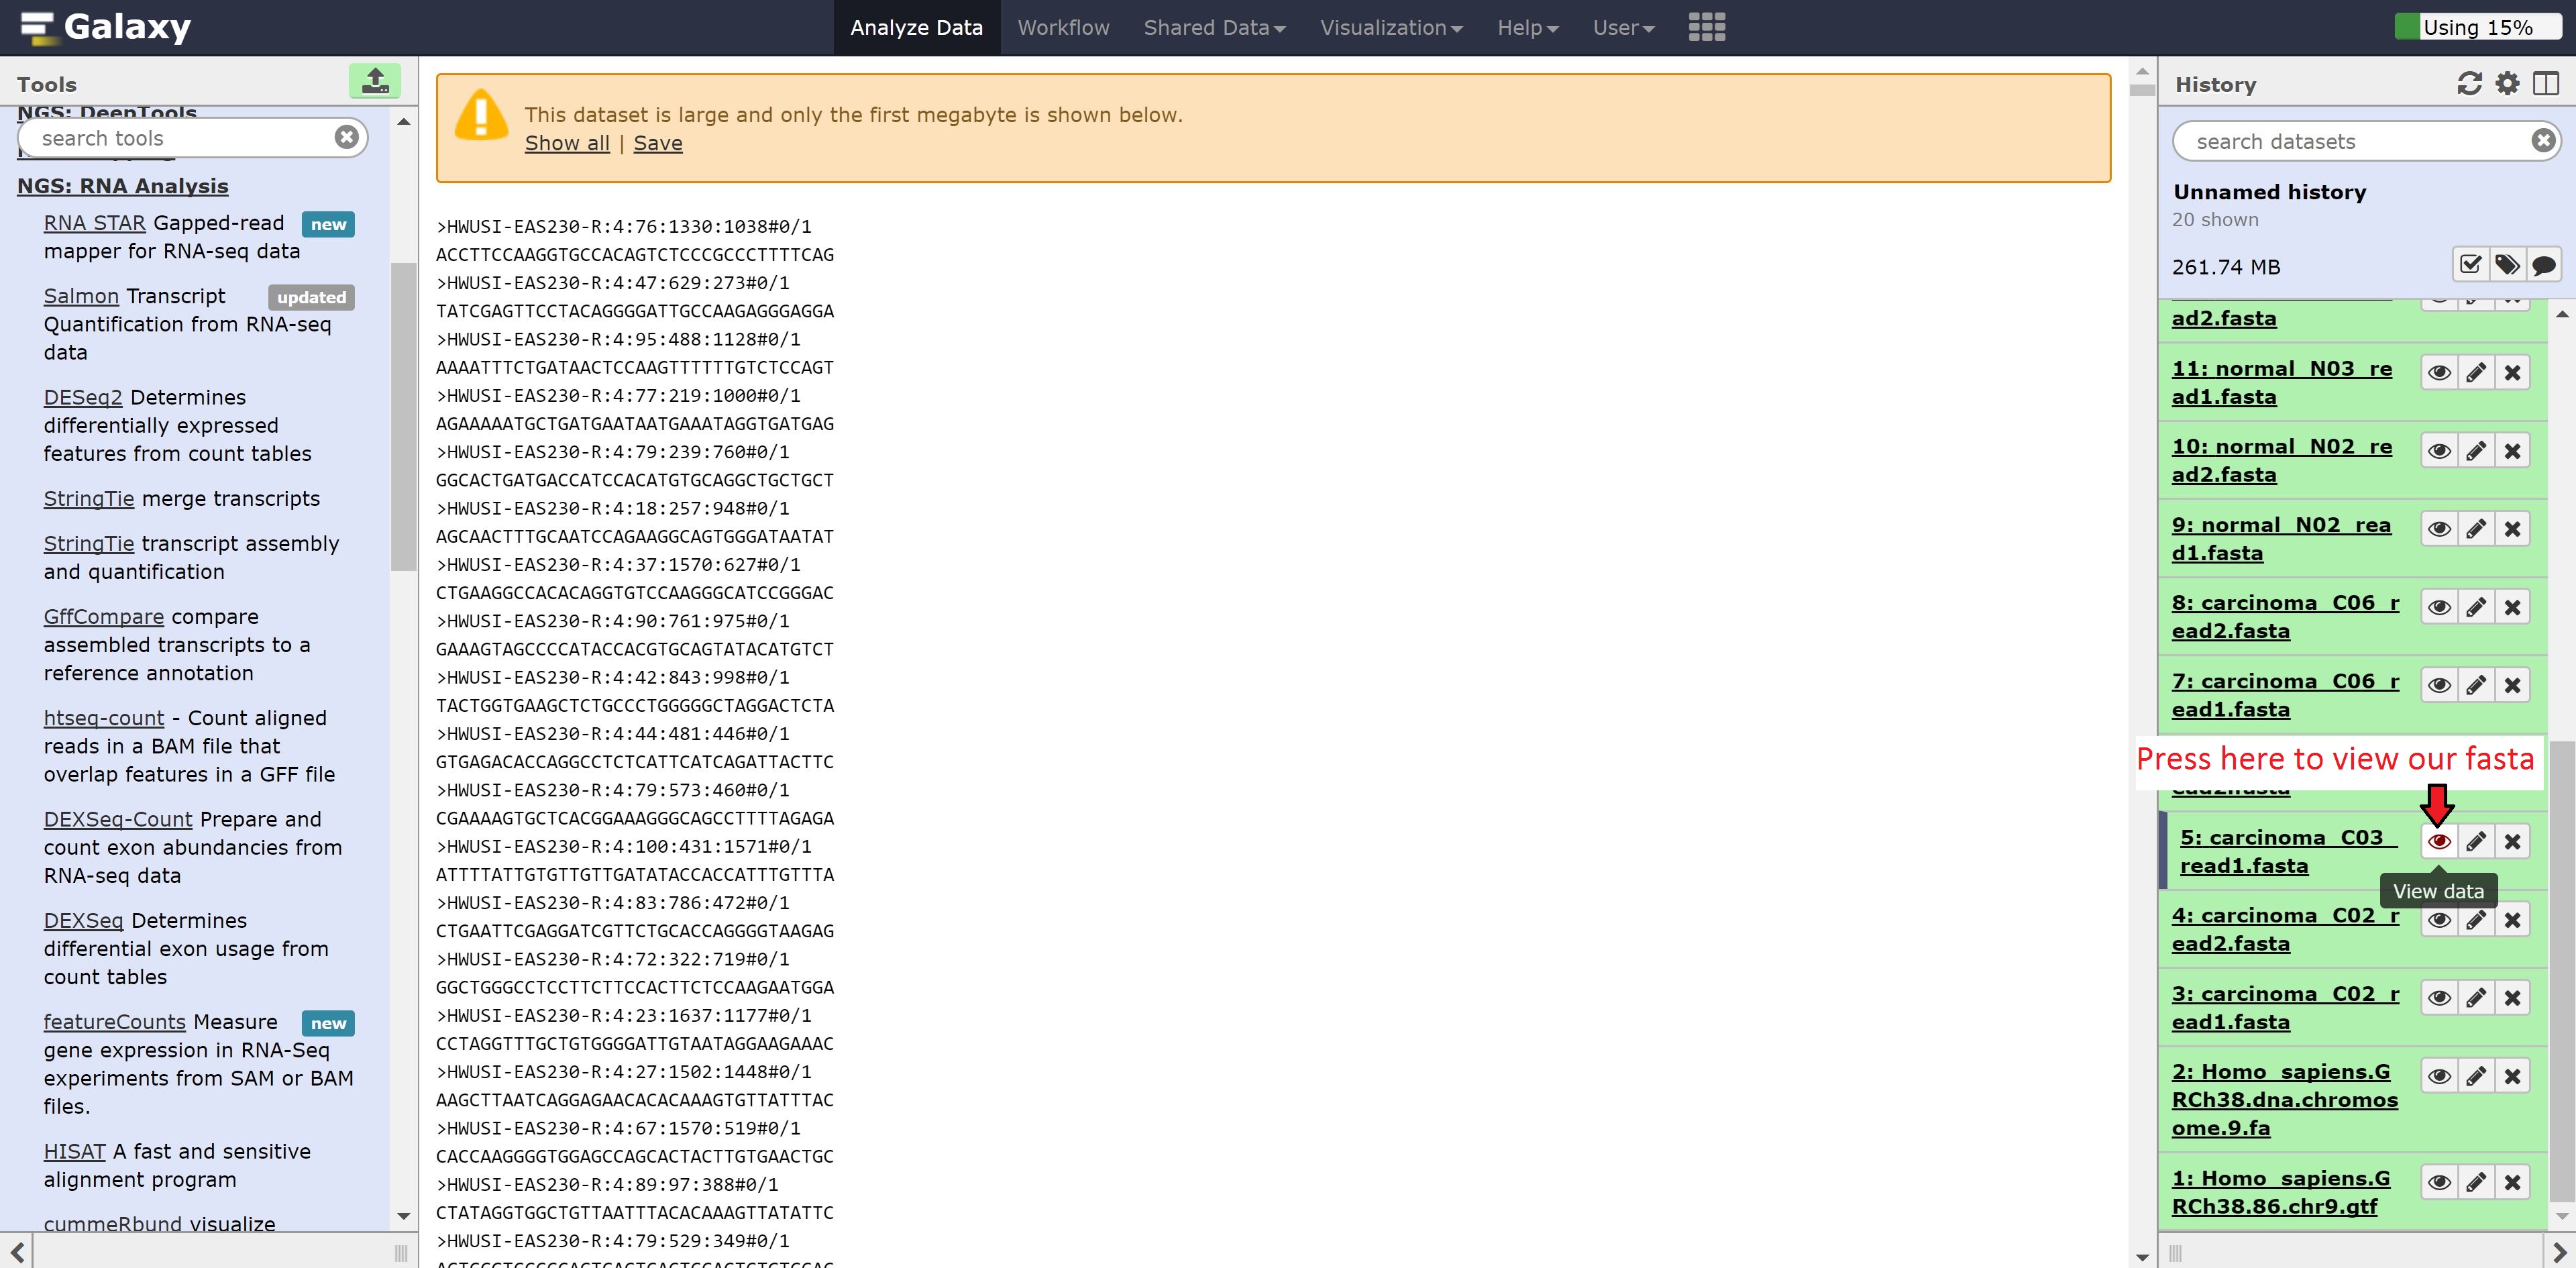
While we wait for Hisat to align our data to our reference, we’re going to explore our data and the Galaxy environment to see other features it has. We can look into our fasta file from earlier to see the format of the data. This is accomplished by pressing on the eye button beside the file:
We can also look at the gtf file we uploaded previously. Similarly, press the eye on the gtf file.
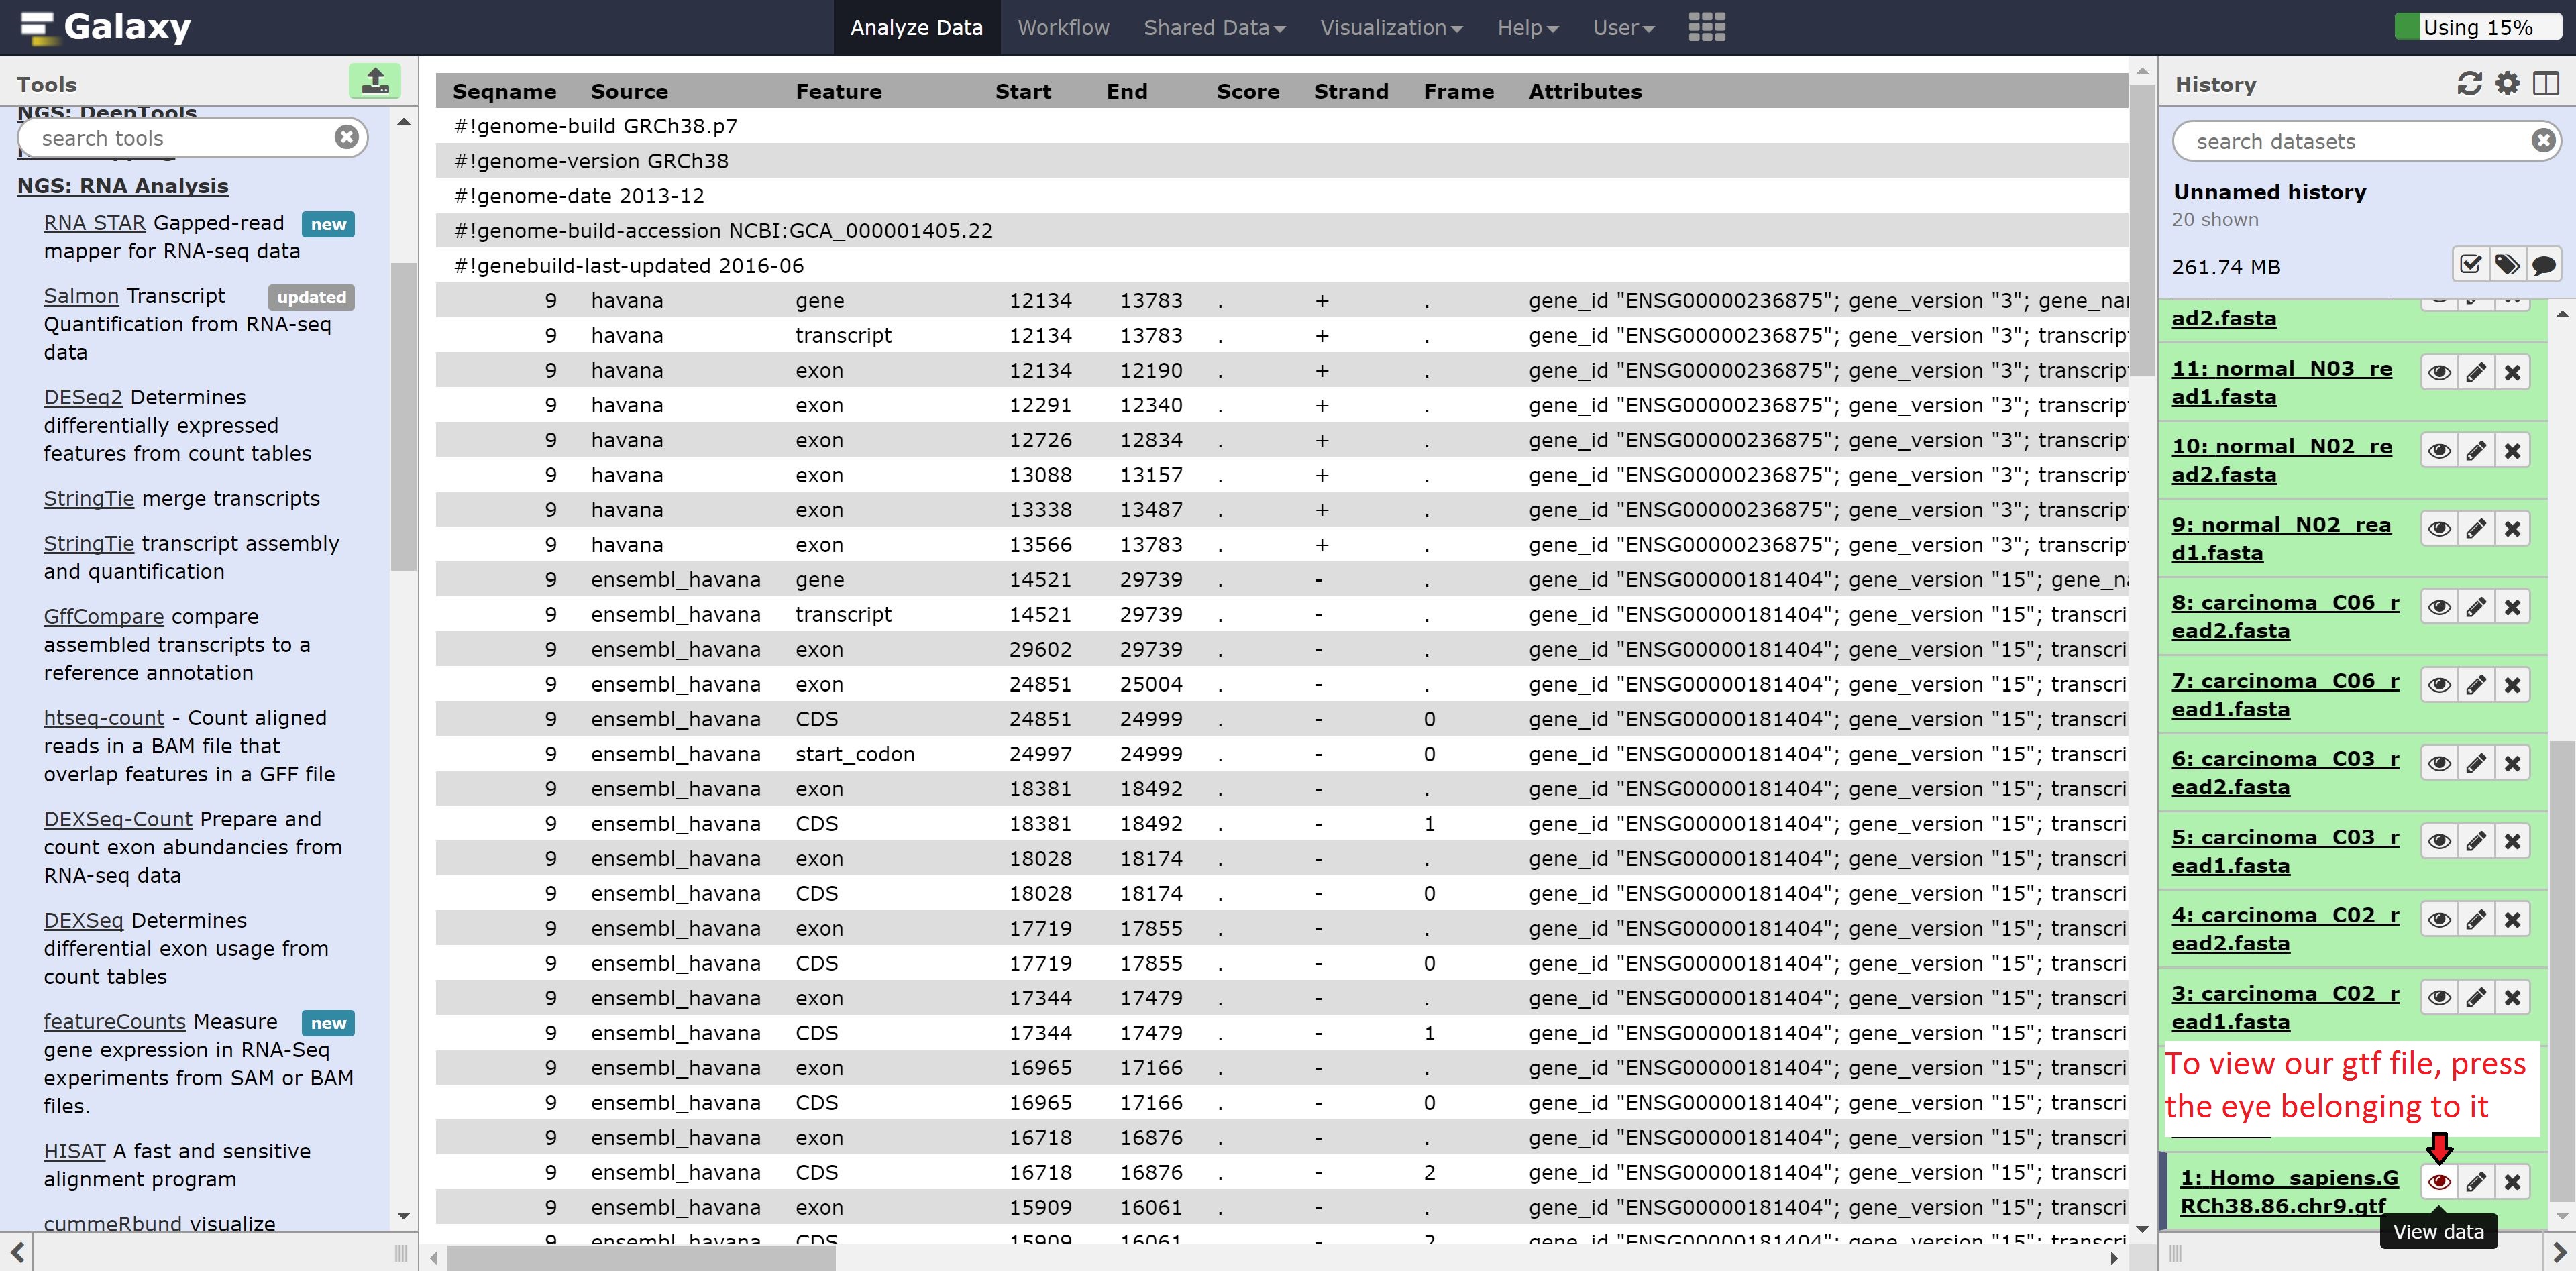
As we can see, the gtf file is column seperated and contains information about the chromosome, source of the feature, the feature type, start, end, and other information.
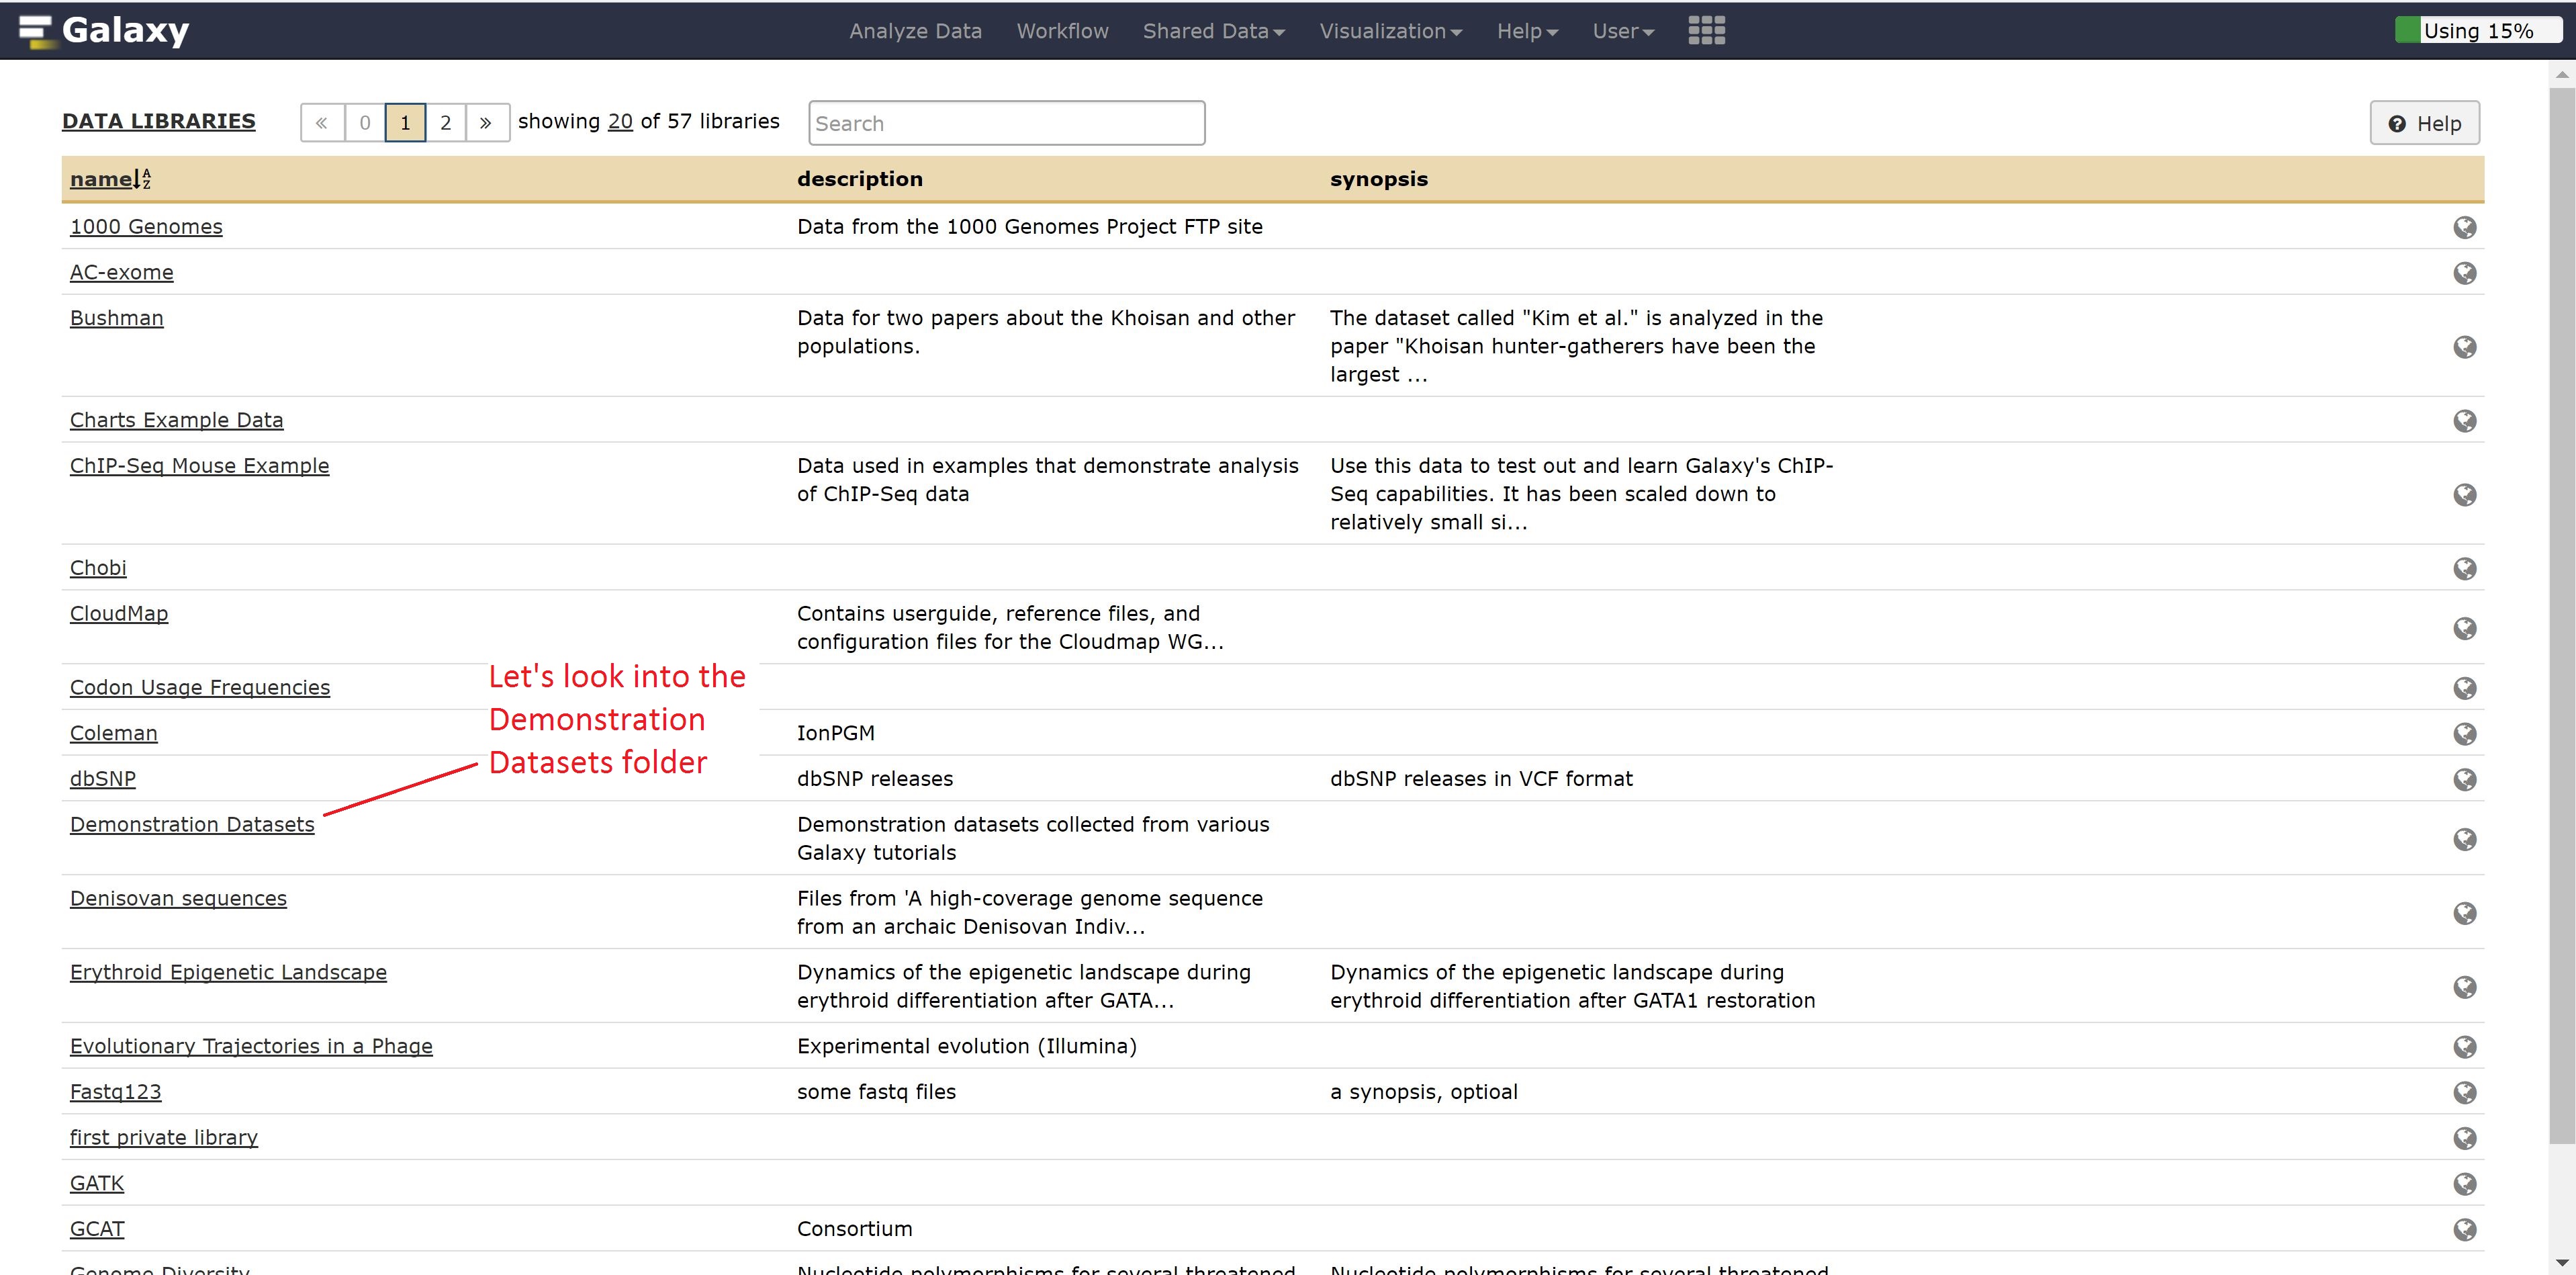
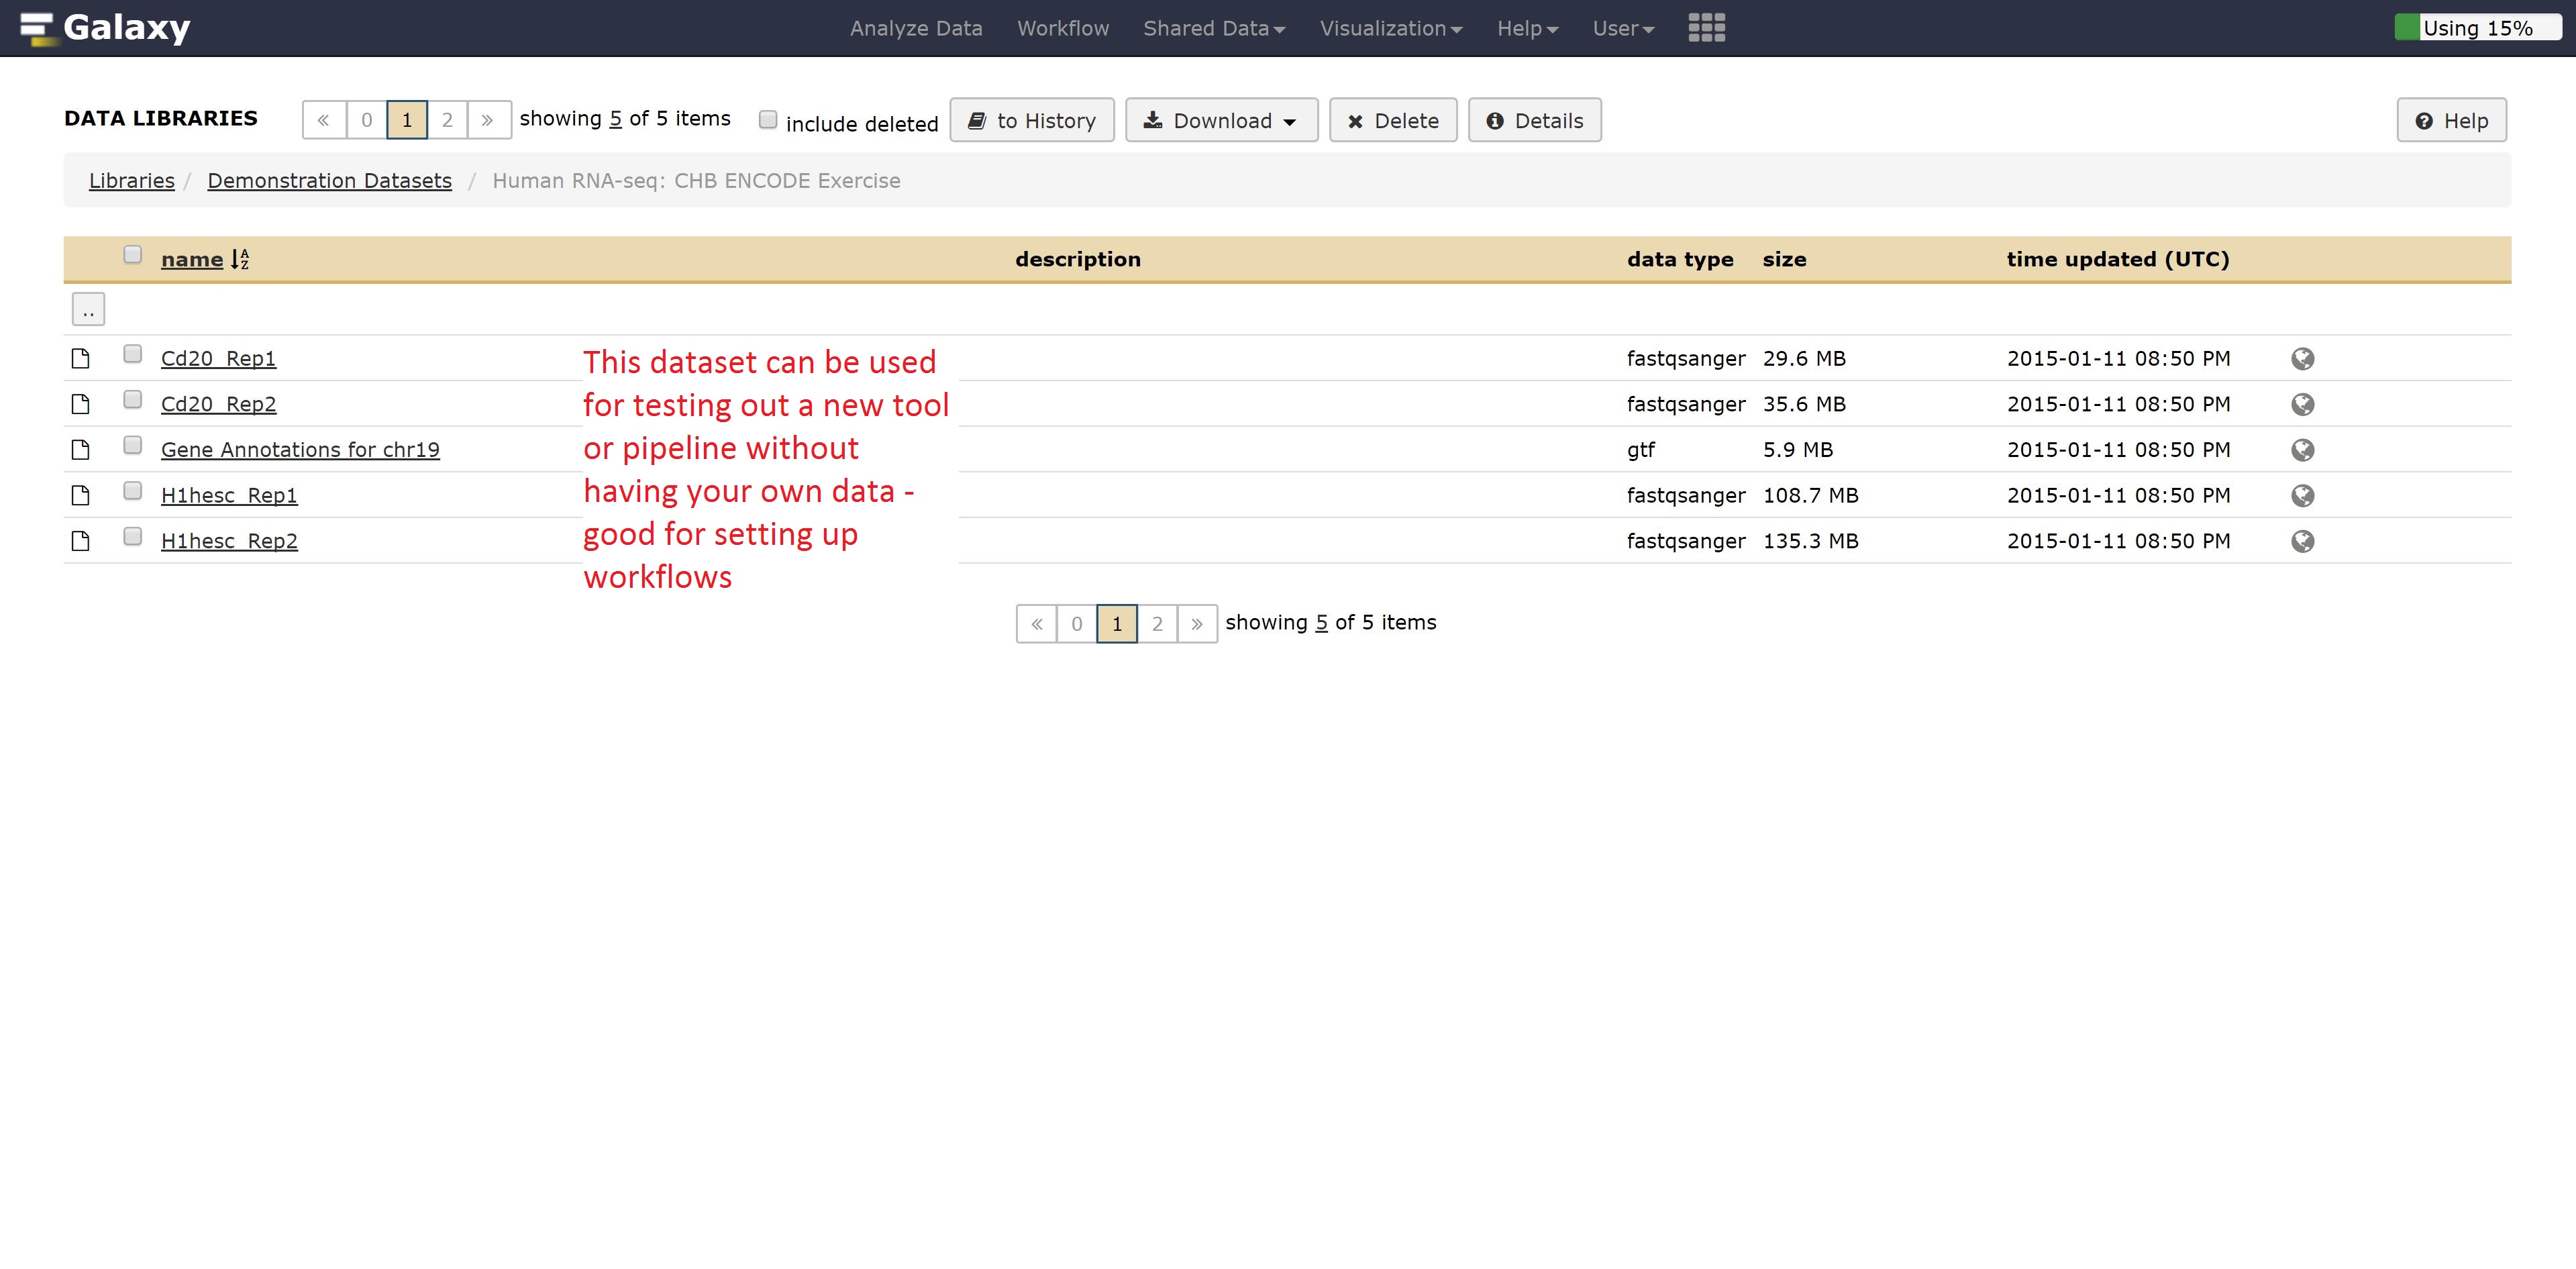
If you wanted to test out tools on data that you don’t have yet, Galaxy has publicly available datasets for a range of different data types.
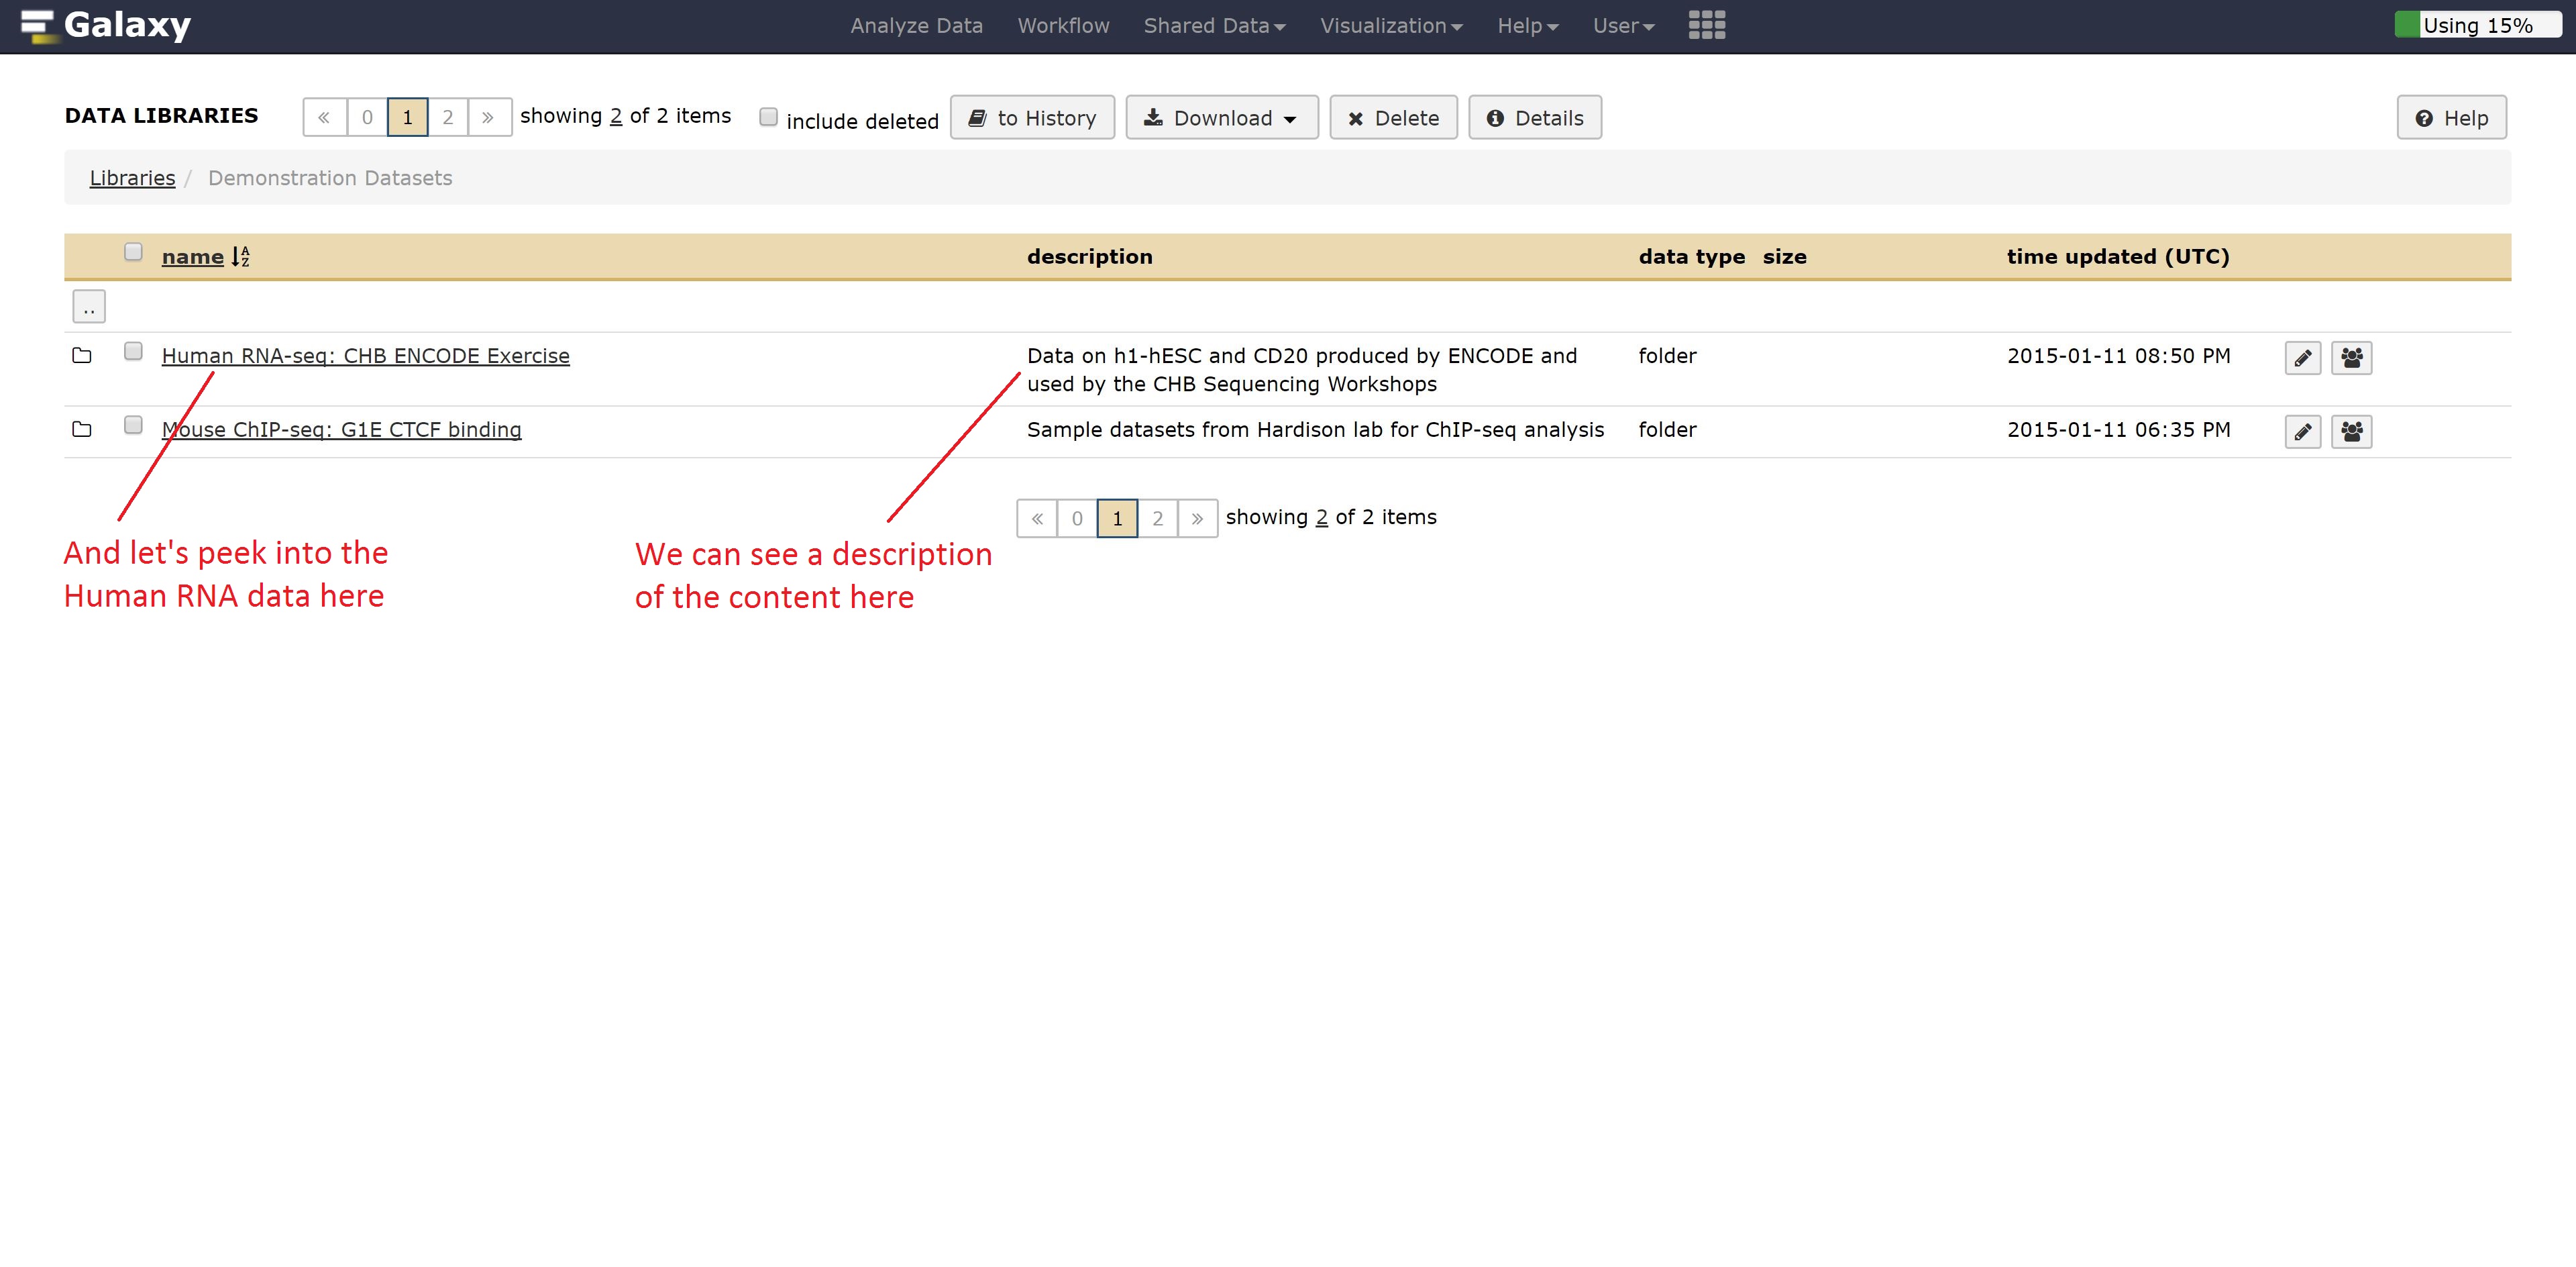
For example, if we didn’t have RNA seq data, we could grab some by going into the Demonstration Datasets, and navigating into the Human RNA-seq folder, where two cell lines are stored in fastq format while a reference is kept as a fasta file.
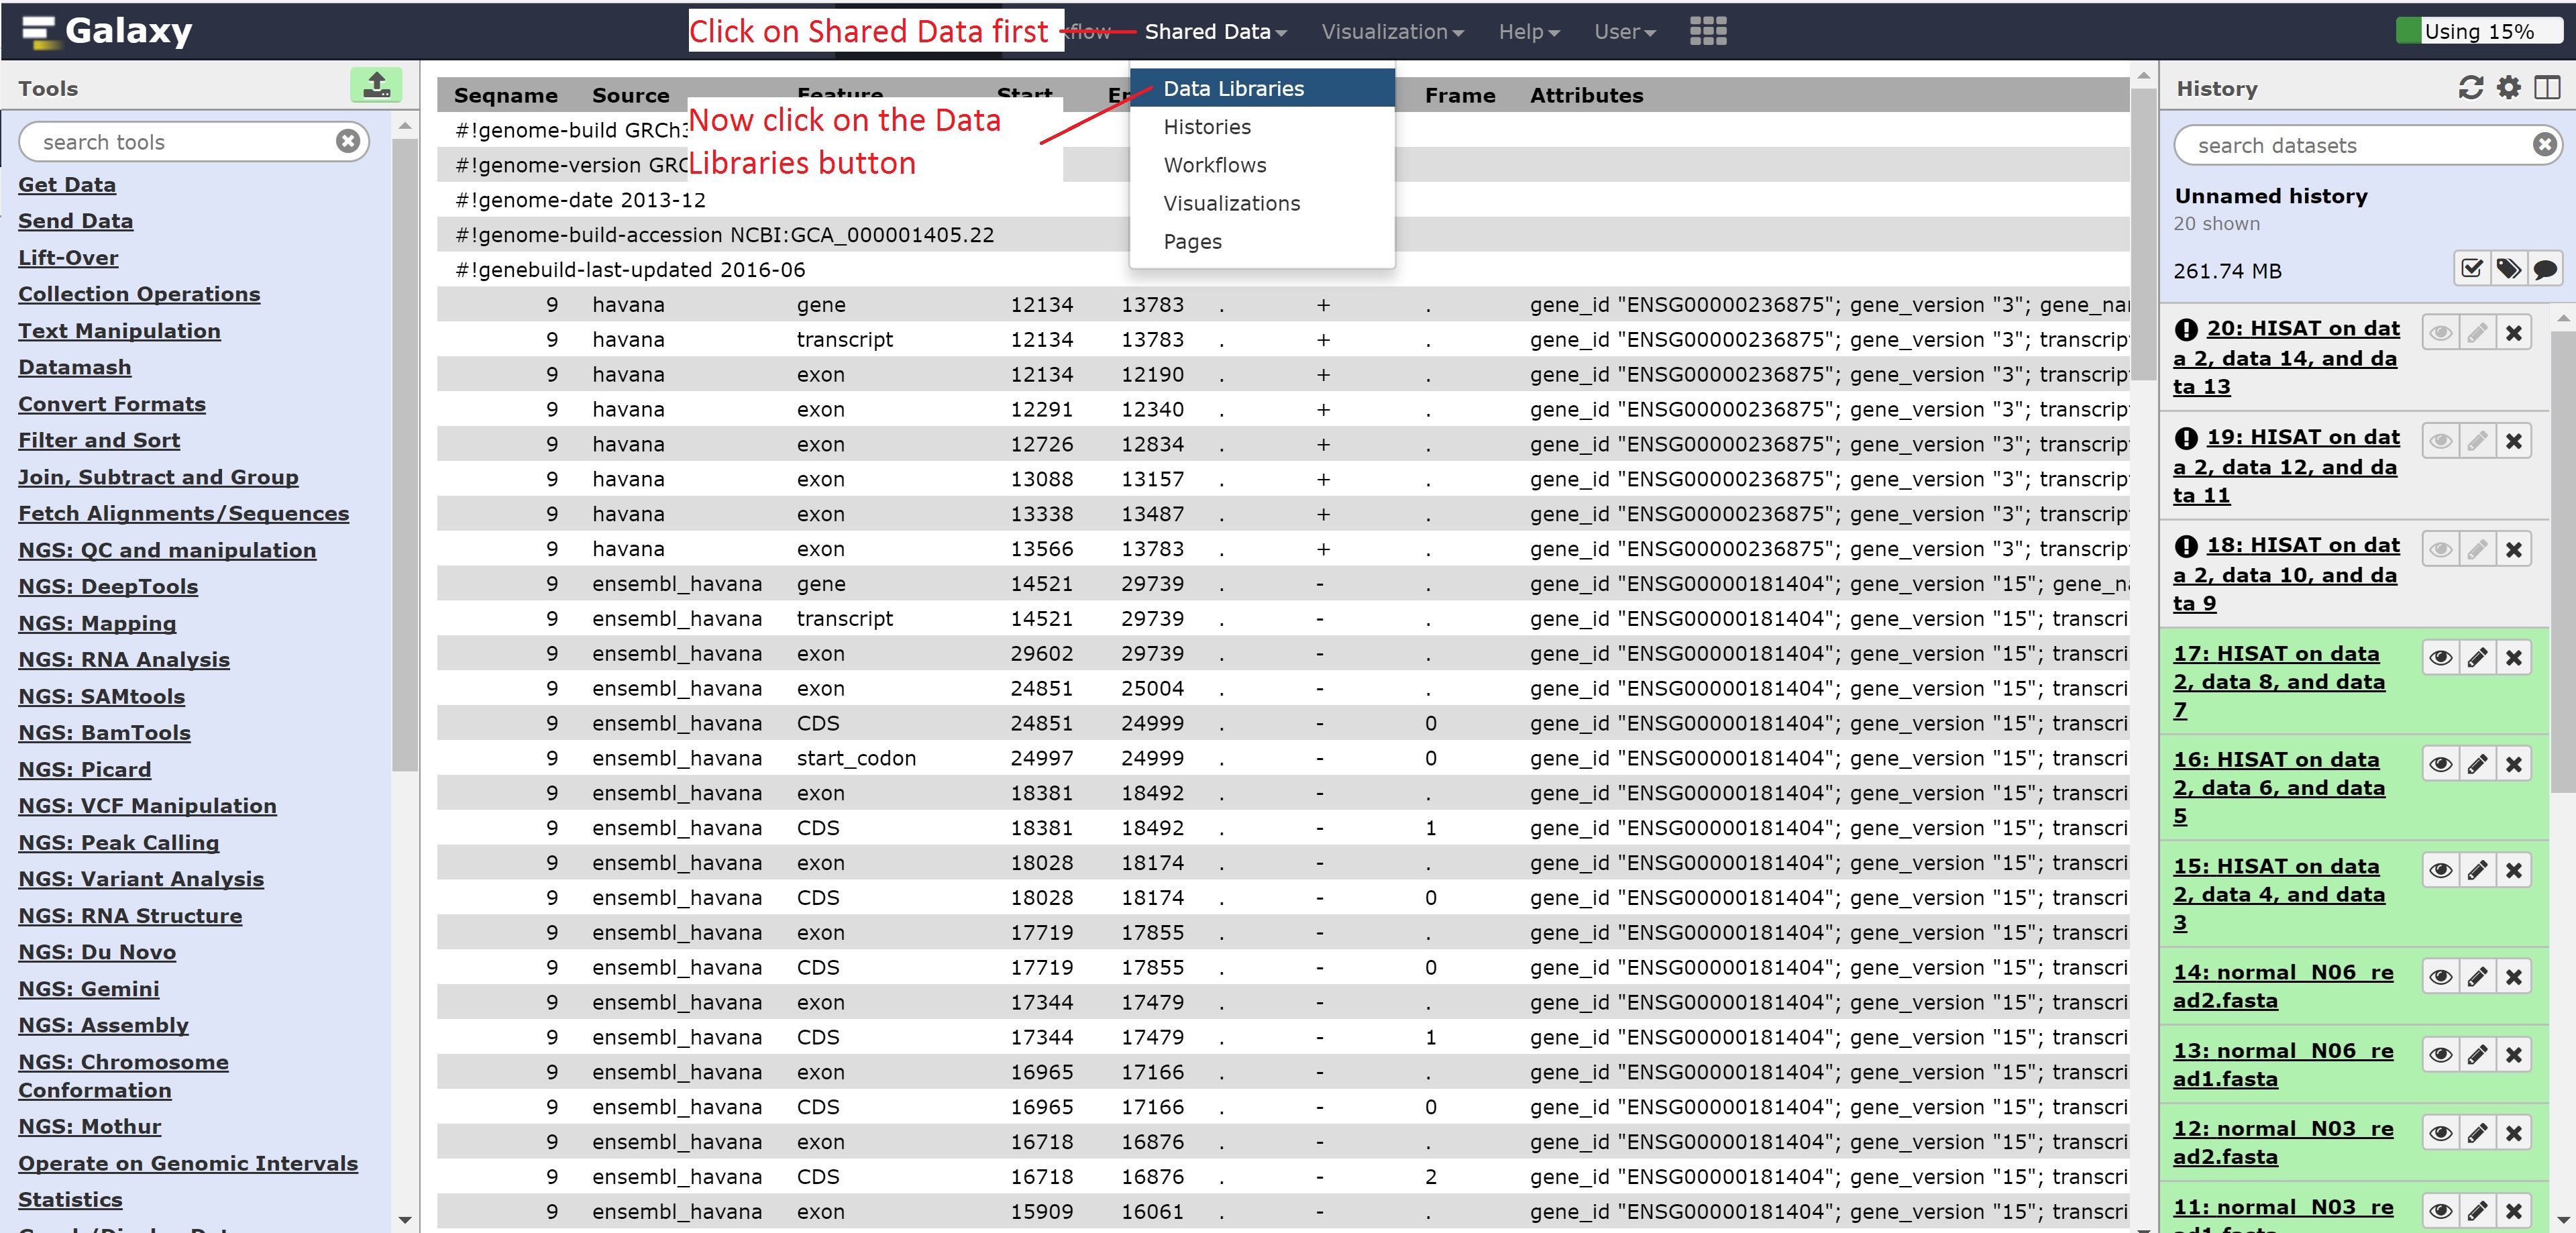
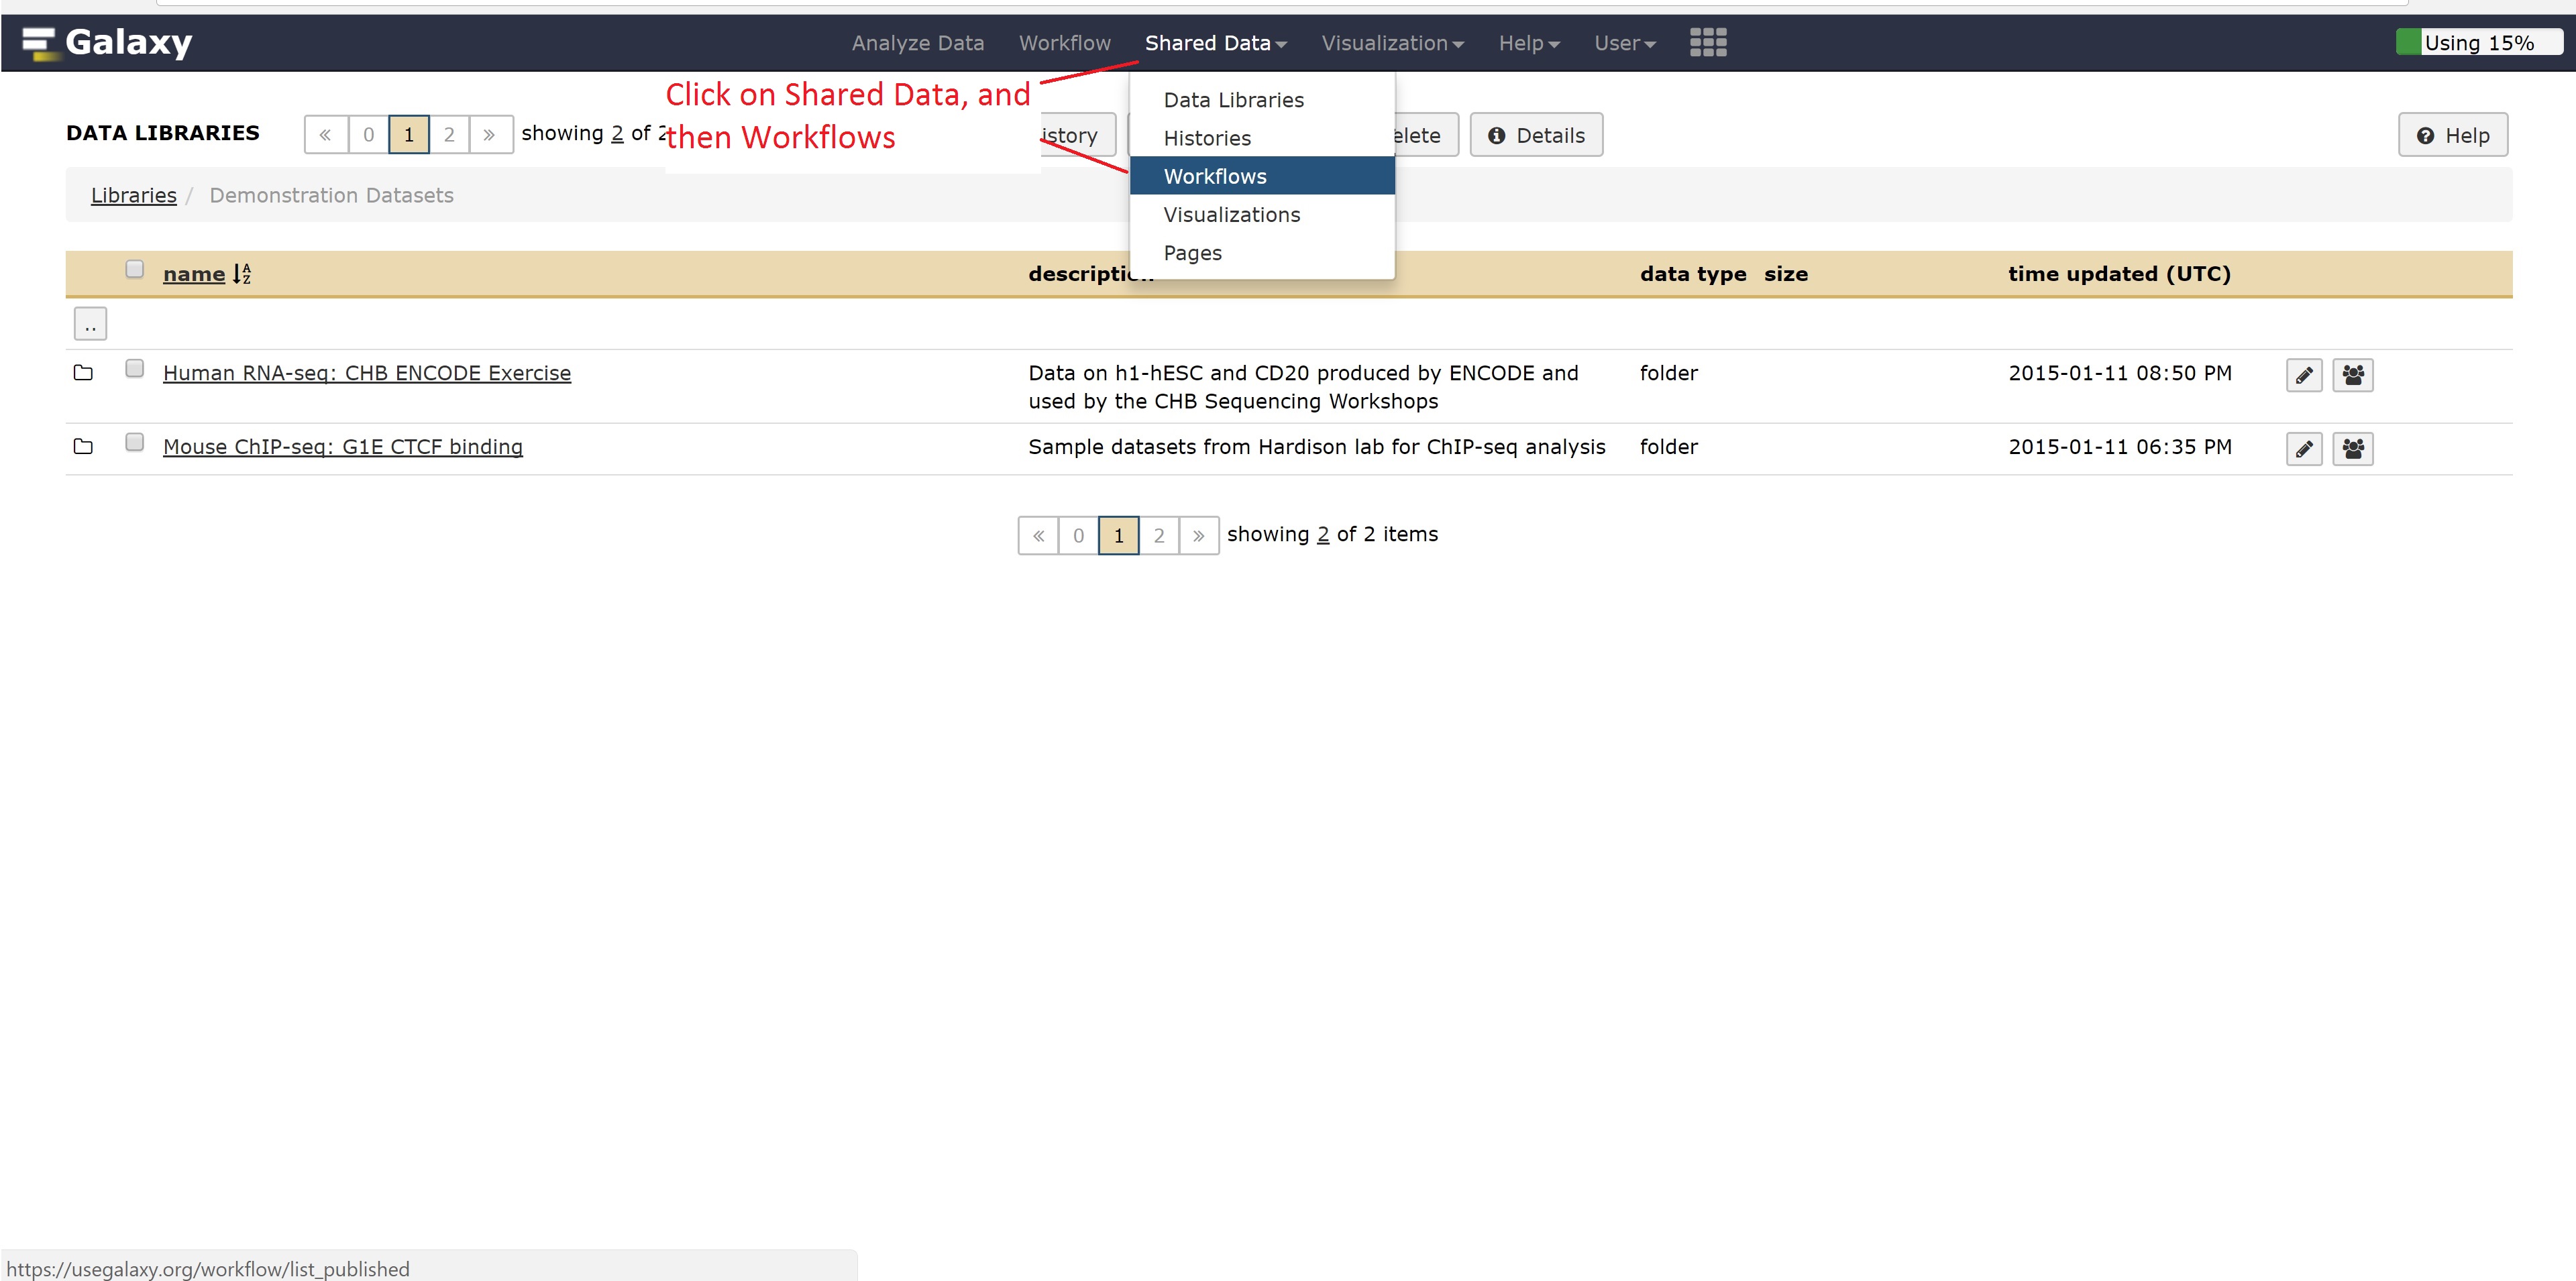
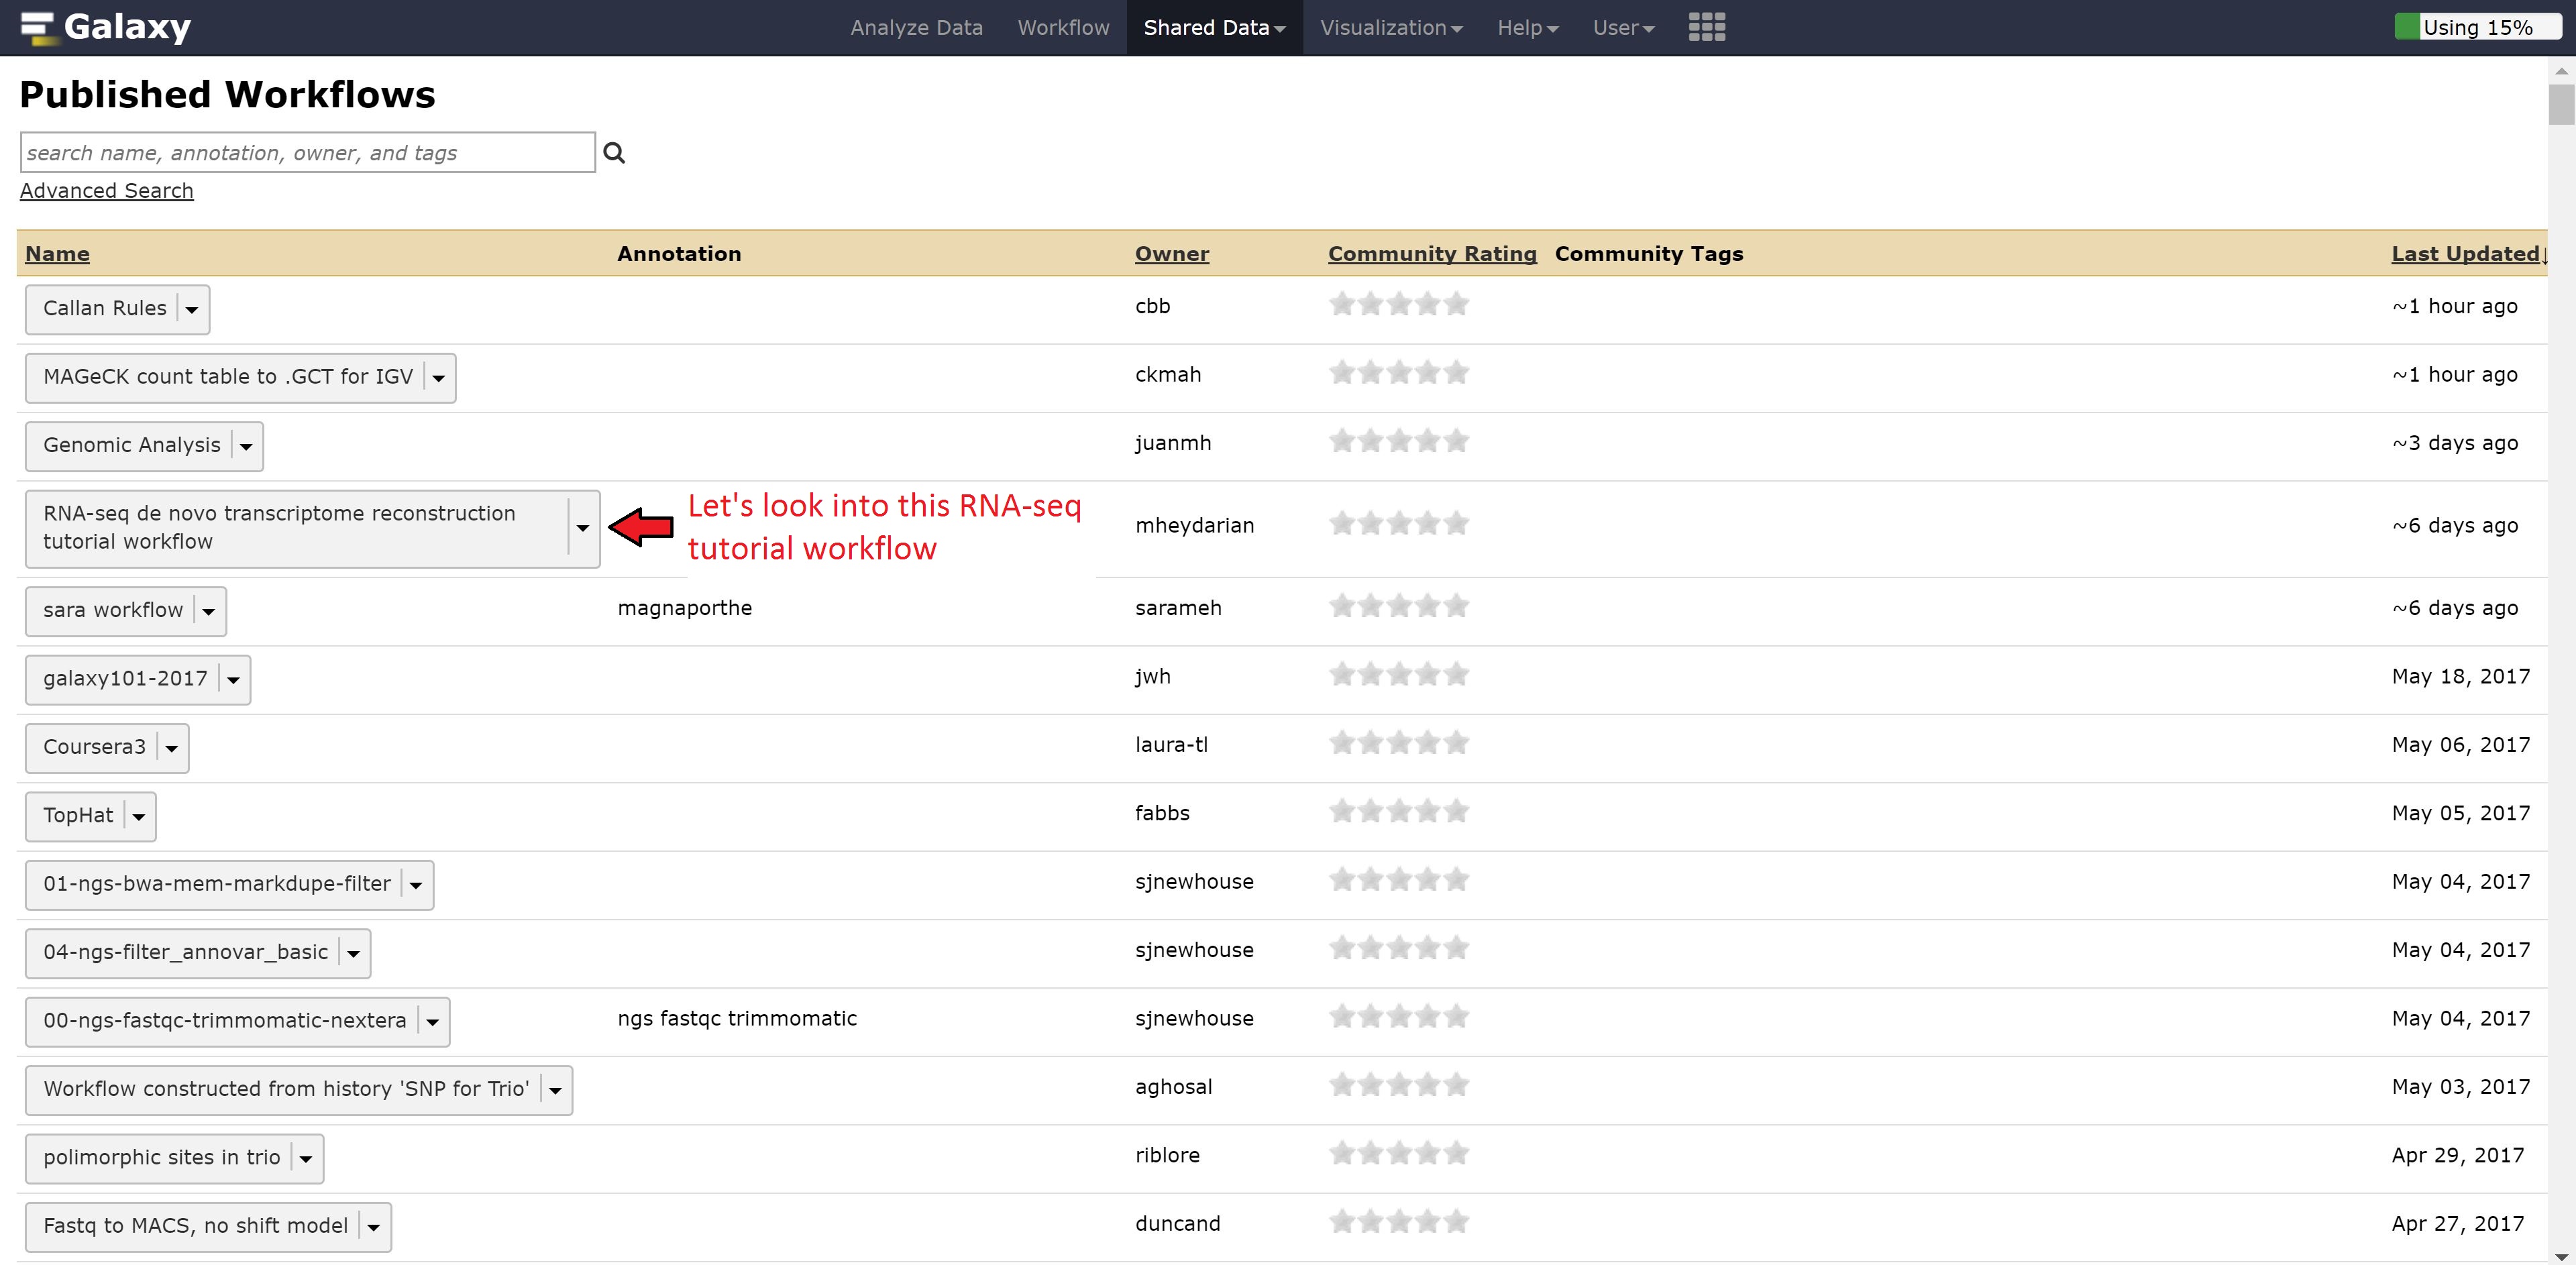
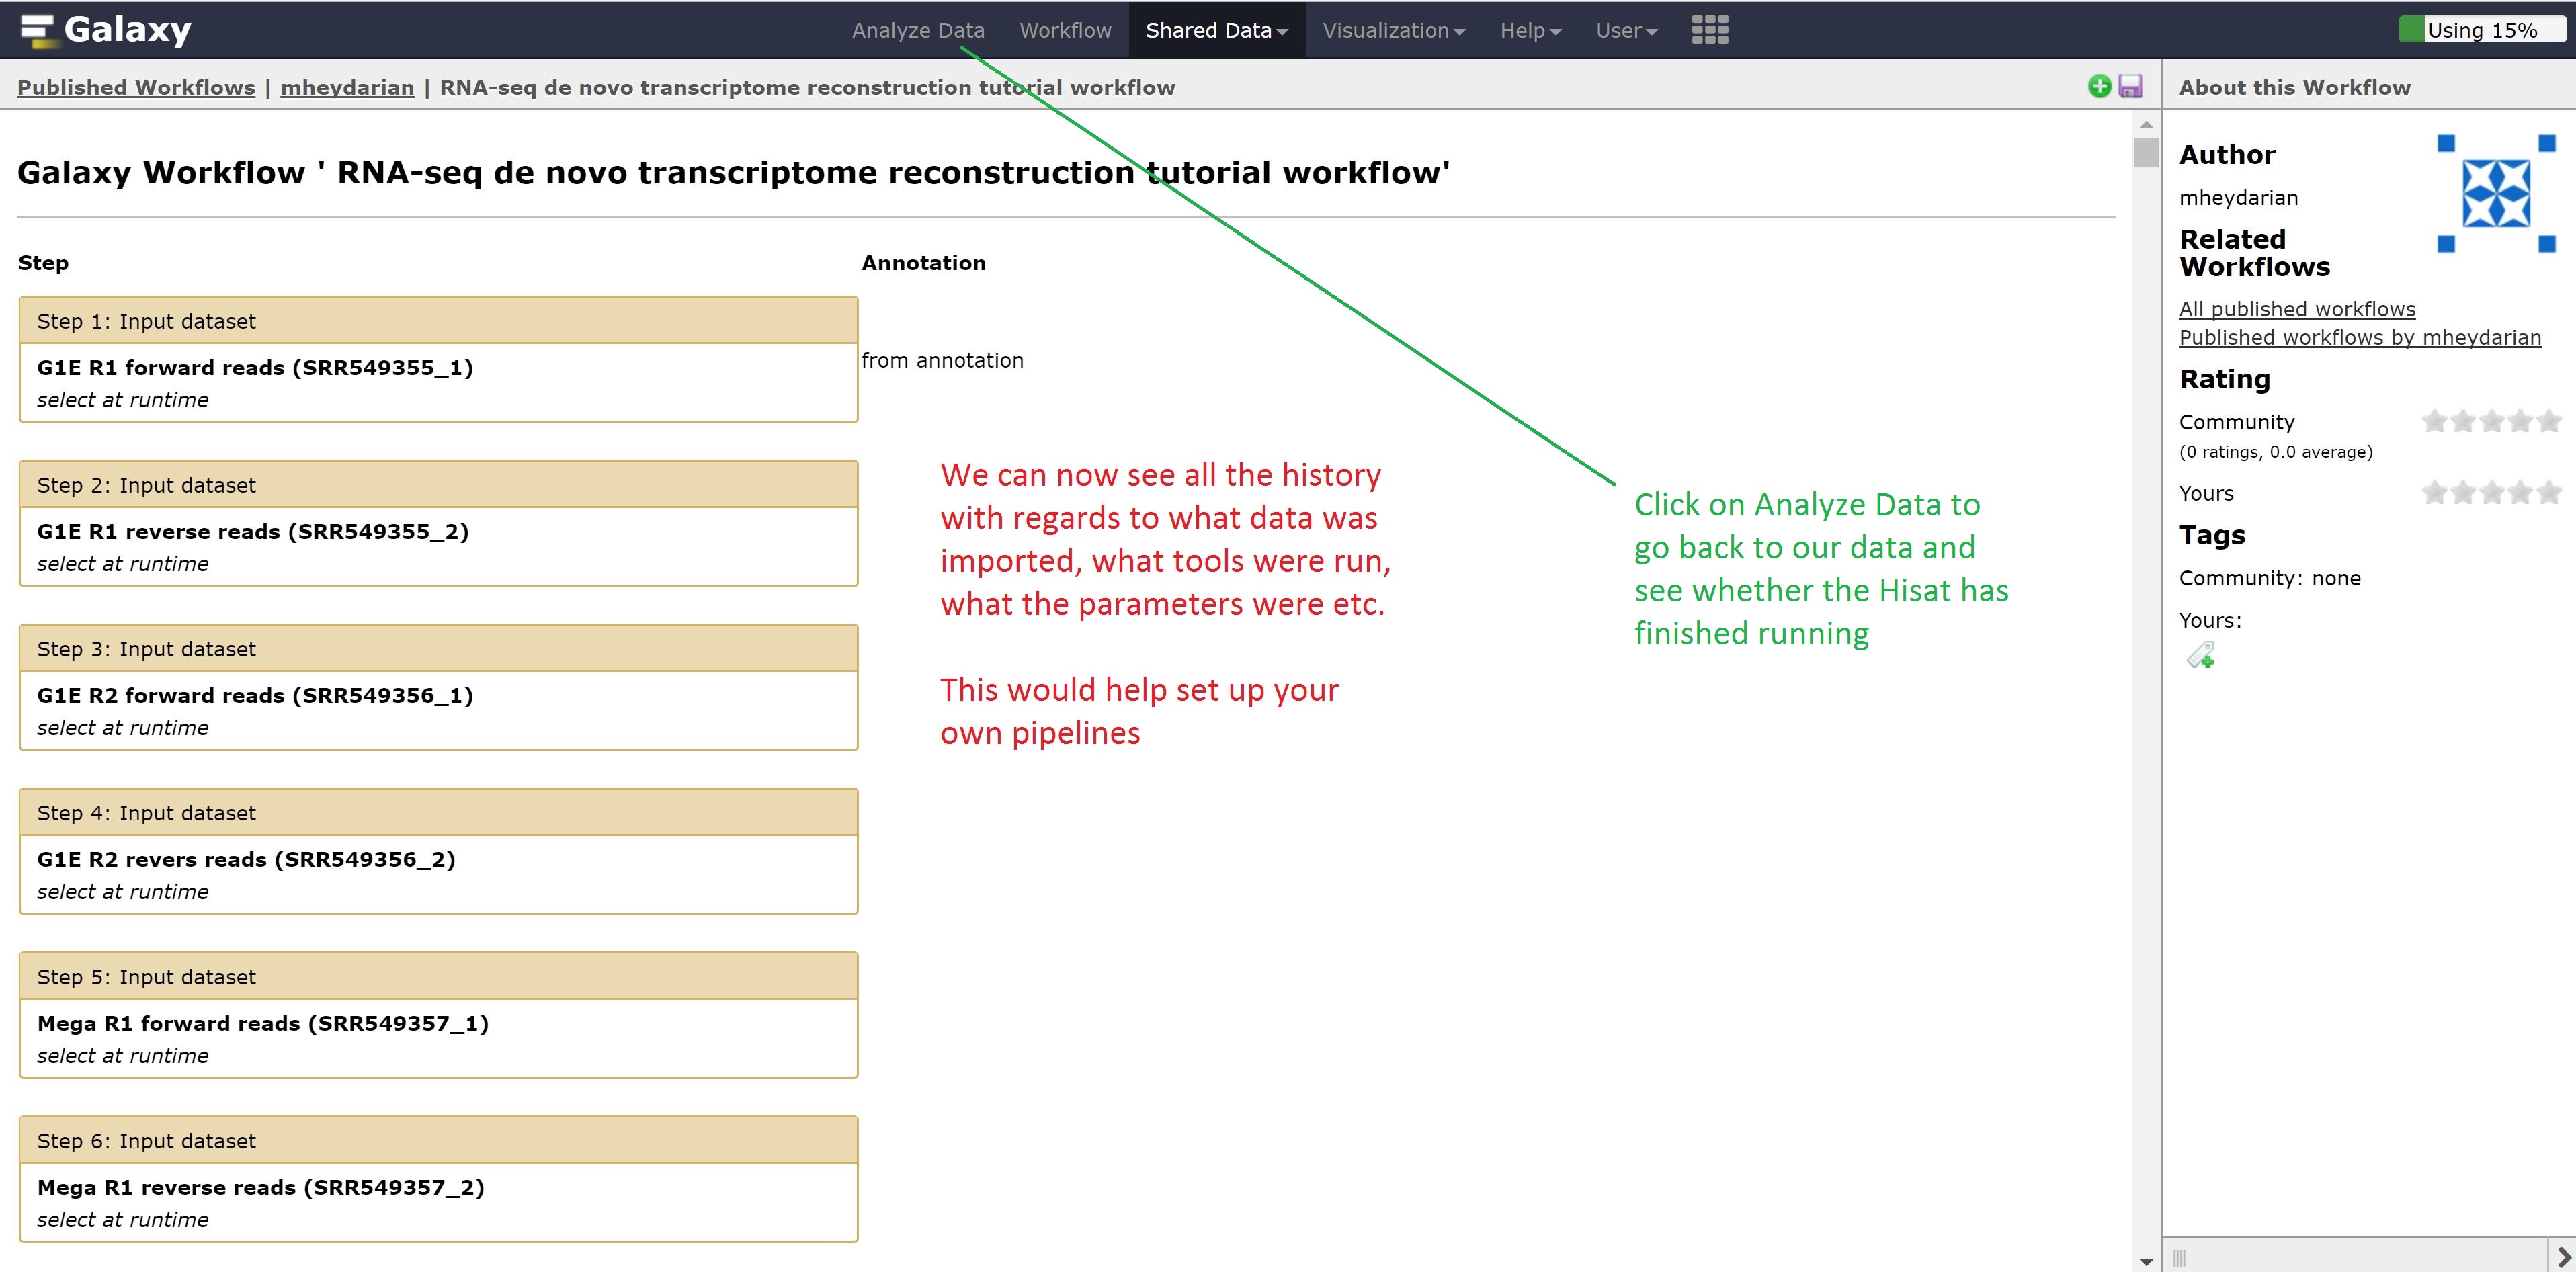
Now instead of looking at example data, we can also look at workflows published by other people for gaining ideas on how to run our other analysis.
Let’s go back to the home page and see whether the alignment has finished.
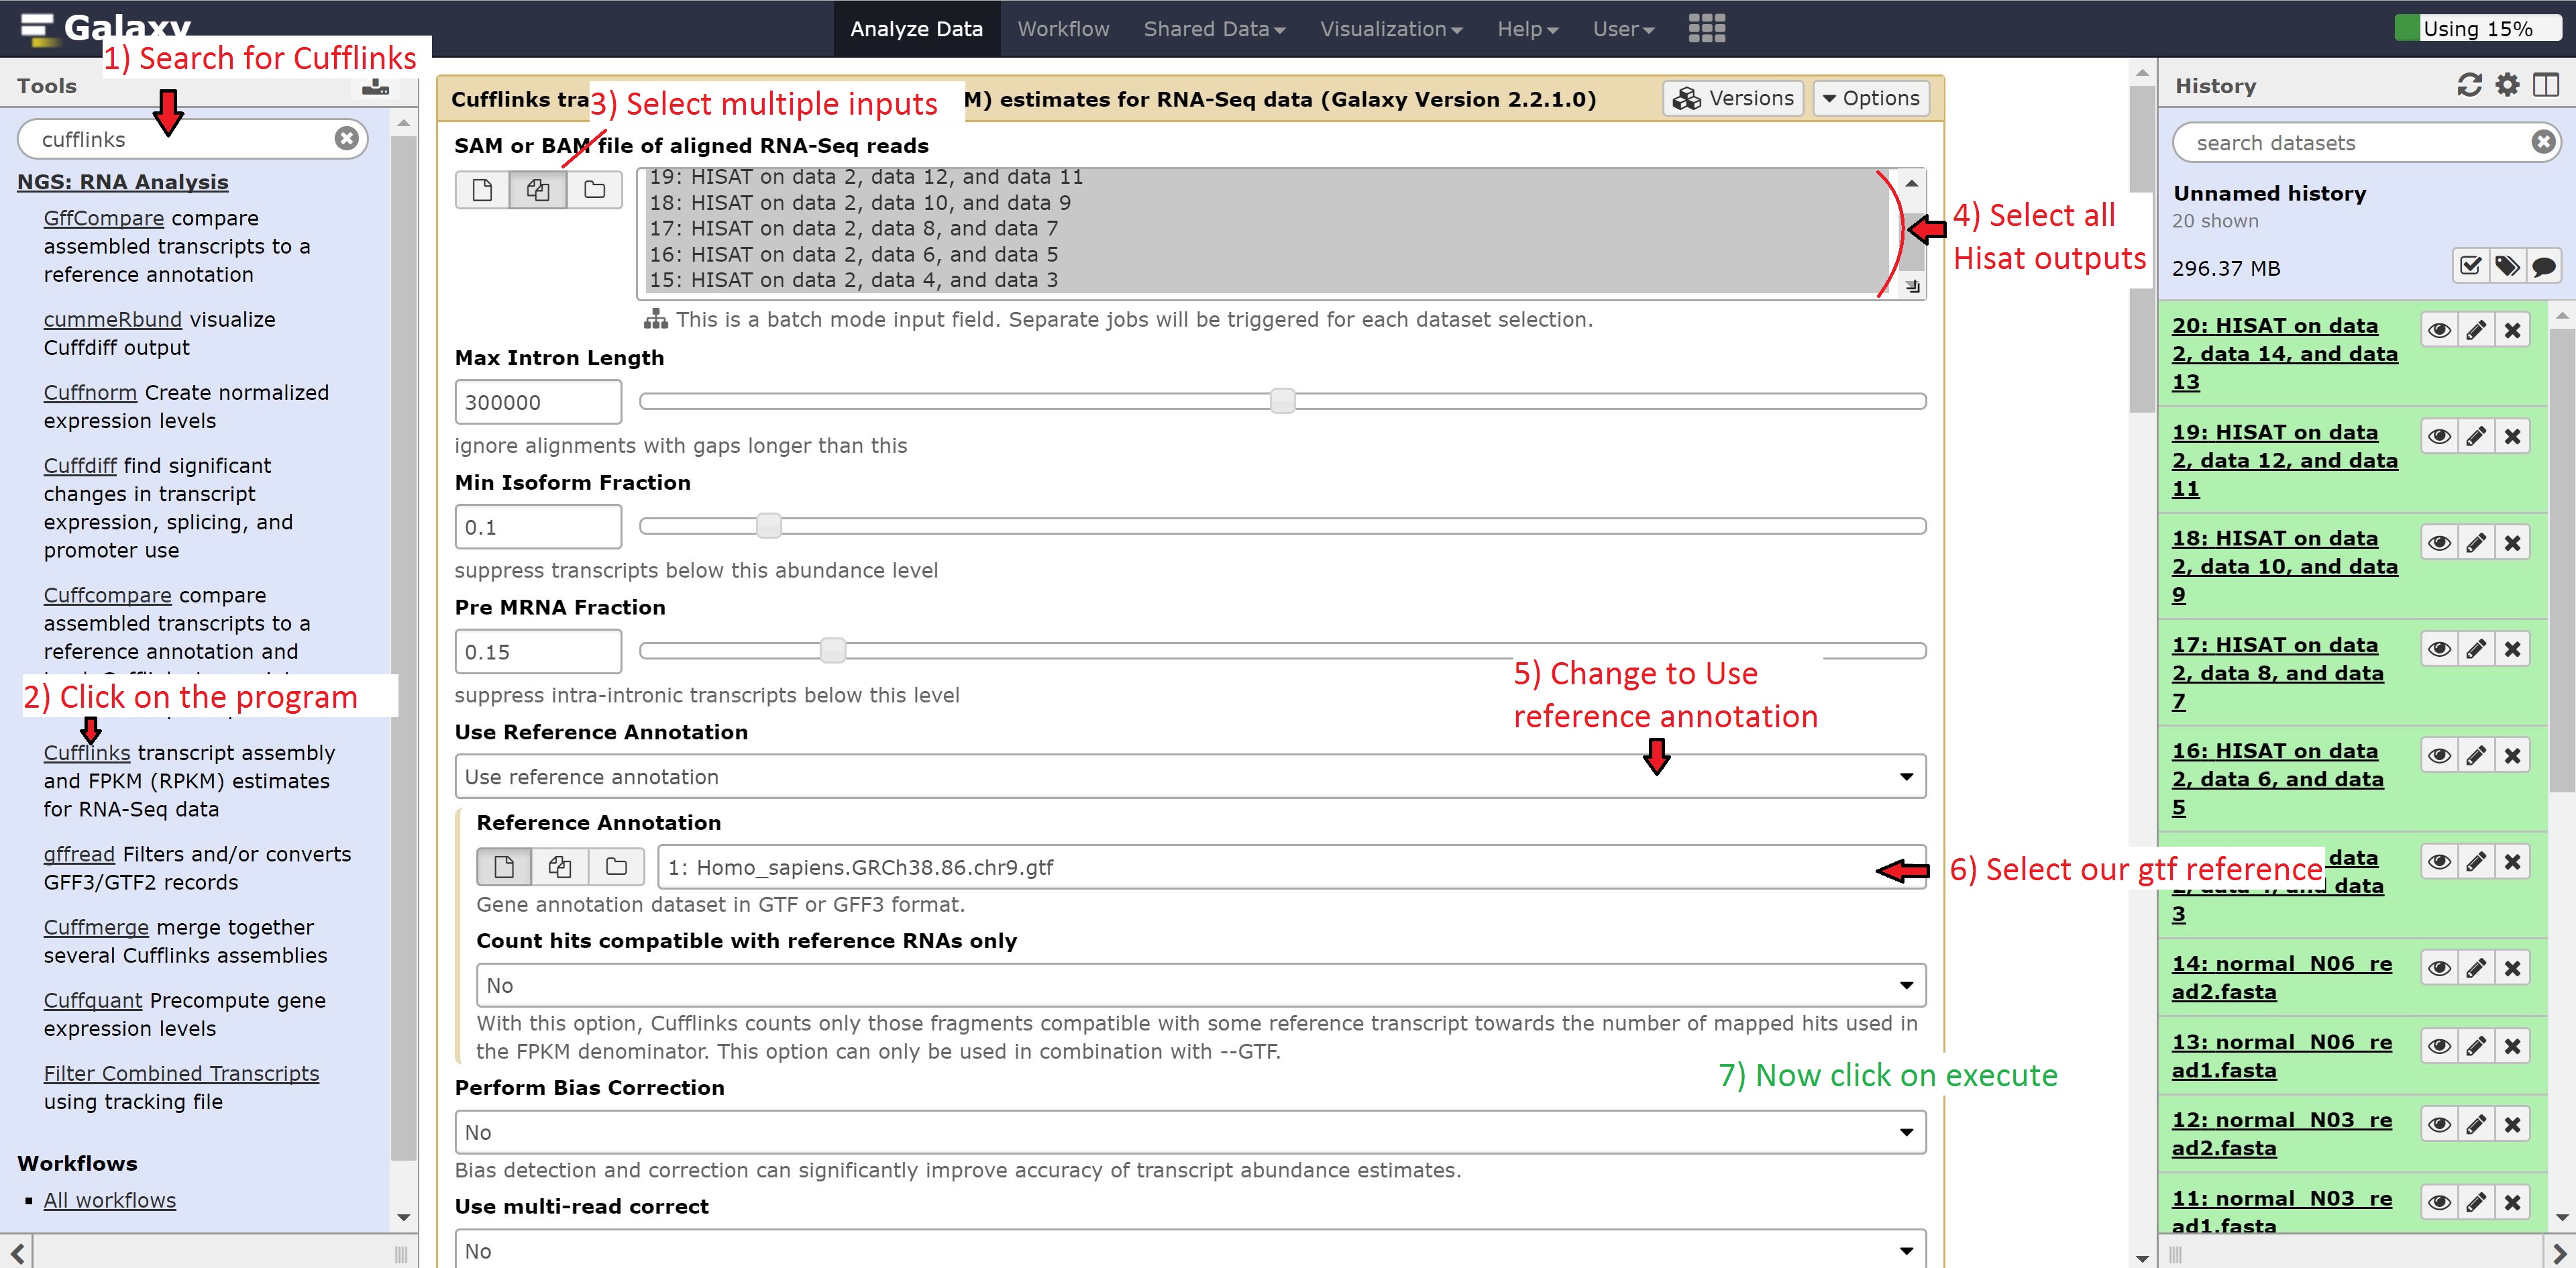
Transcript assembly and quantification using Cufflinks
Now we’re going to run cufflinks to assemble our transcripts and quantify them.
To do this, type Cufflinks in the search bar and click on the program. Once opened, modify the options by changing:
- SAM or BAM of aligned RNA-Seq reads to multiple datasets
- Use reference annotation to use reference annotation
- Reference annotation to 1: Homo_sapiens.GRCh38.86.chr9.gtf
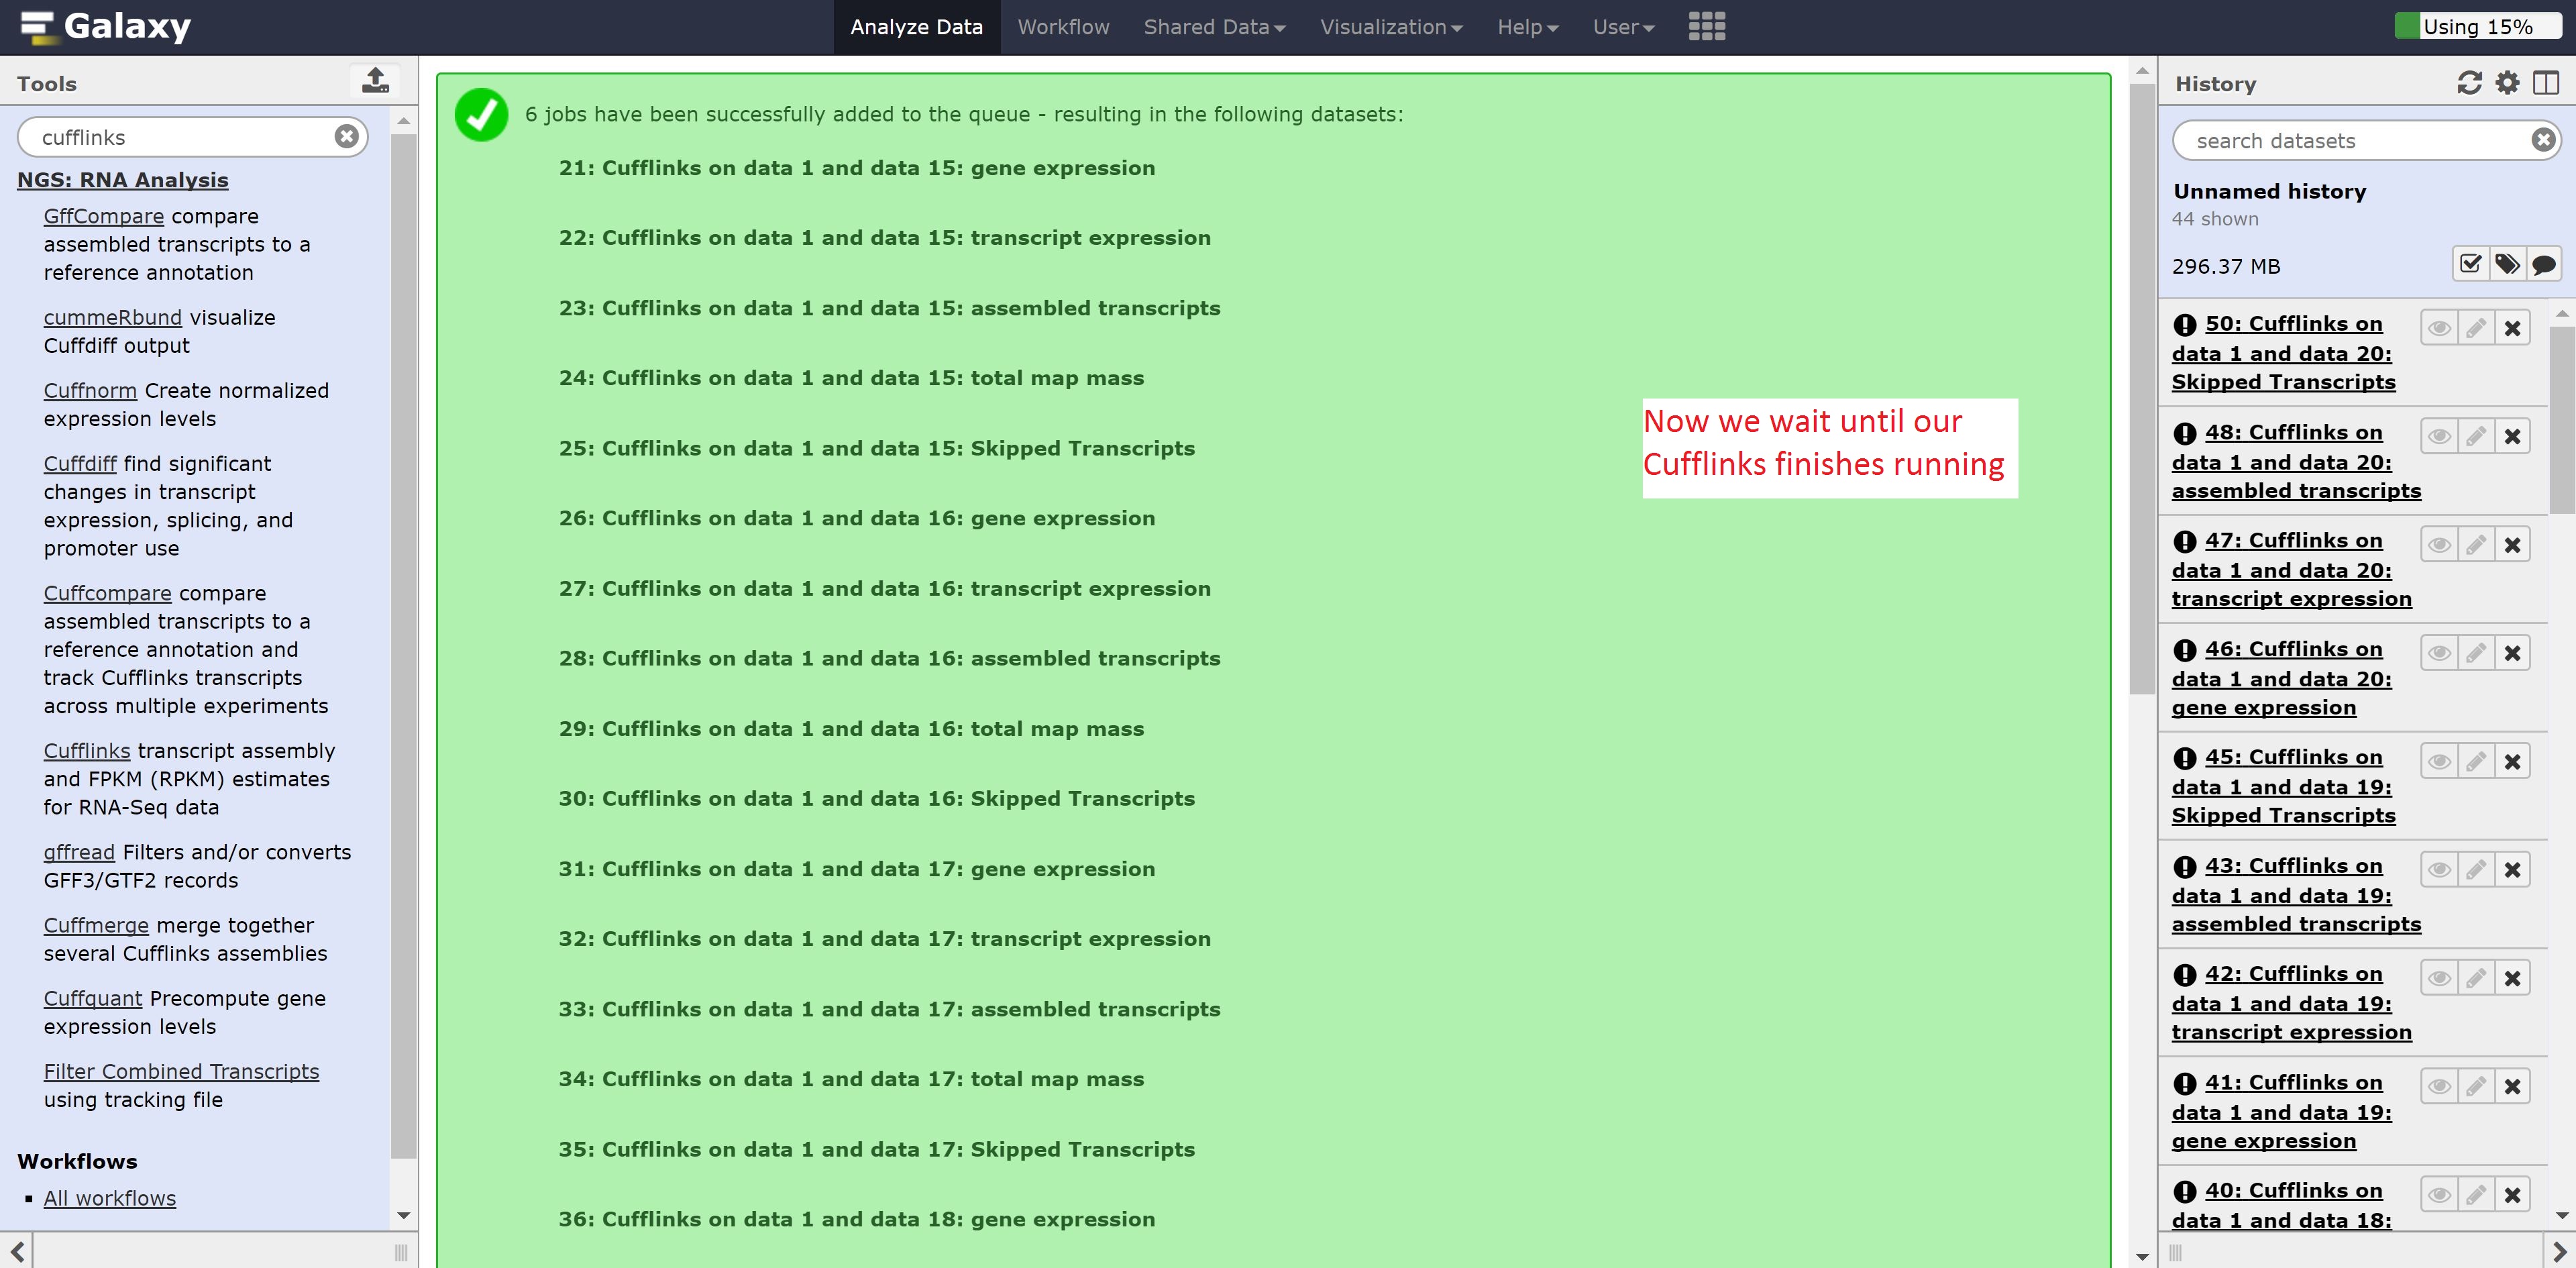
Make sure to select all the outputs in the SAM or BAM of aligned RNA-Seq reads. Leave all other options on default, and press run.
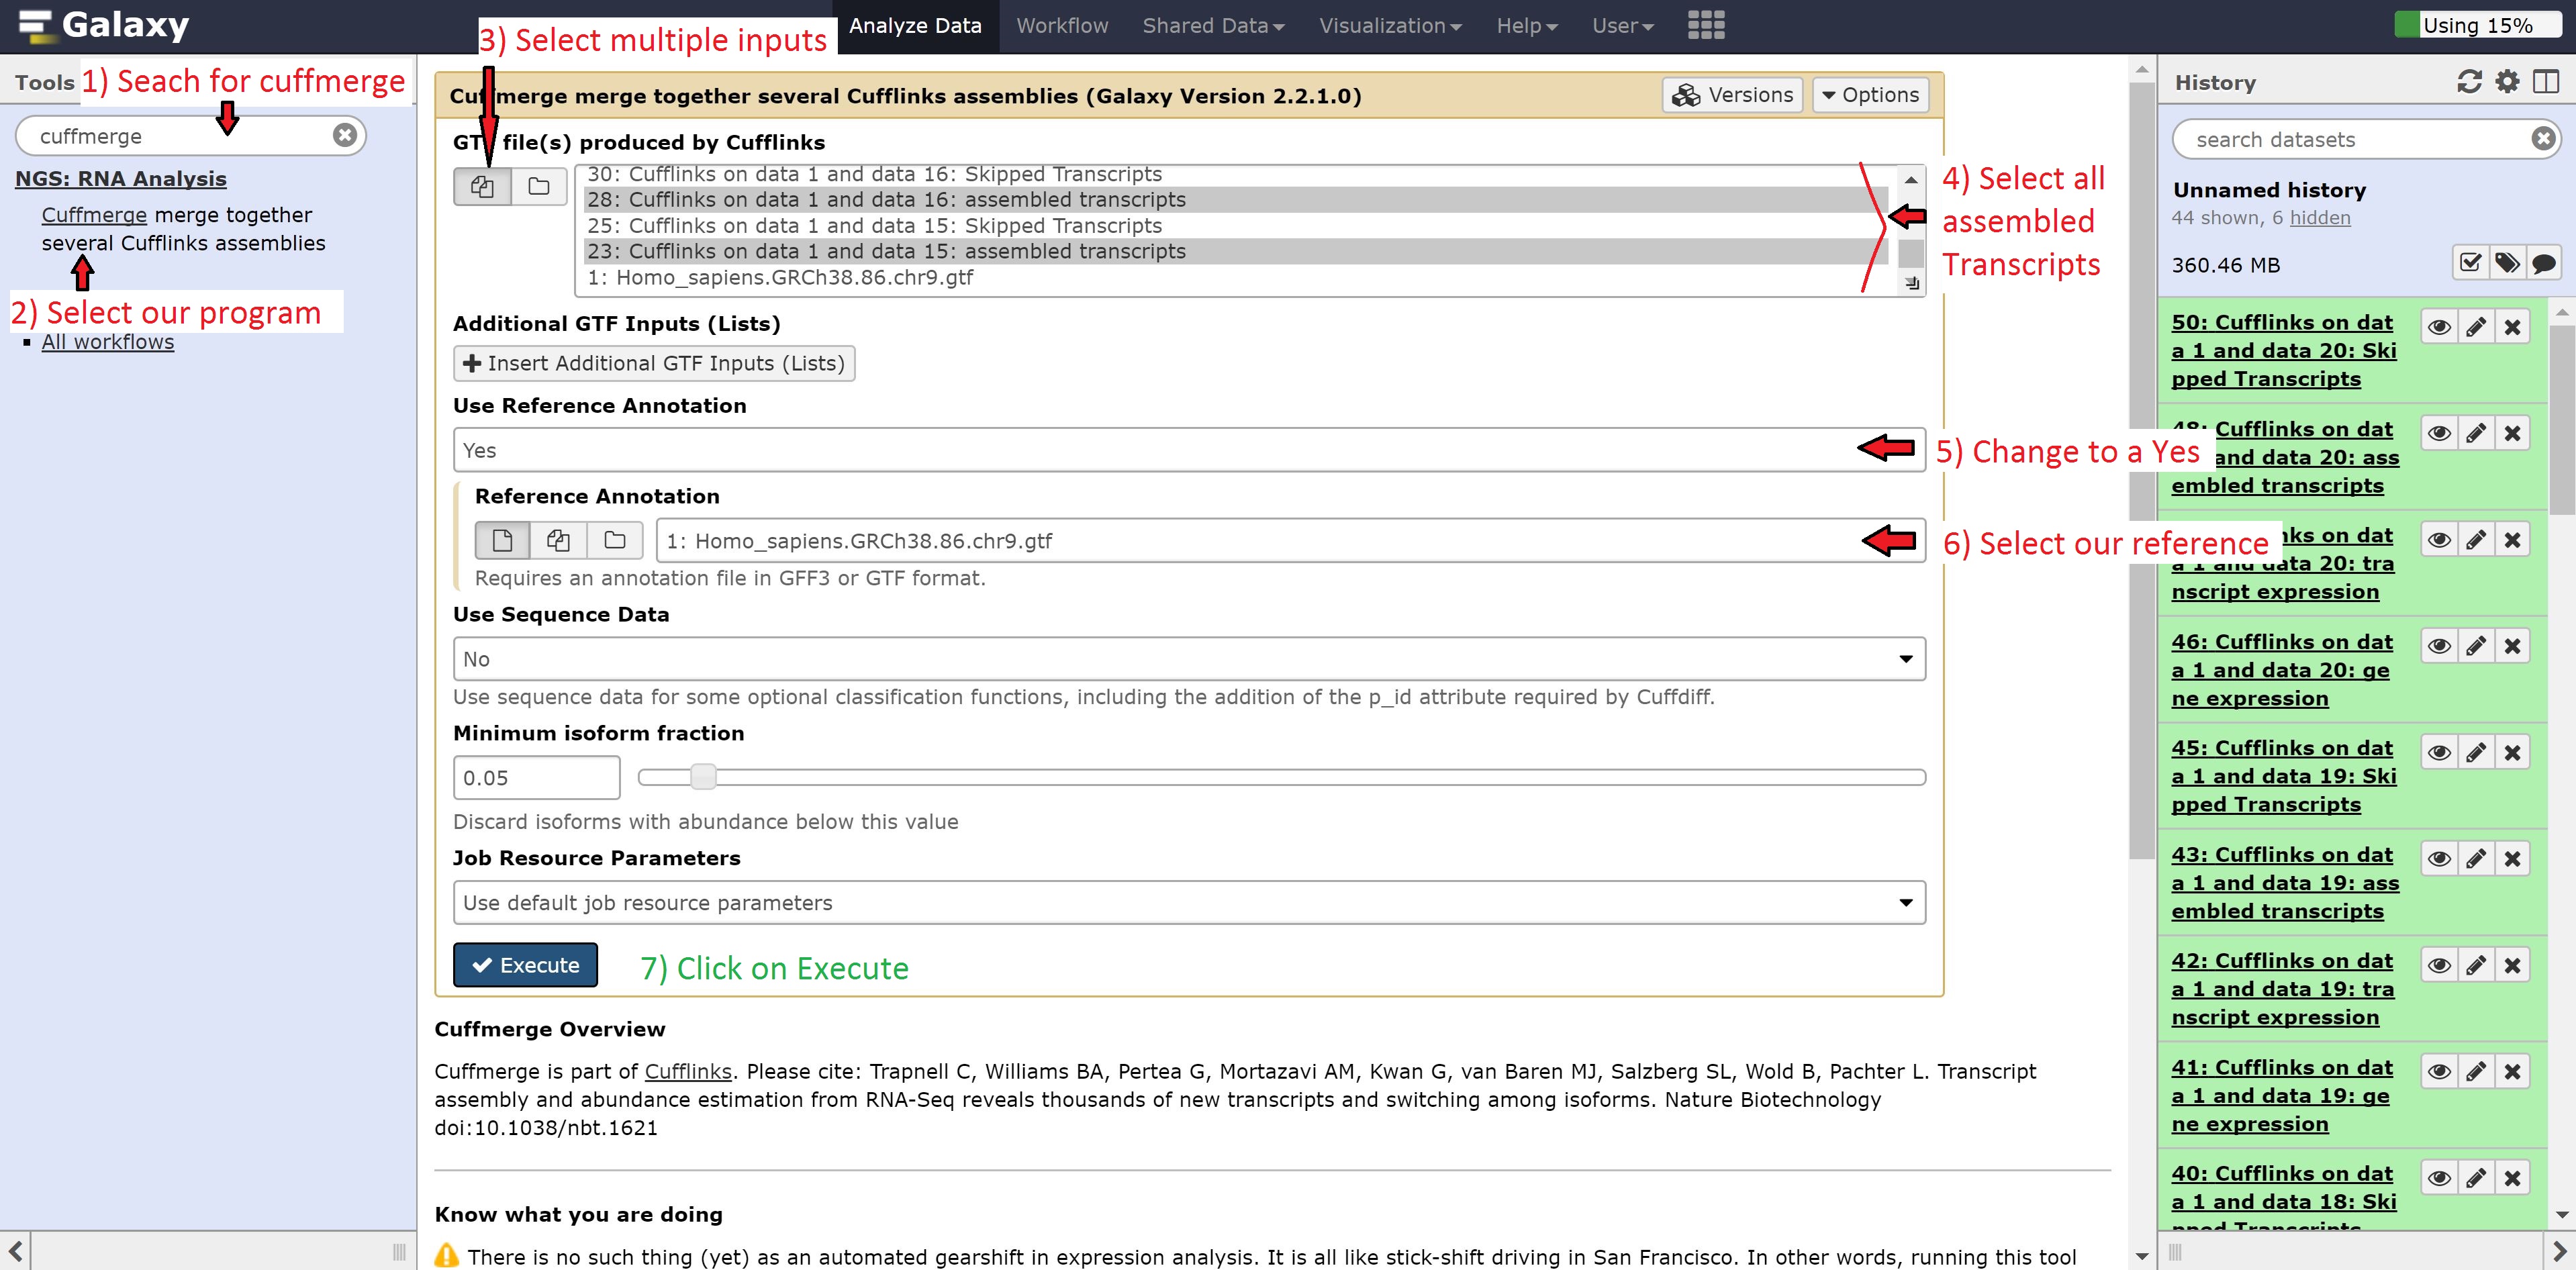
Merging transcript quantification from Cufflinks
Next, we’re going to combine our transcript abundances from Cufflinks using the Cuffmerge program. Like before, type Cuffmerge in the search options to the left, select the program, and then modify it as follows:
- GTF file(s) produced by Cufflinks to multiple
- Use reference annotation to use reference annotation
- Reference annotation to 1: Homo_sapiens.GRCh38.86.chr9.gtf
Select only the assembled Transcripts in the GTF file(s) produced by Cufflinks. Leave all other options on default, and press run.
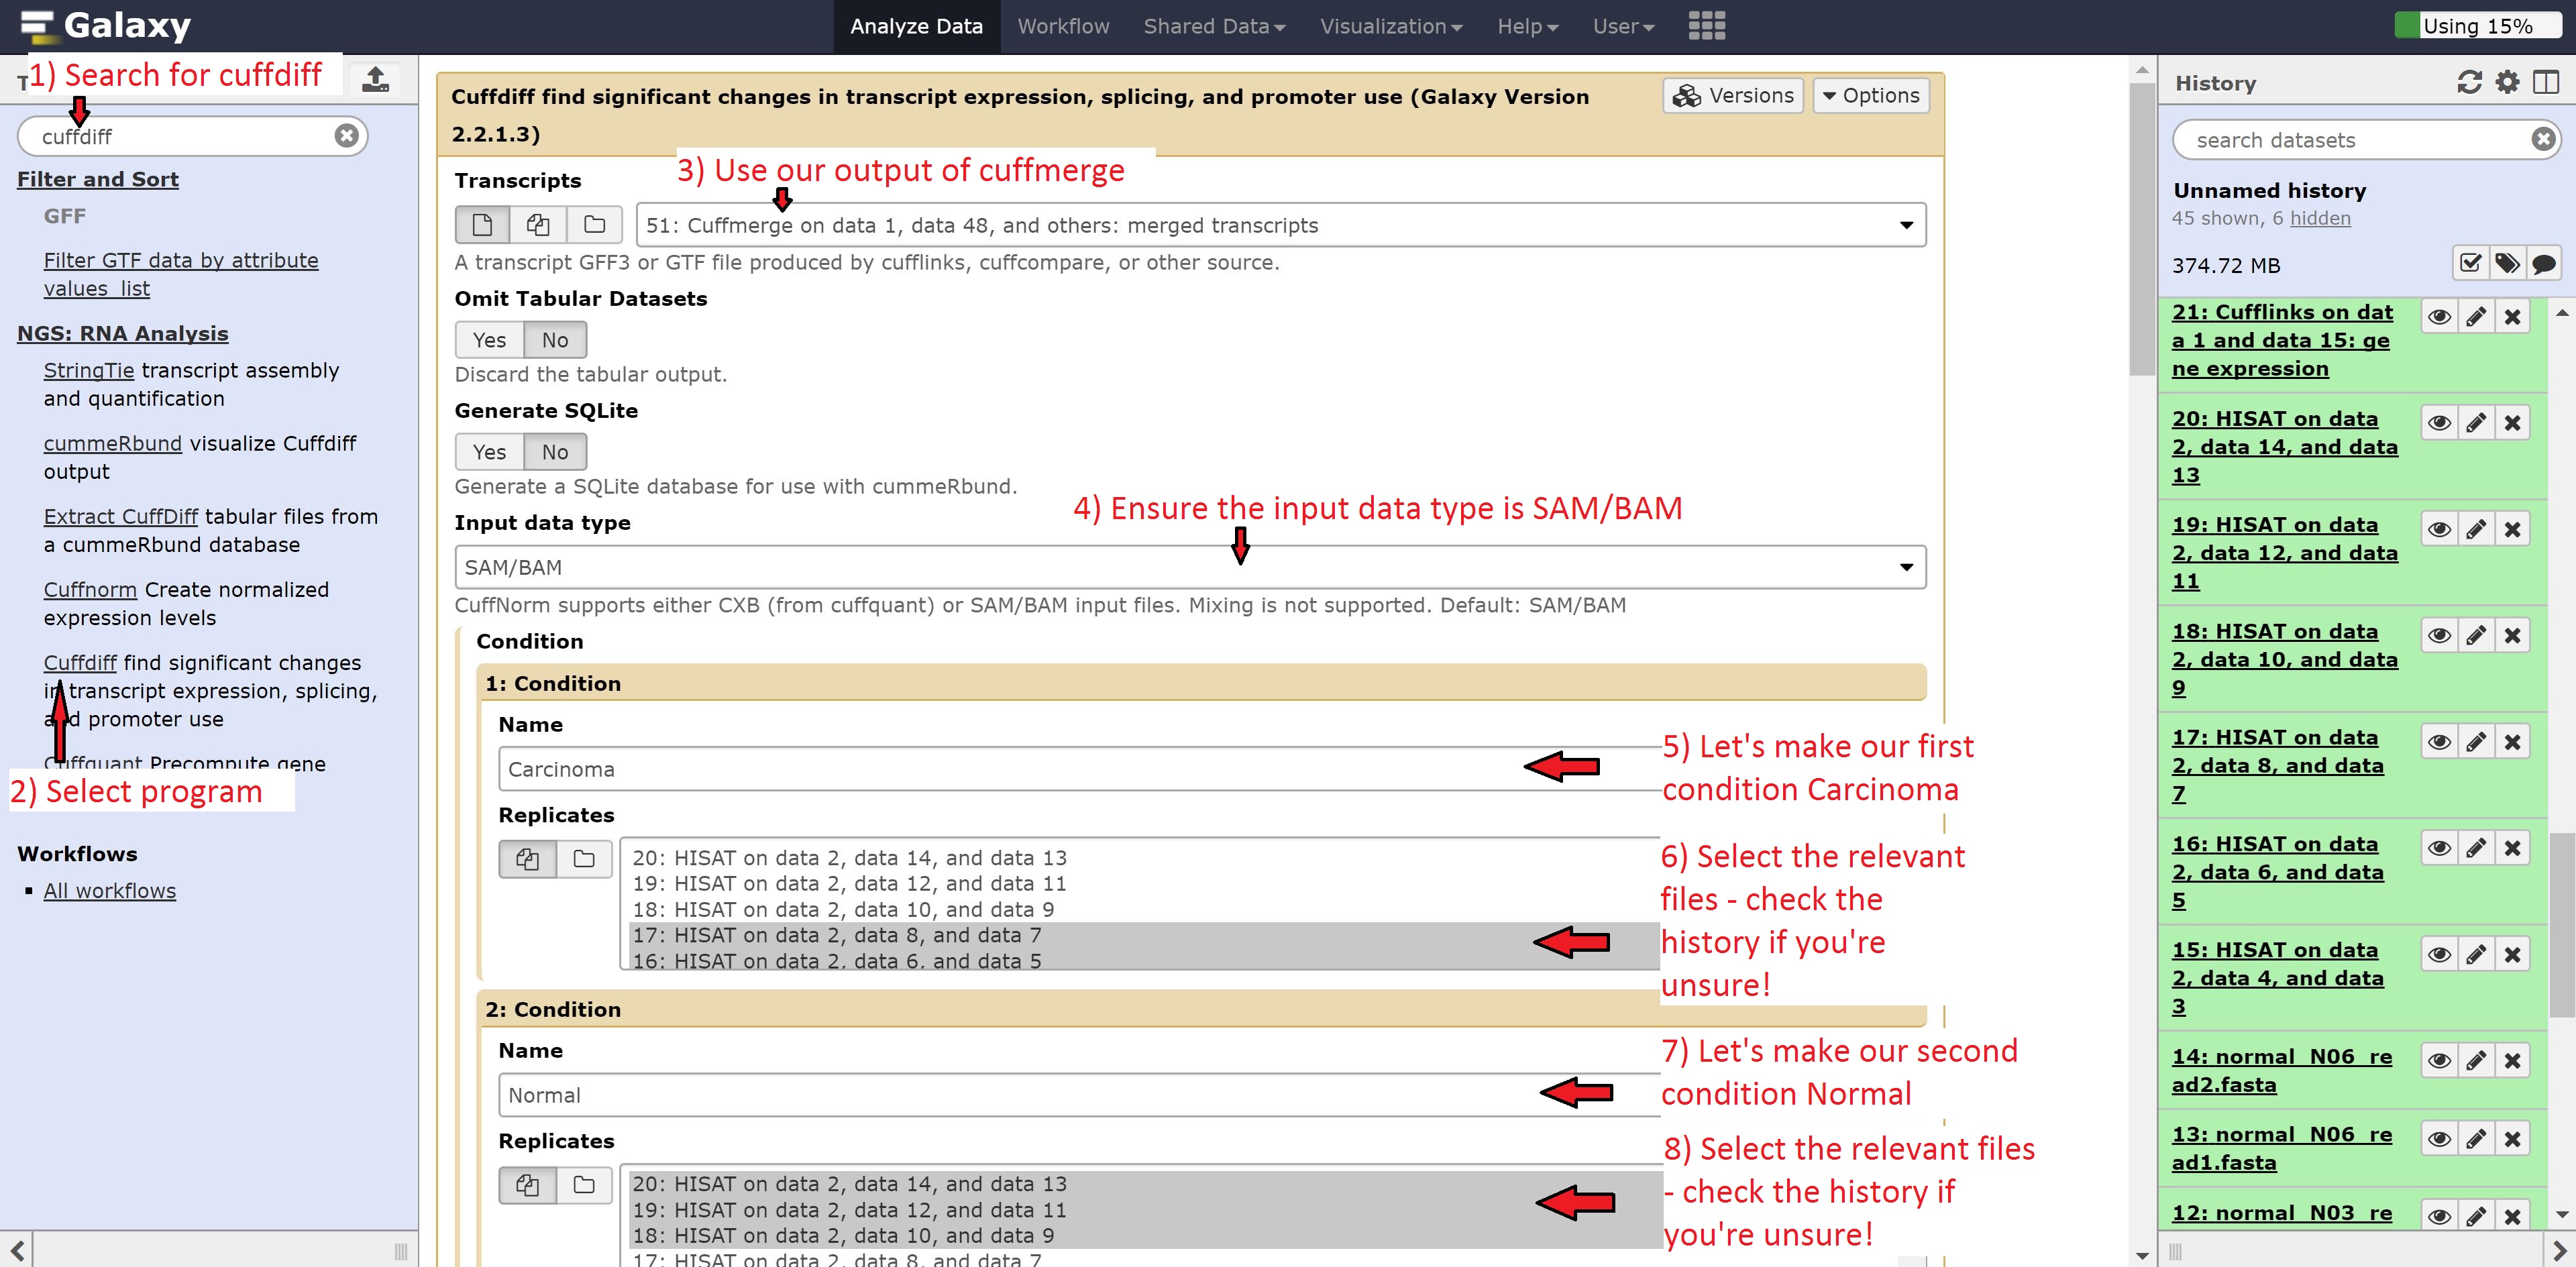
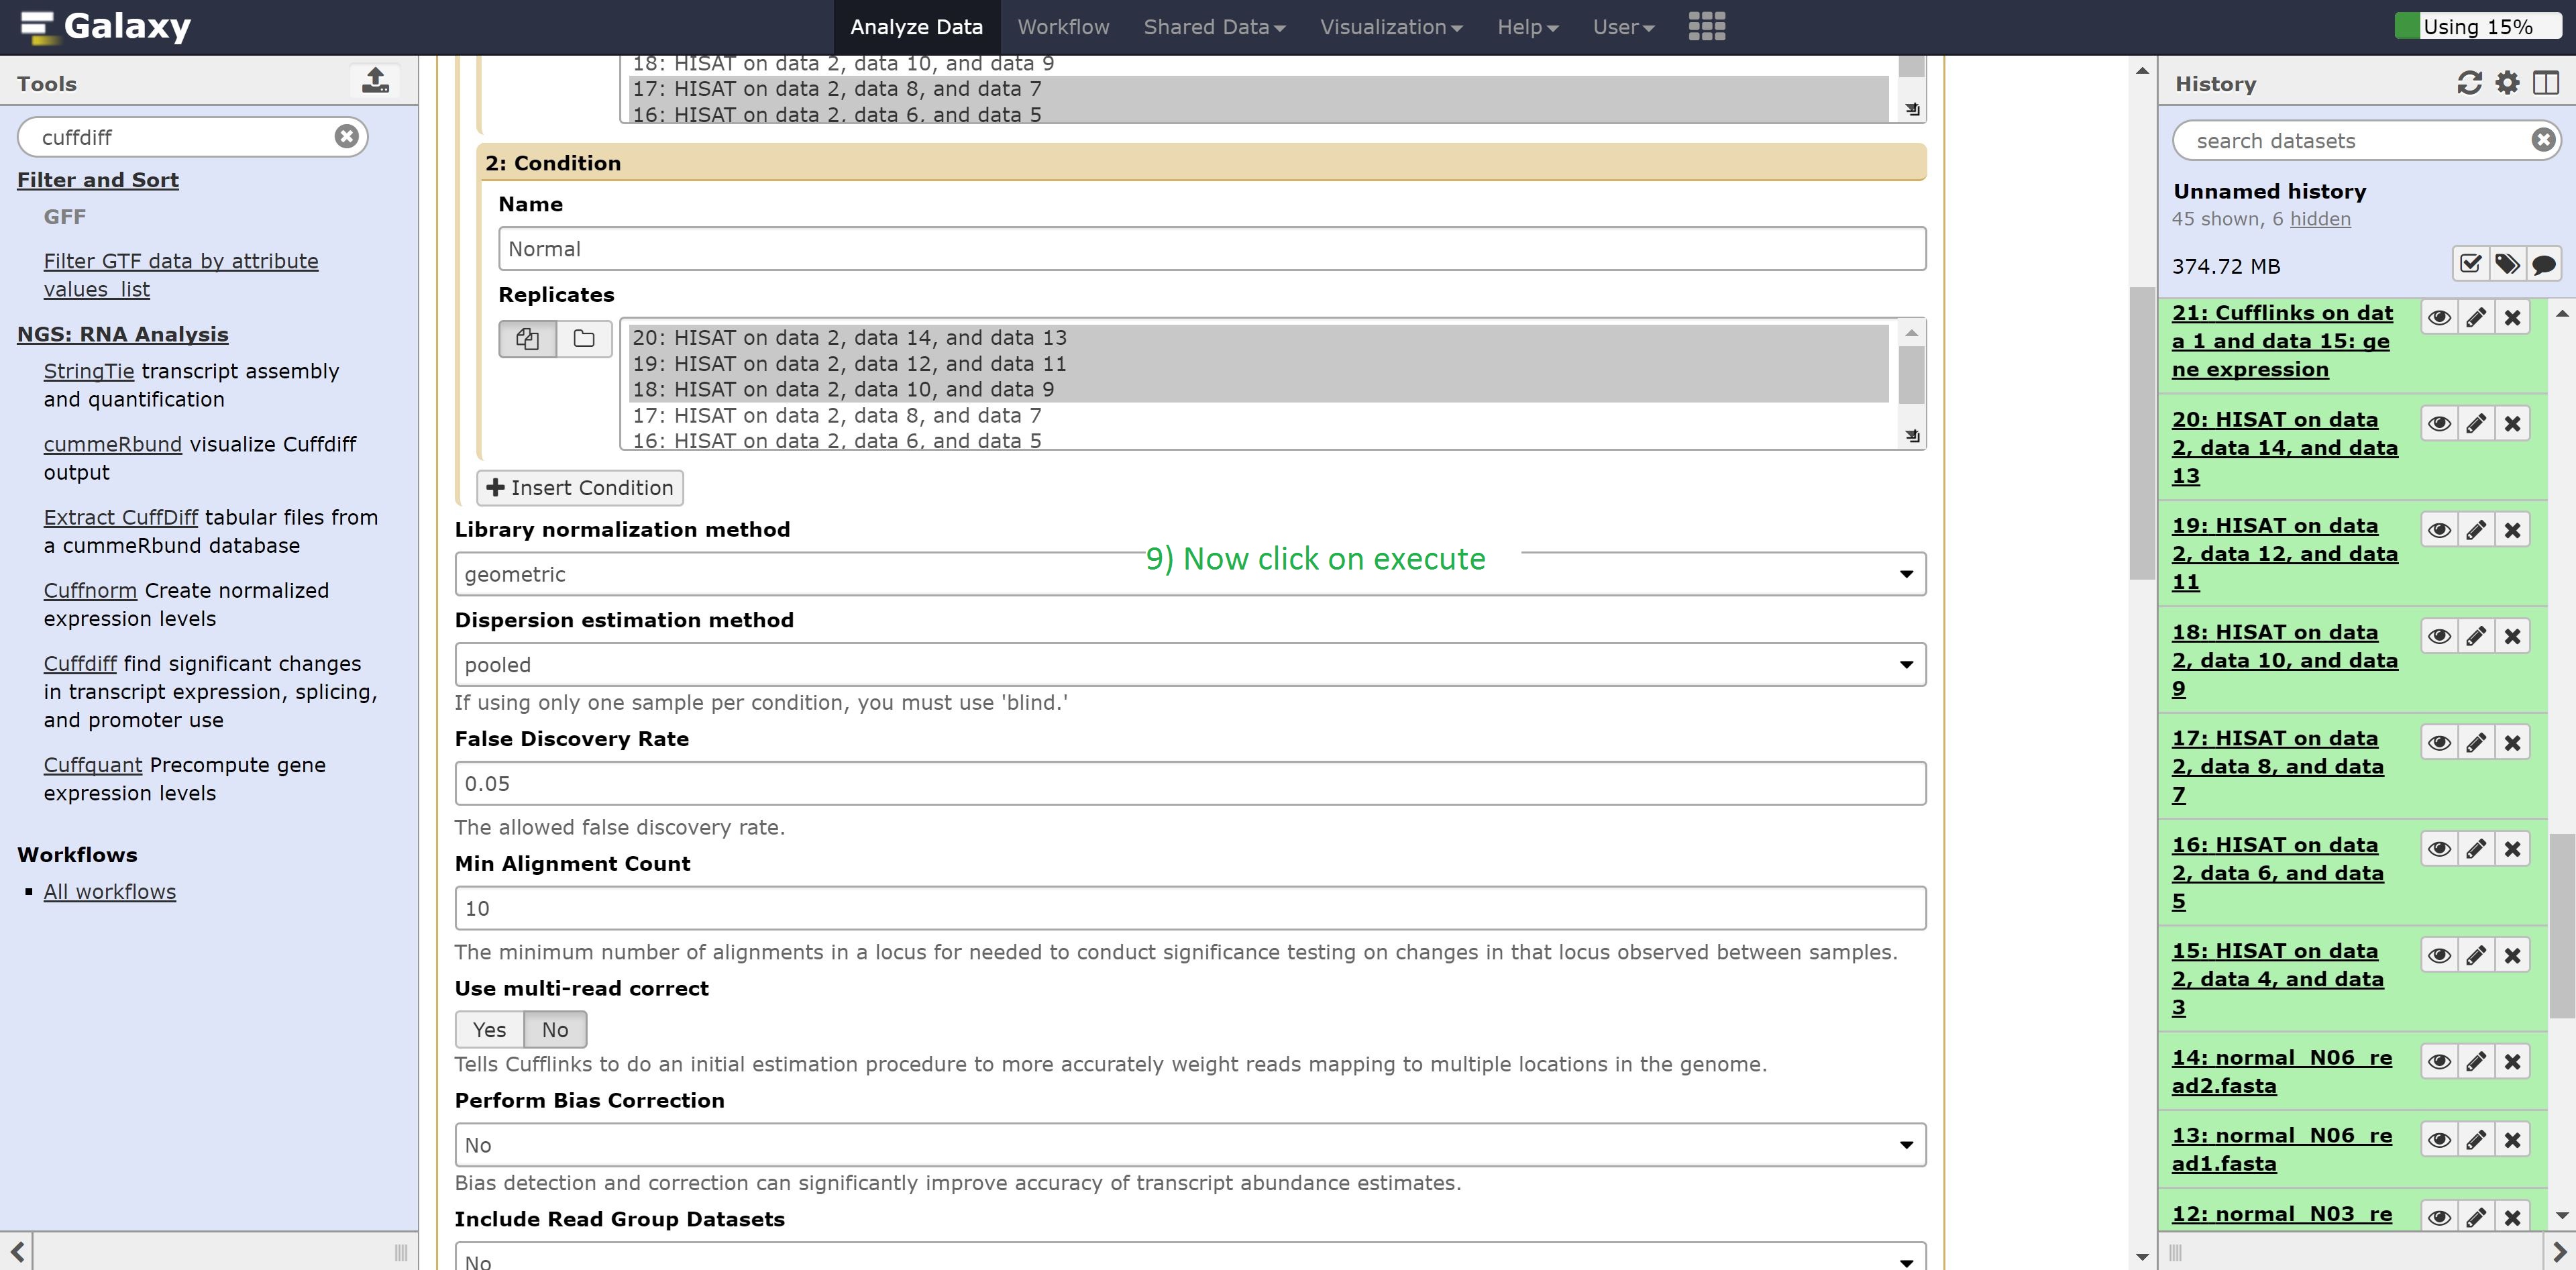
Differential expression analysis using Cuffdiff
Finally we’re going to perform the differential expression analysis between our two groups using the outputs from Hisat and cuffmerge. Find Cuffdiff in the search bar and select it, and make the following changes:
- Transcripts to Cuffmerge on data…
- 1: Condition Name to Carcinoma
- Select the Carcinoma samples: datasets 14, 15, 16
- 2: Condition Name to Normal
- Select the Normal samples: datasets 17, 18, 19
Leave everything else on default, and execute the command.
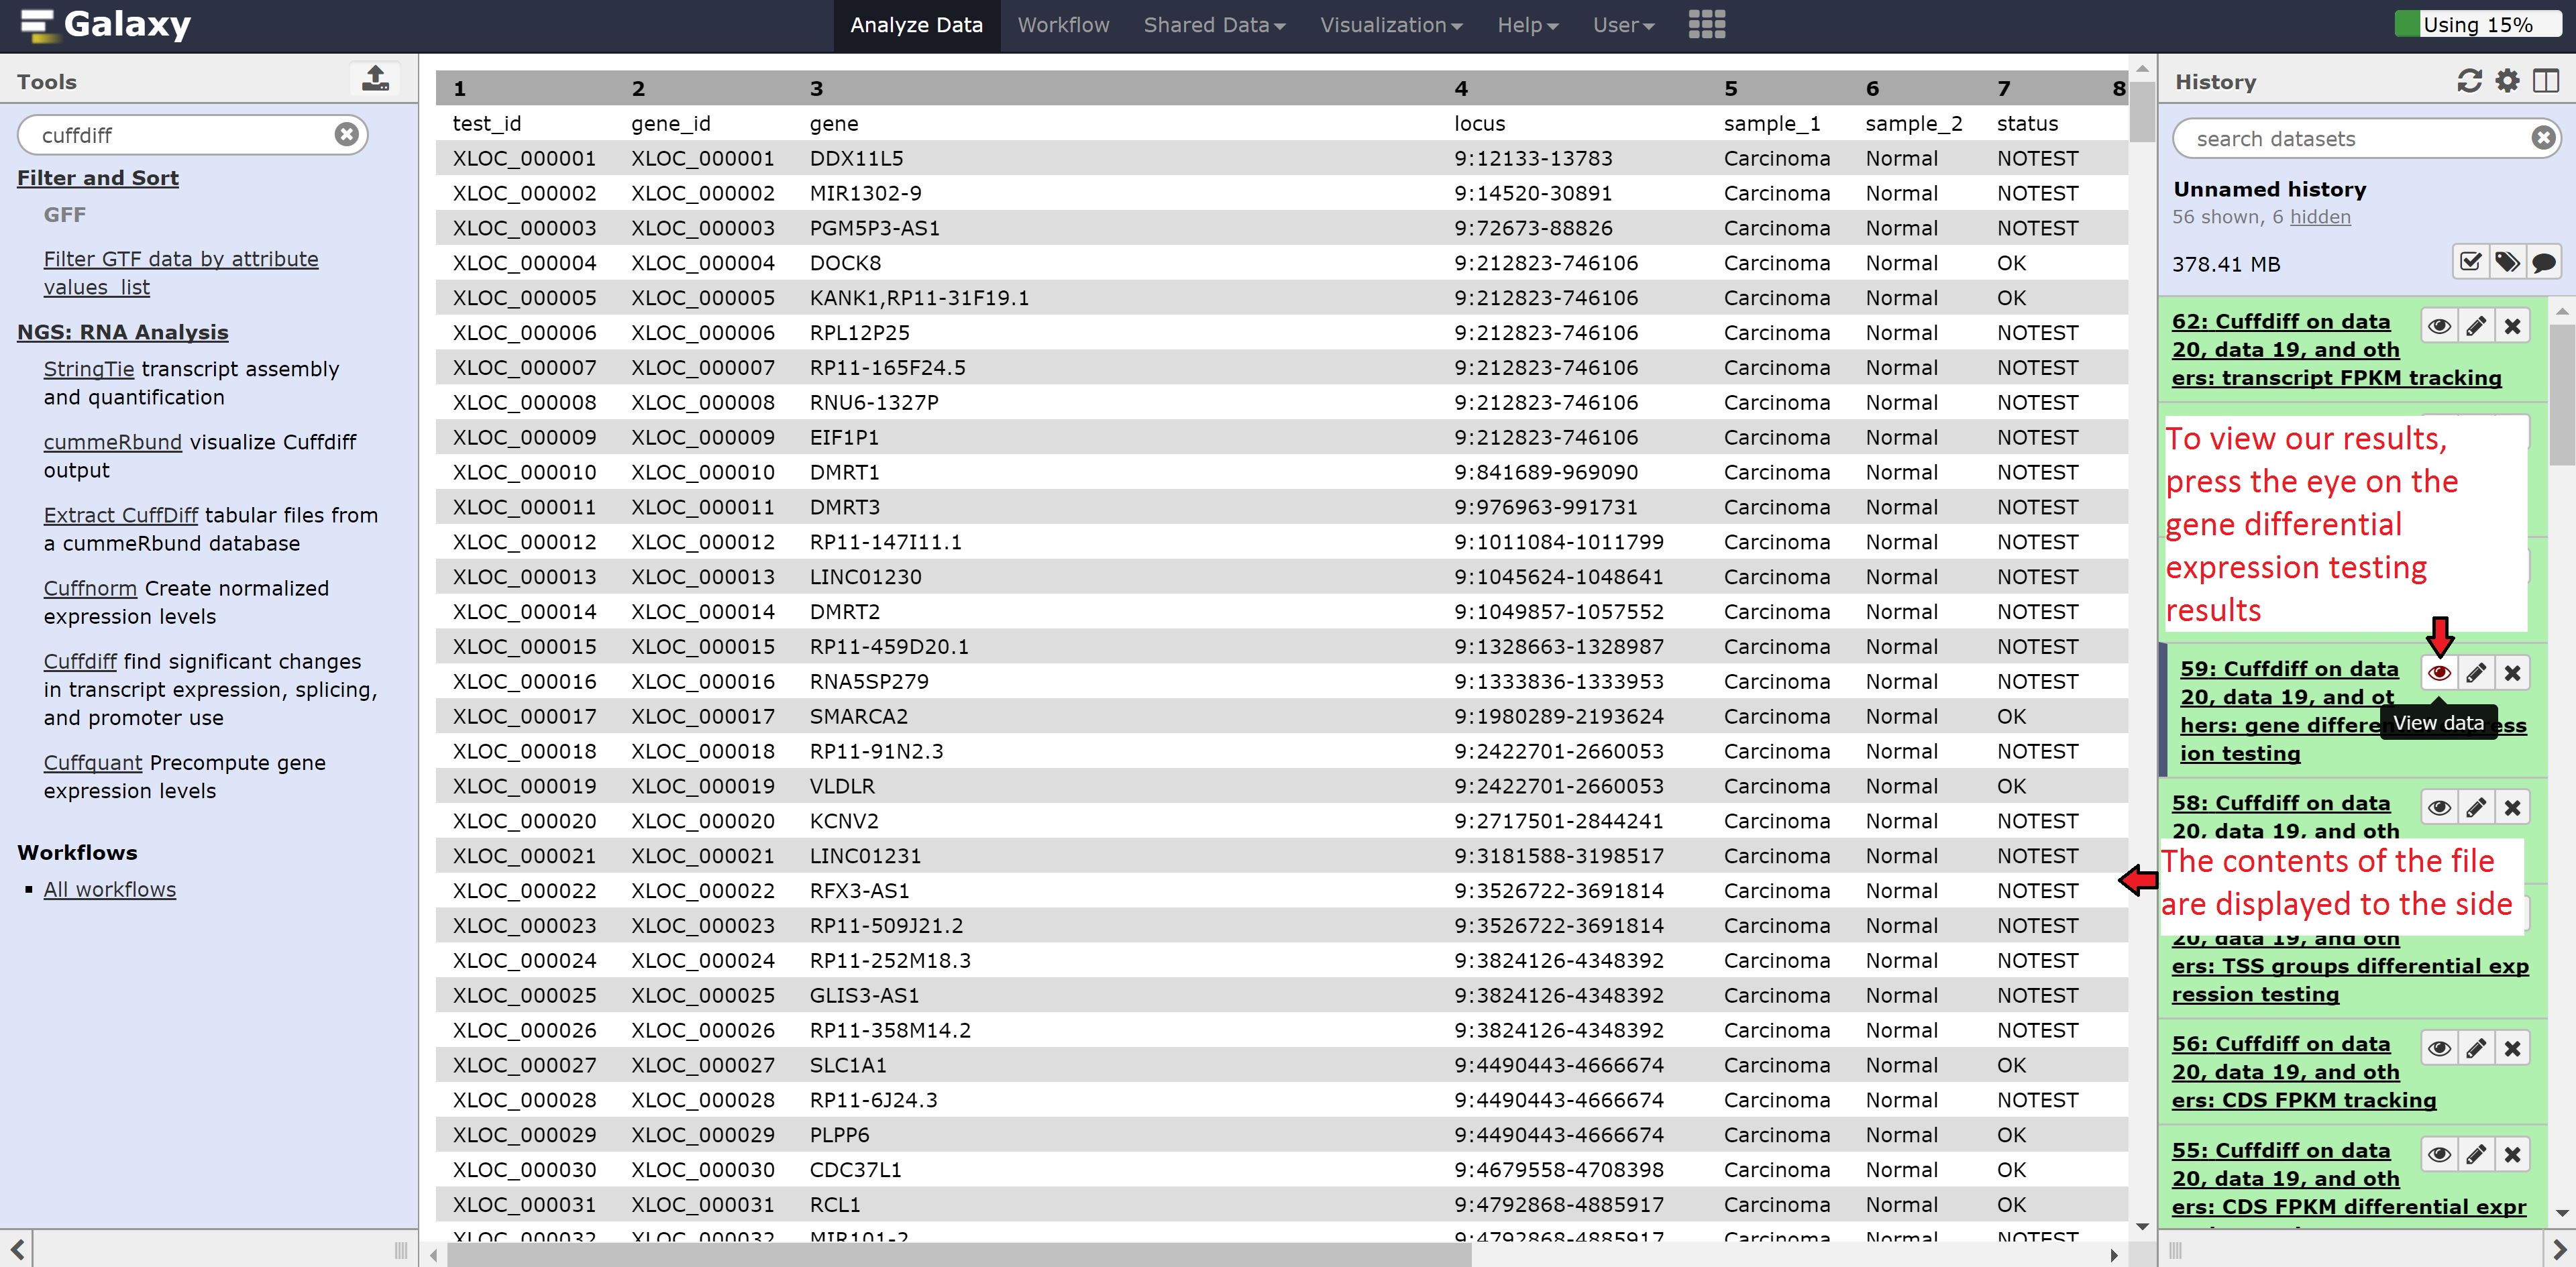
Cuffdiff will generate differential expression results based on genes, transcripts, TSS, promoters, CDS, and splicing. We’re going to look into the gene based differential expression, but feel free to peer into the other files.
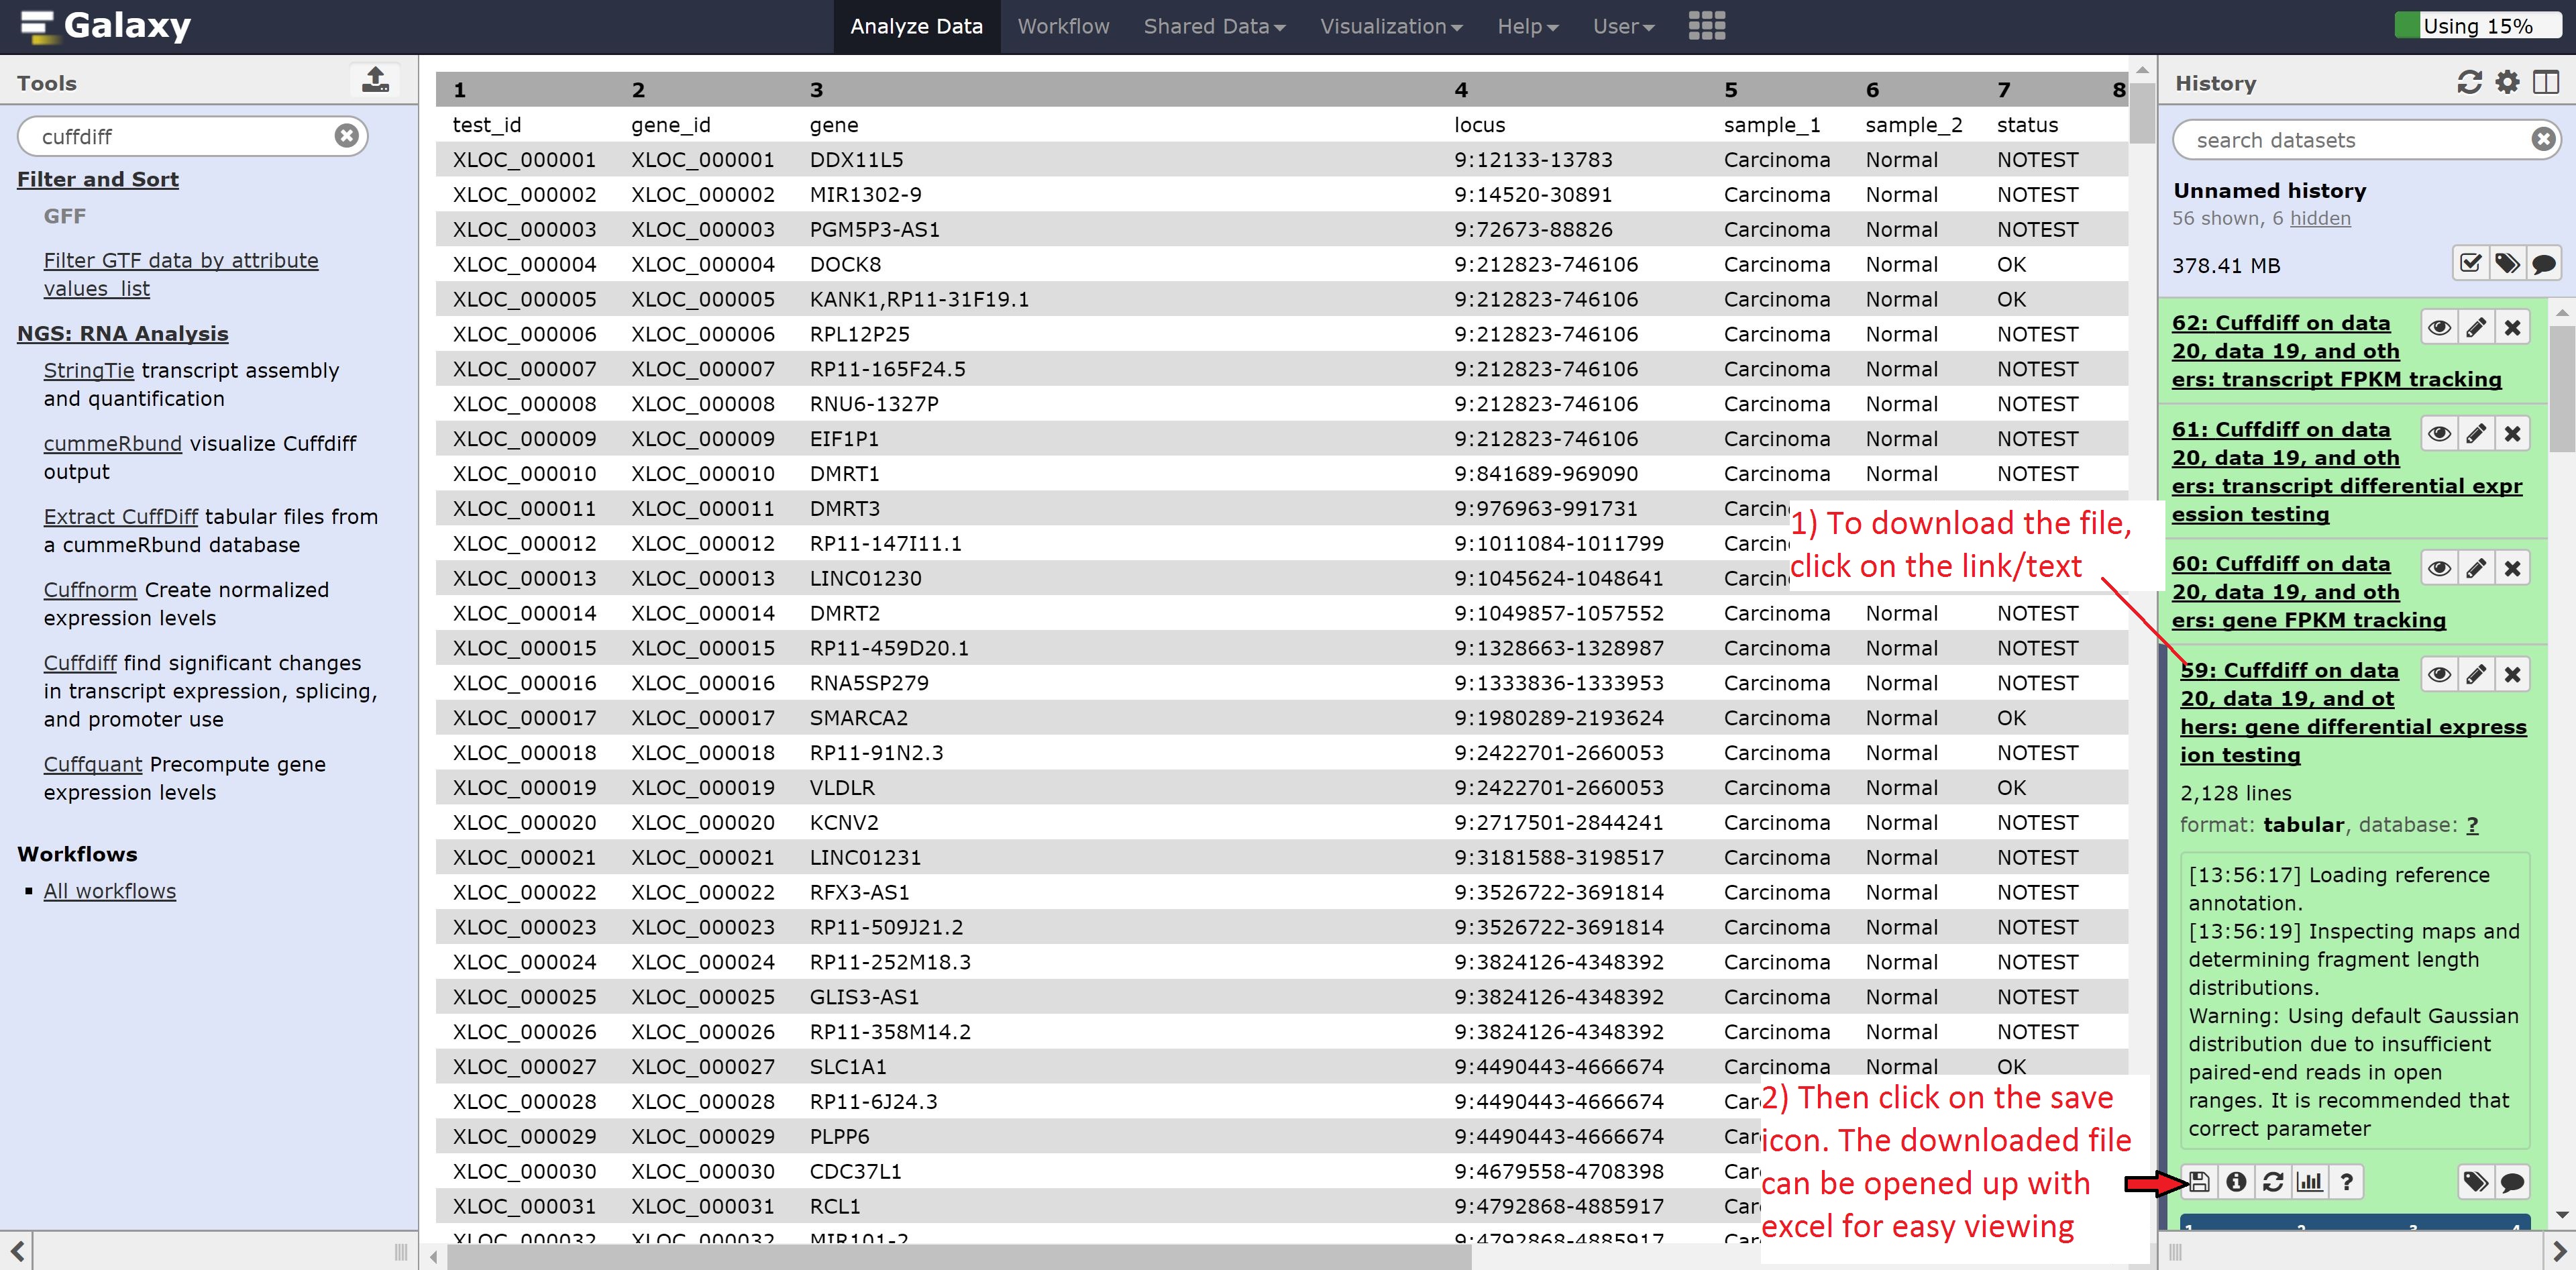
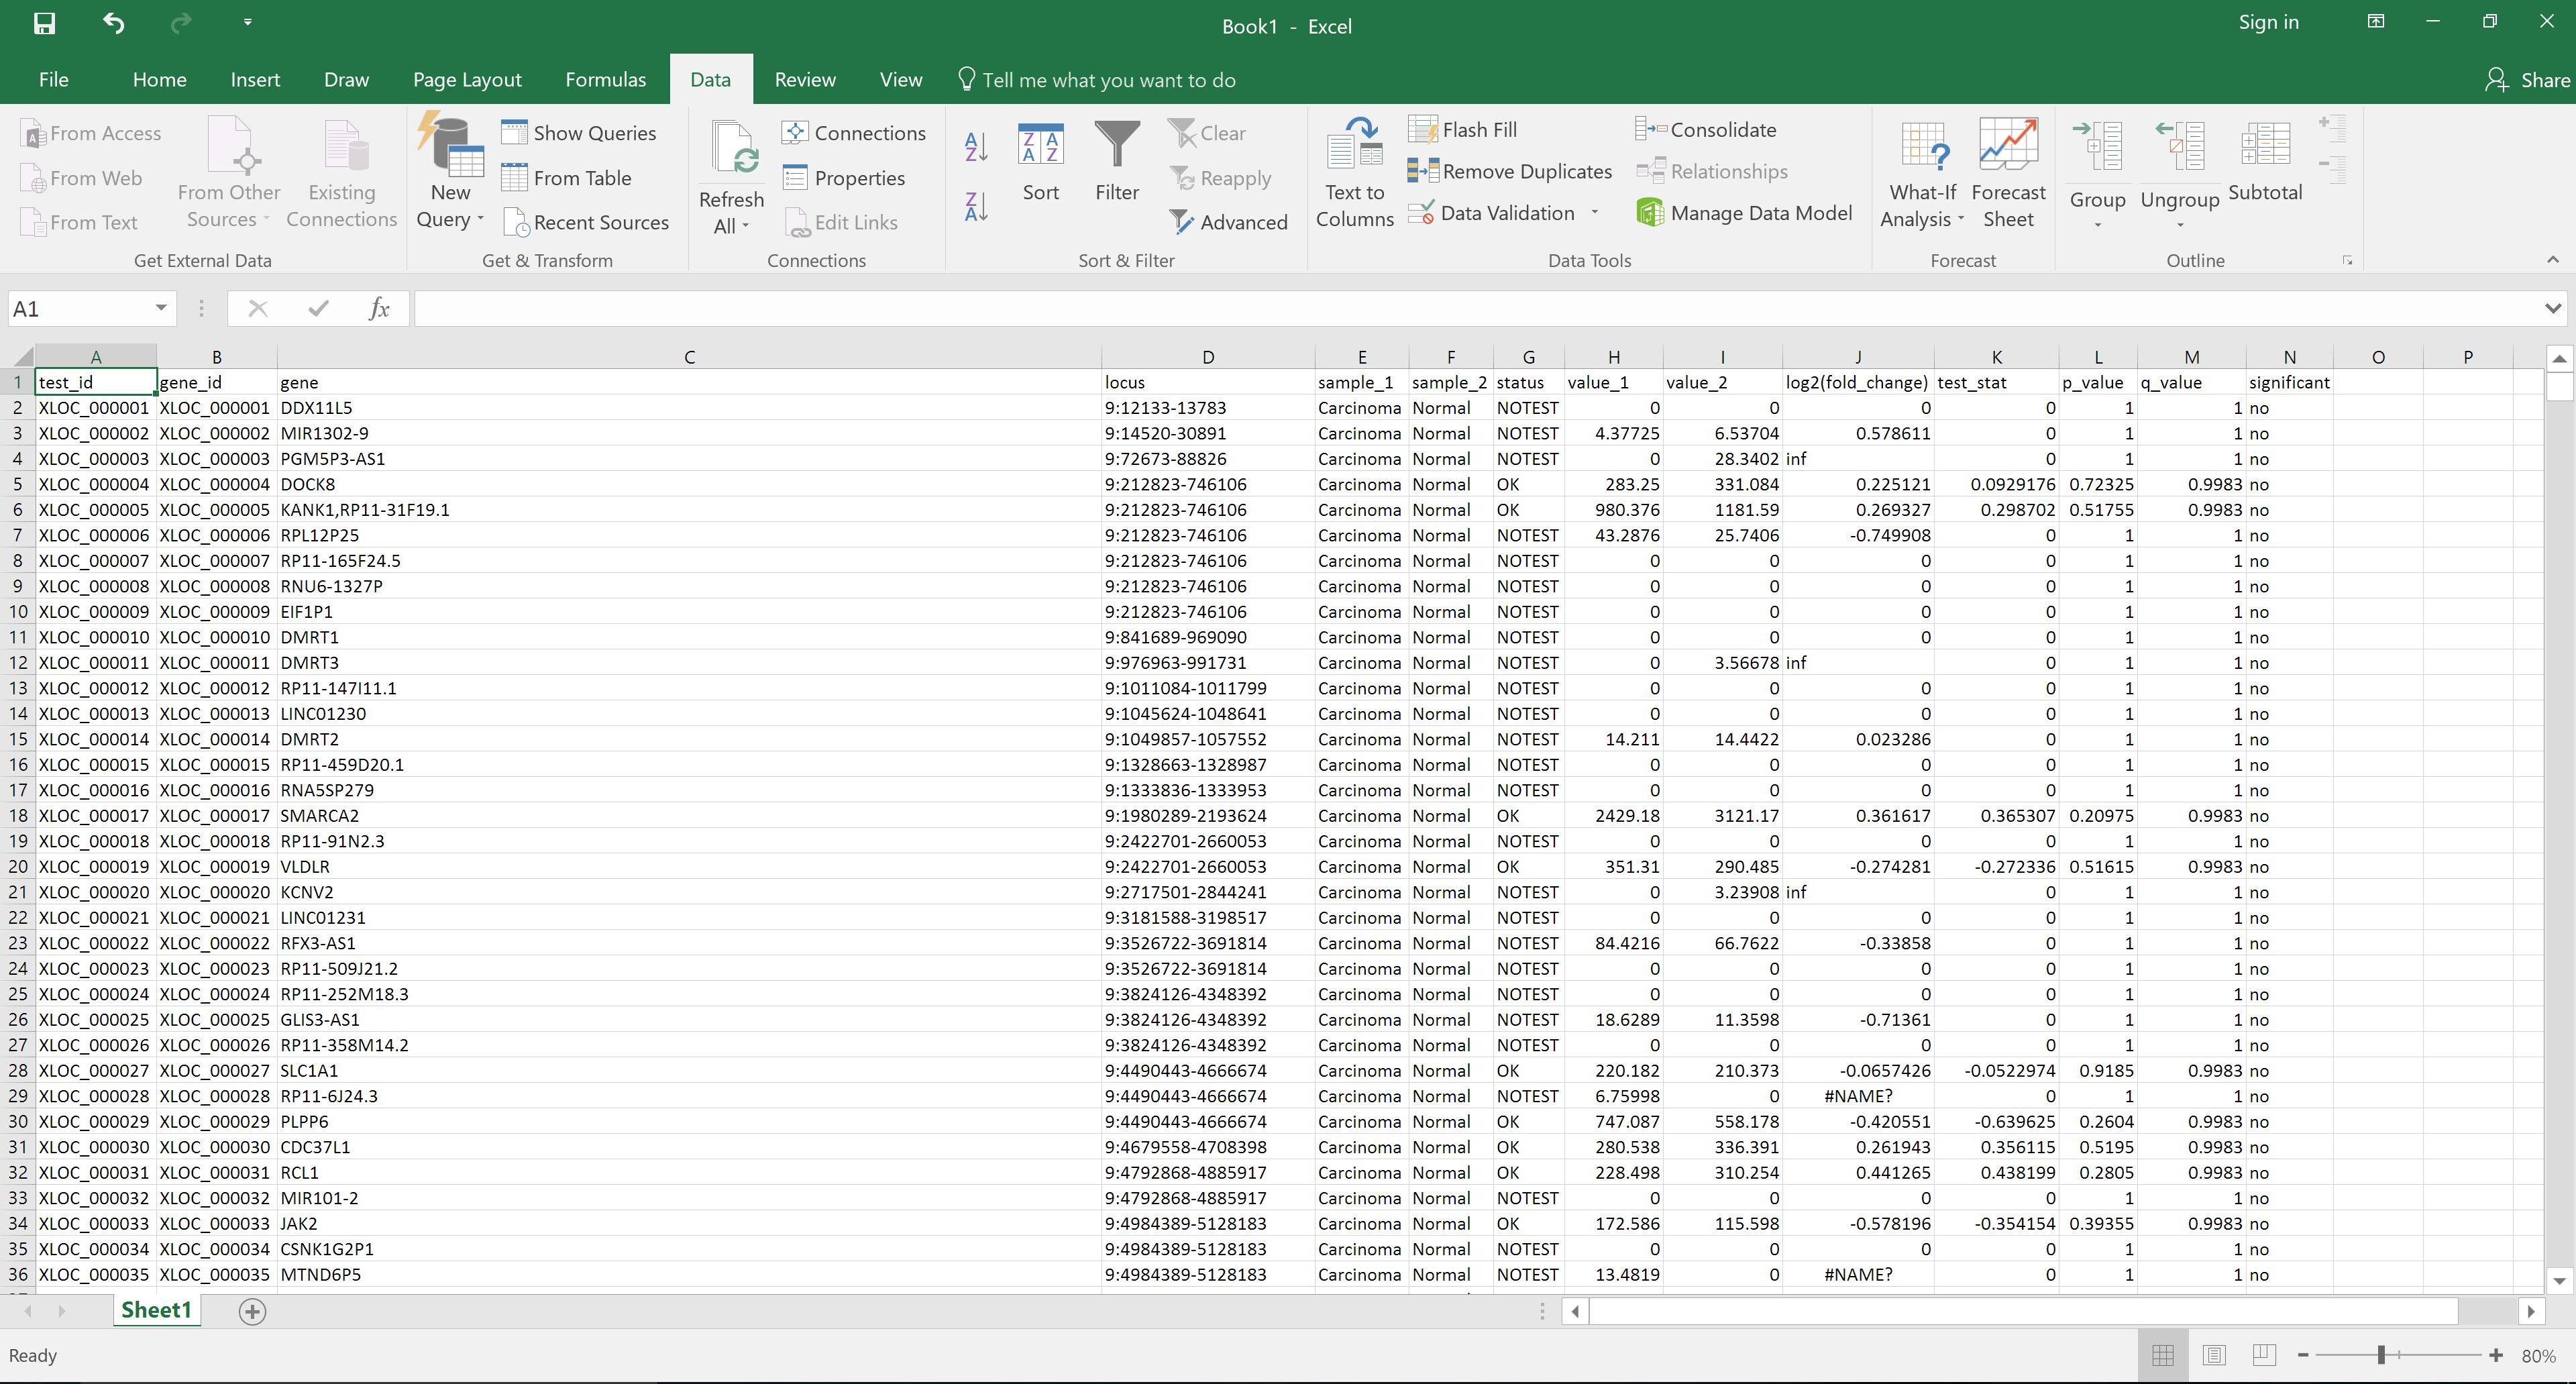
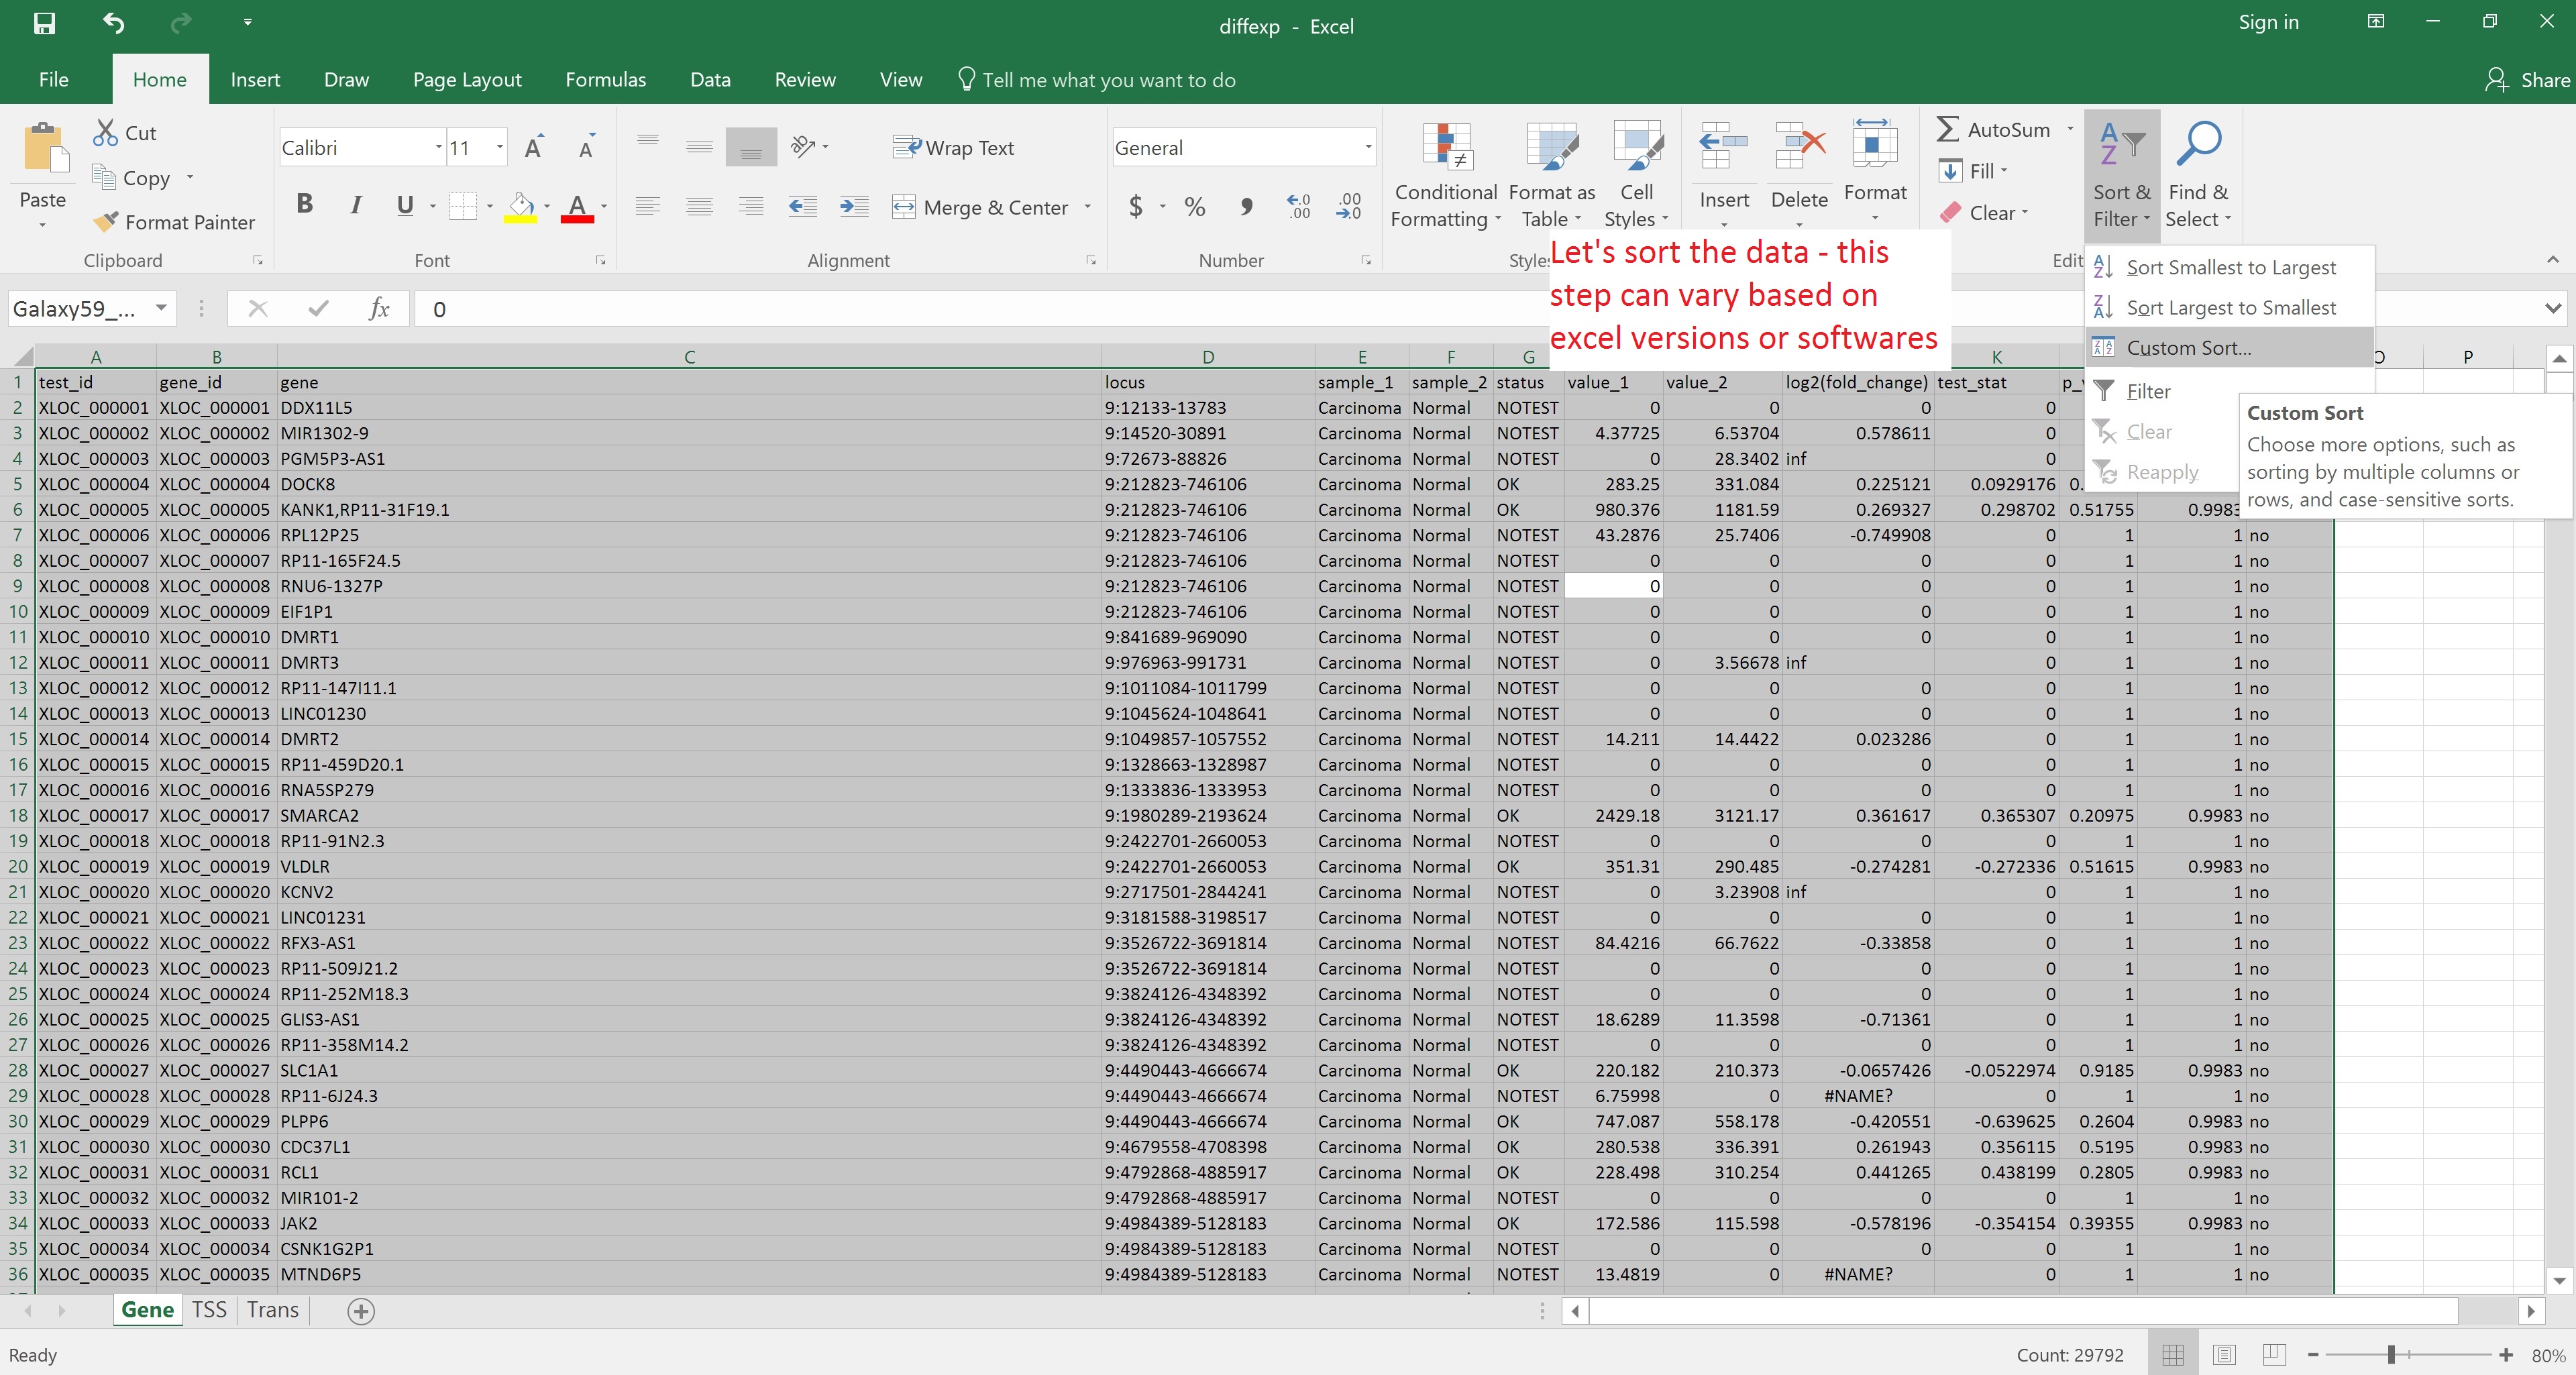
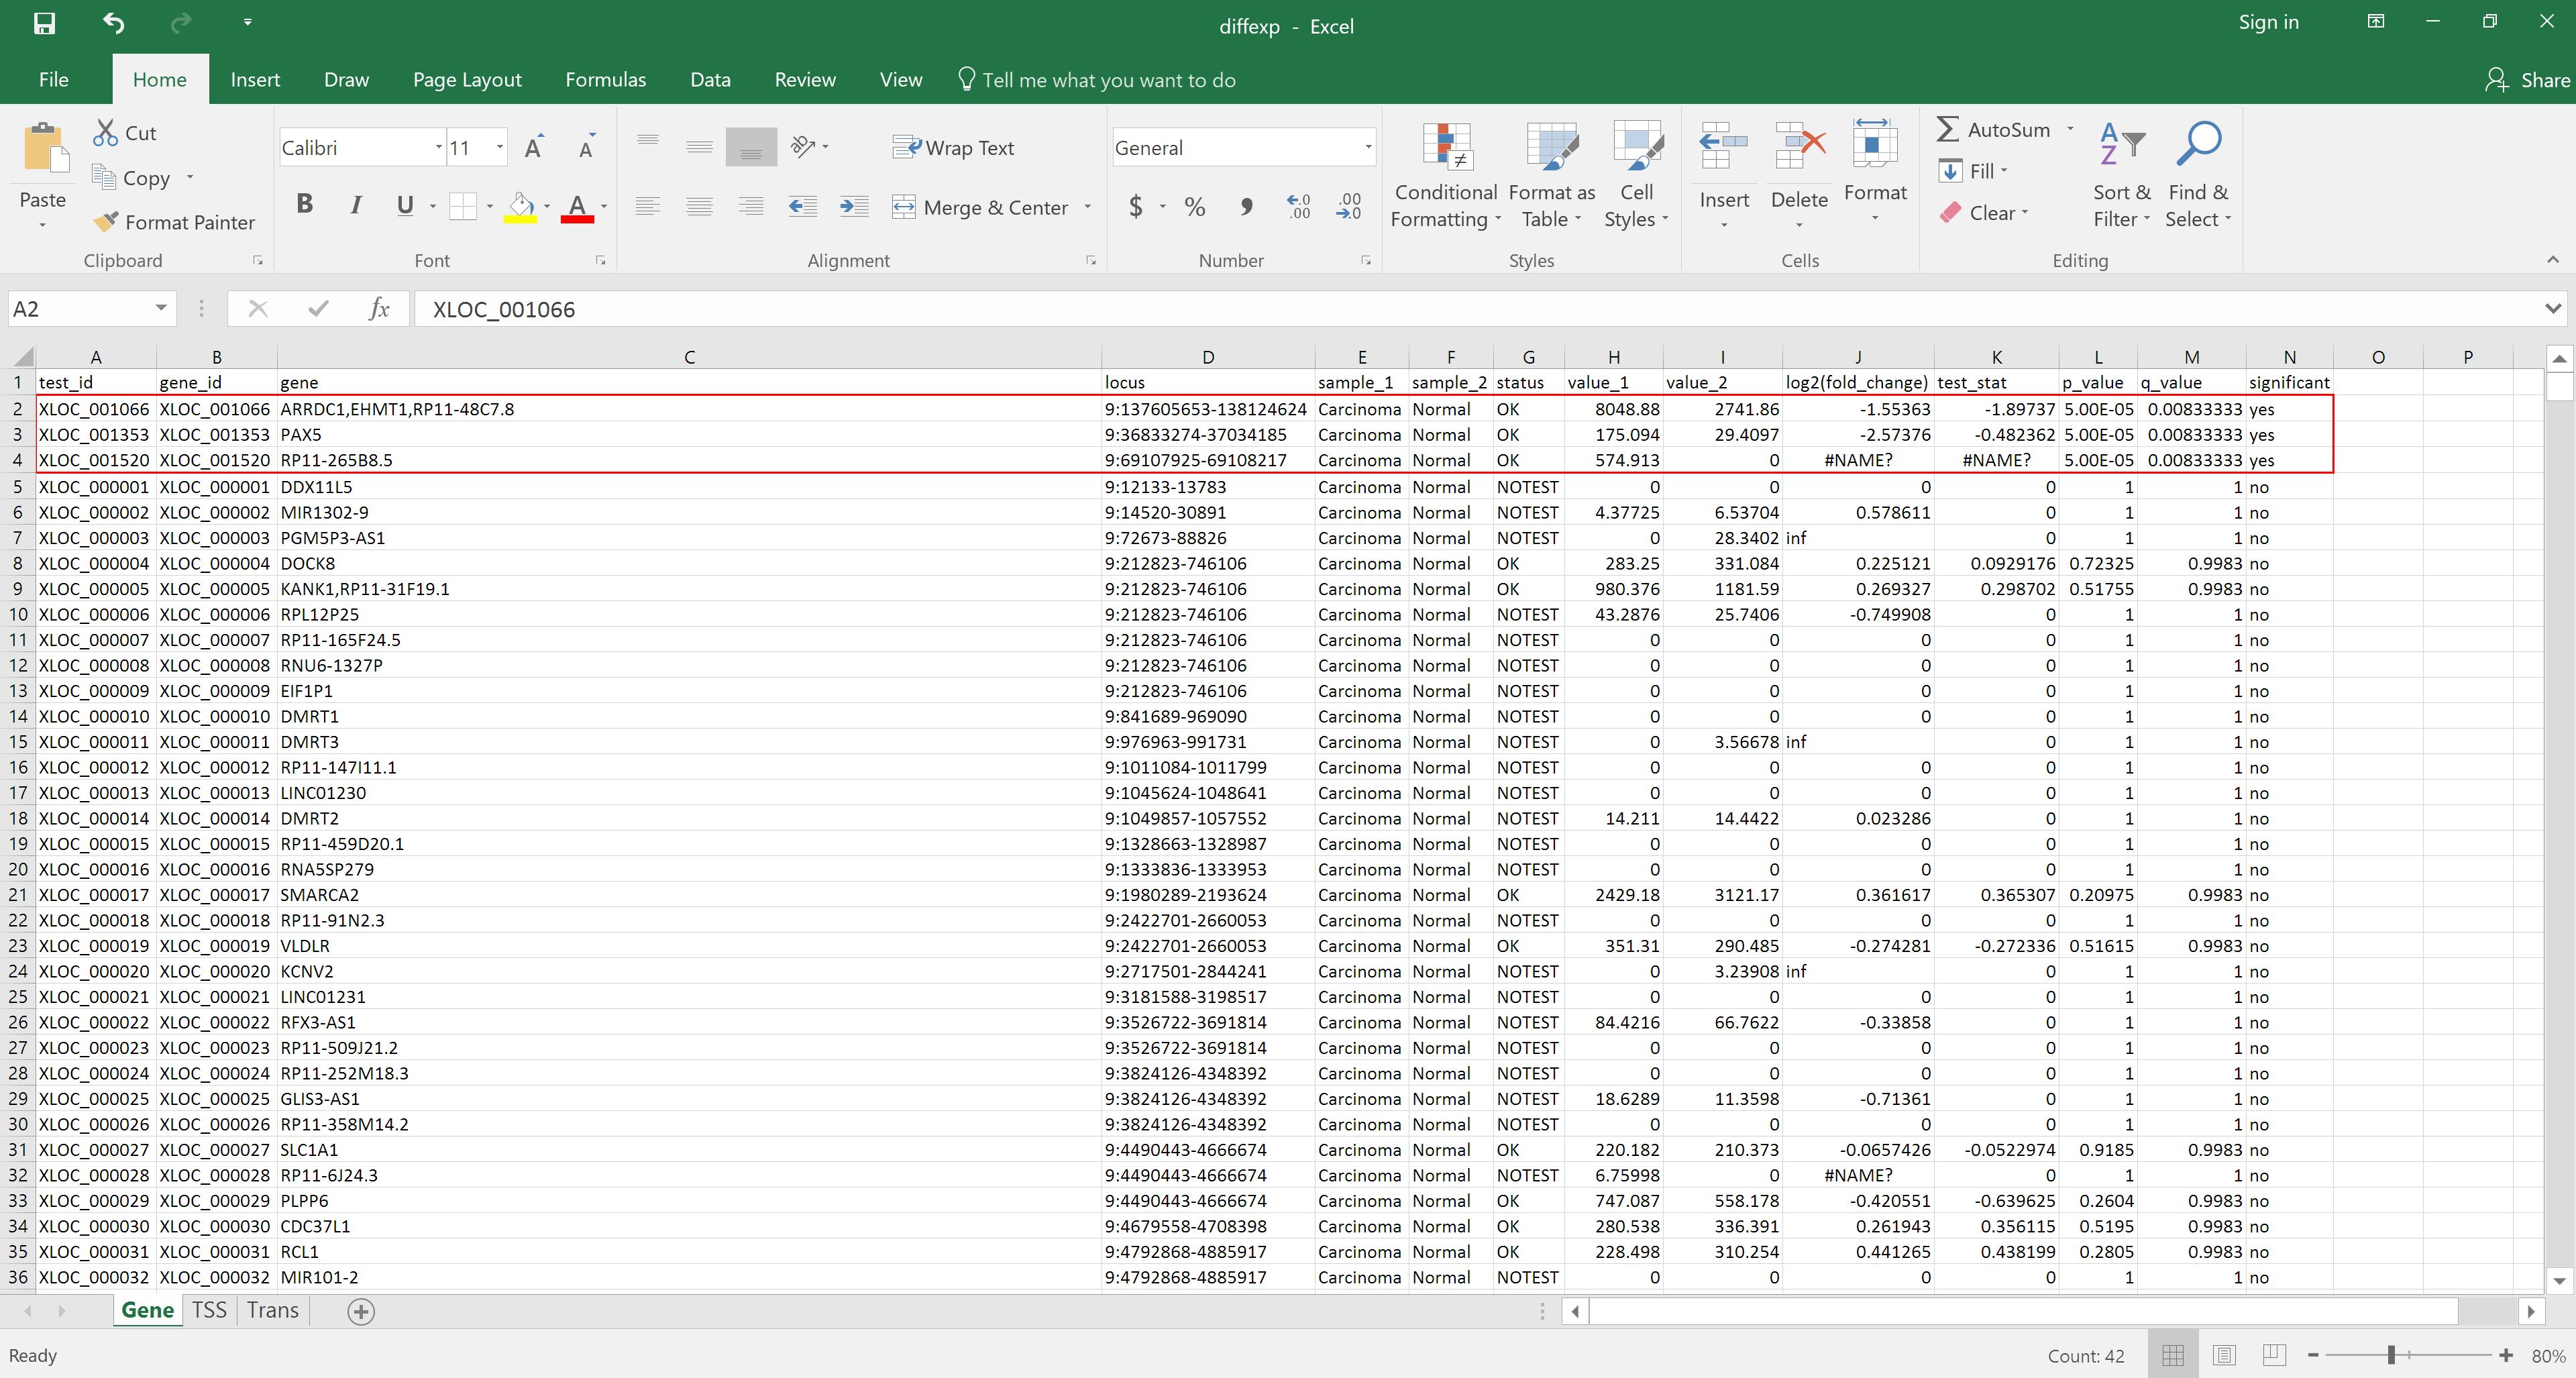
Click on the eye of the Cuffdiff on data 20, data 19, and others: gene differential expression testing to view the contents of the file. As we can see from the file, it contains the gene id, gene name, locus, the annotation for the samples, whether a test for significant differential expression was/could be performed, the normalized gene counts, log2 fold change, significance, false positive value, and finally whether the gene is significantly differentially expressed.
Alternatively, the file can be downloaded and opened in Excel for reordering by, for example, status in the significant column:

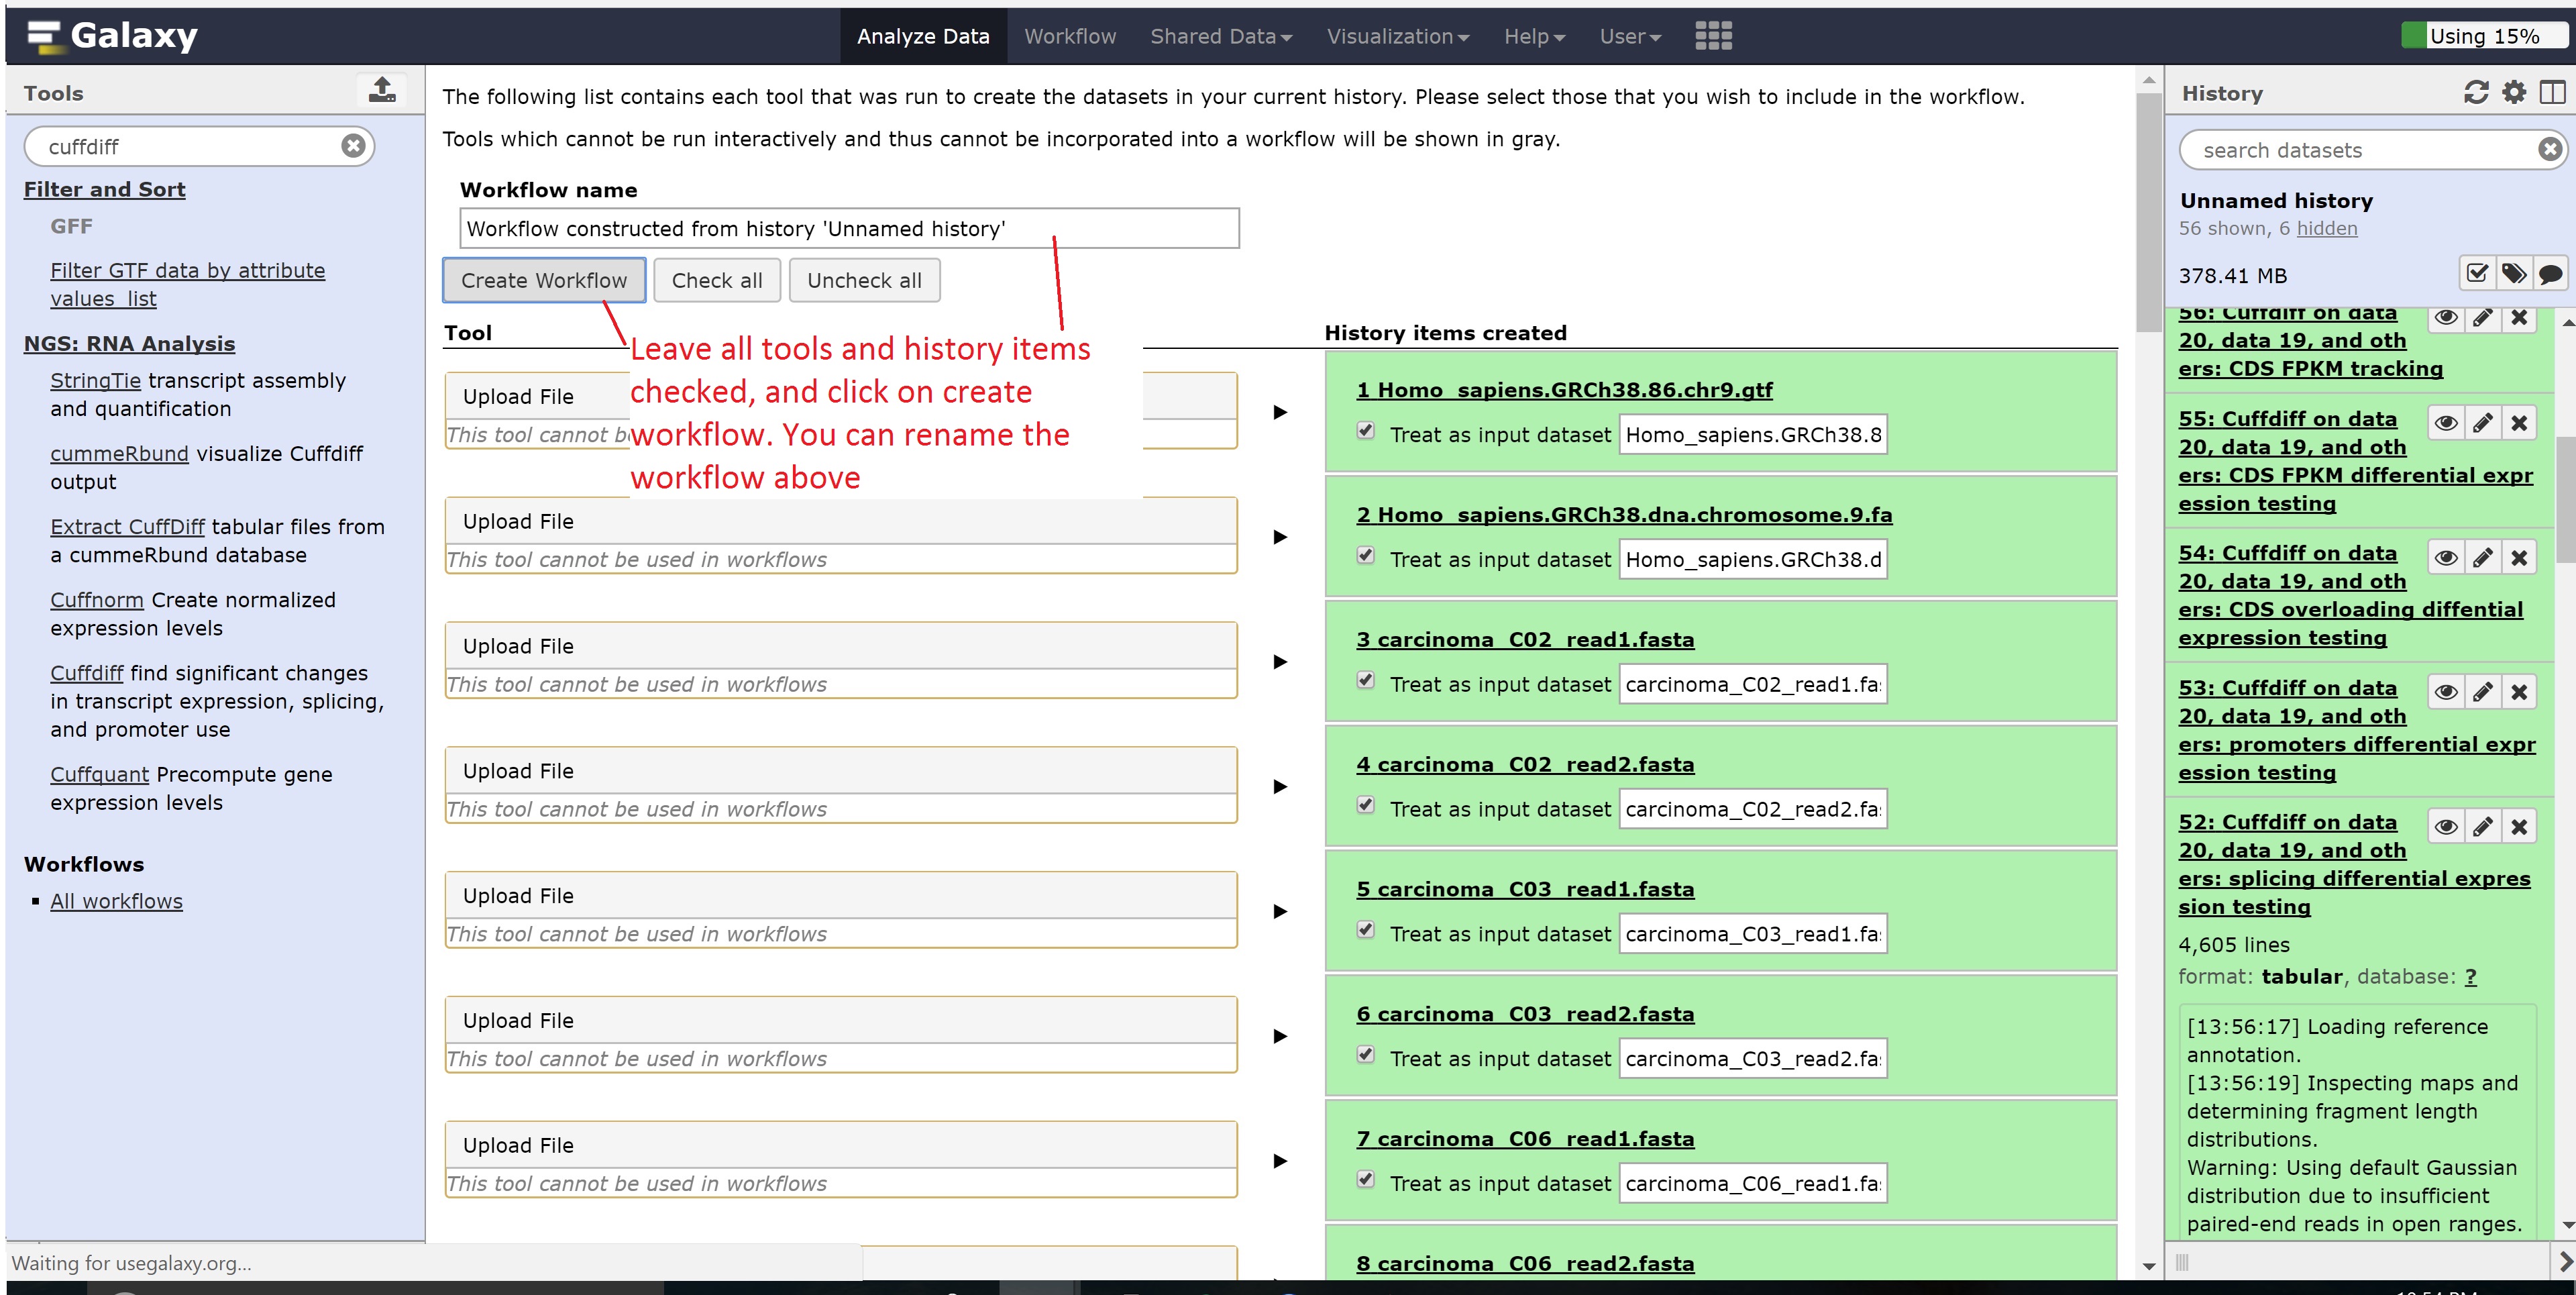
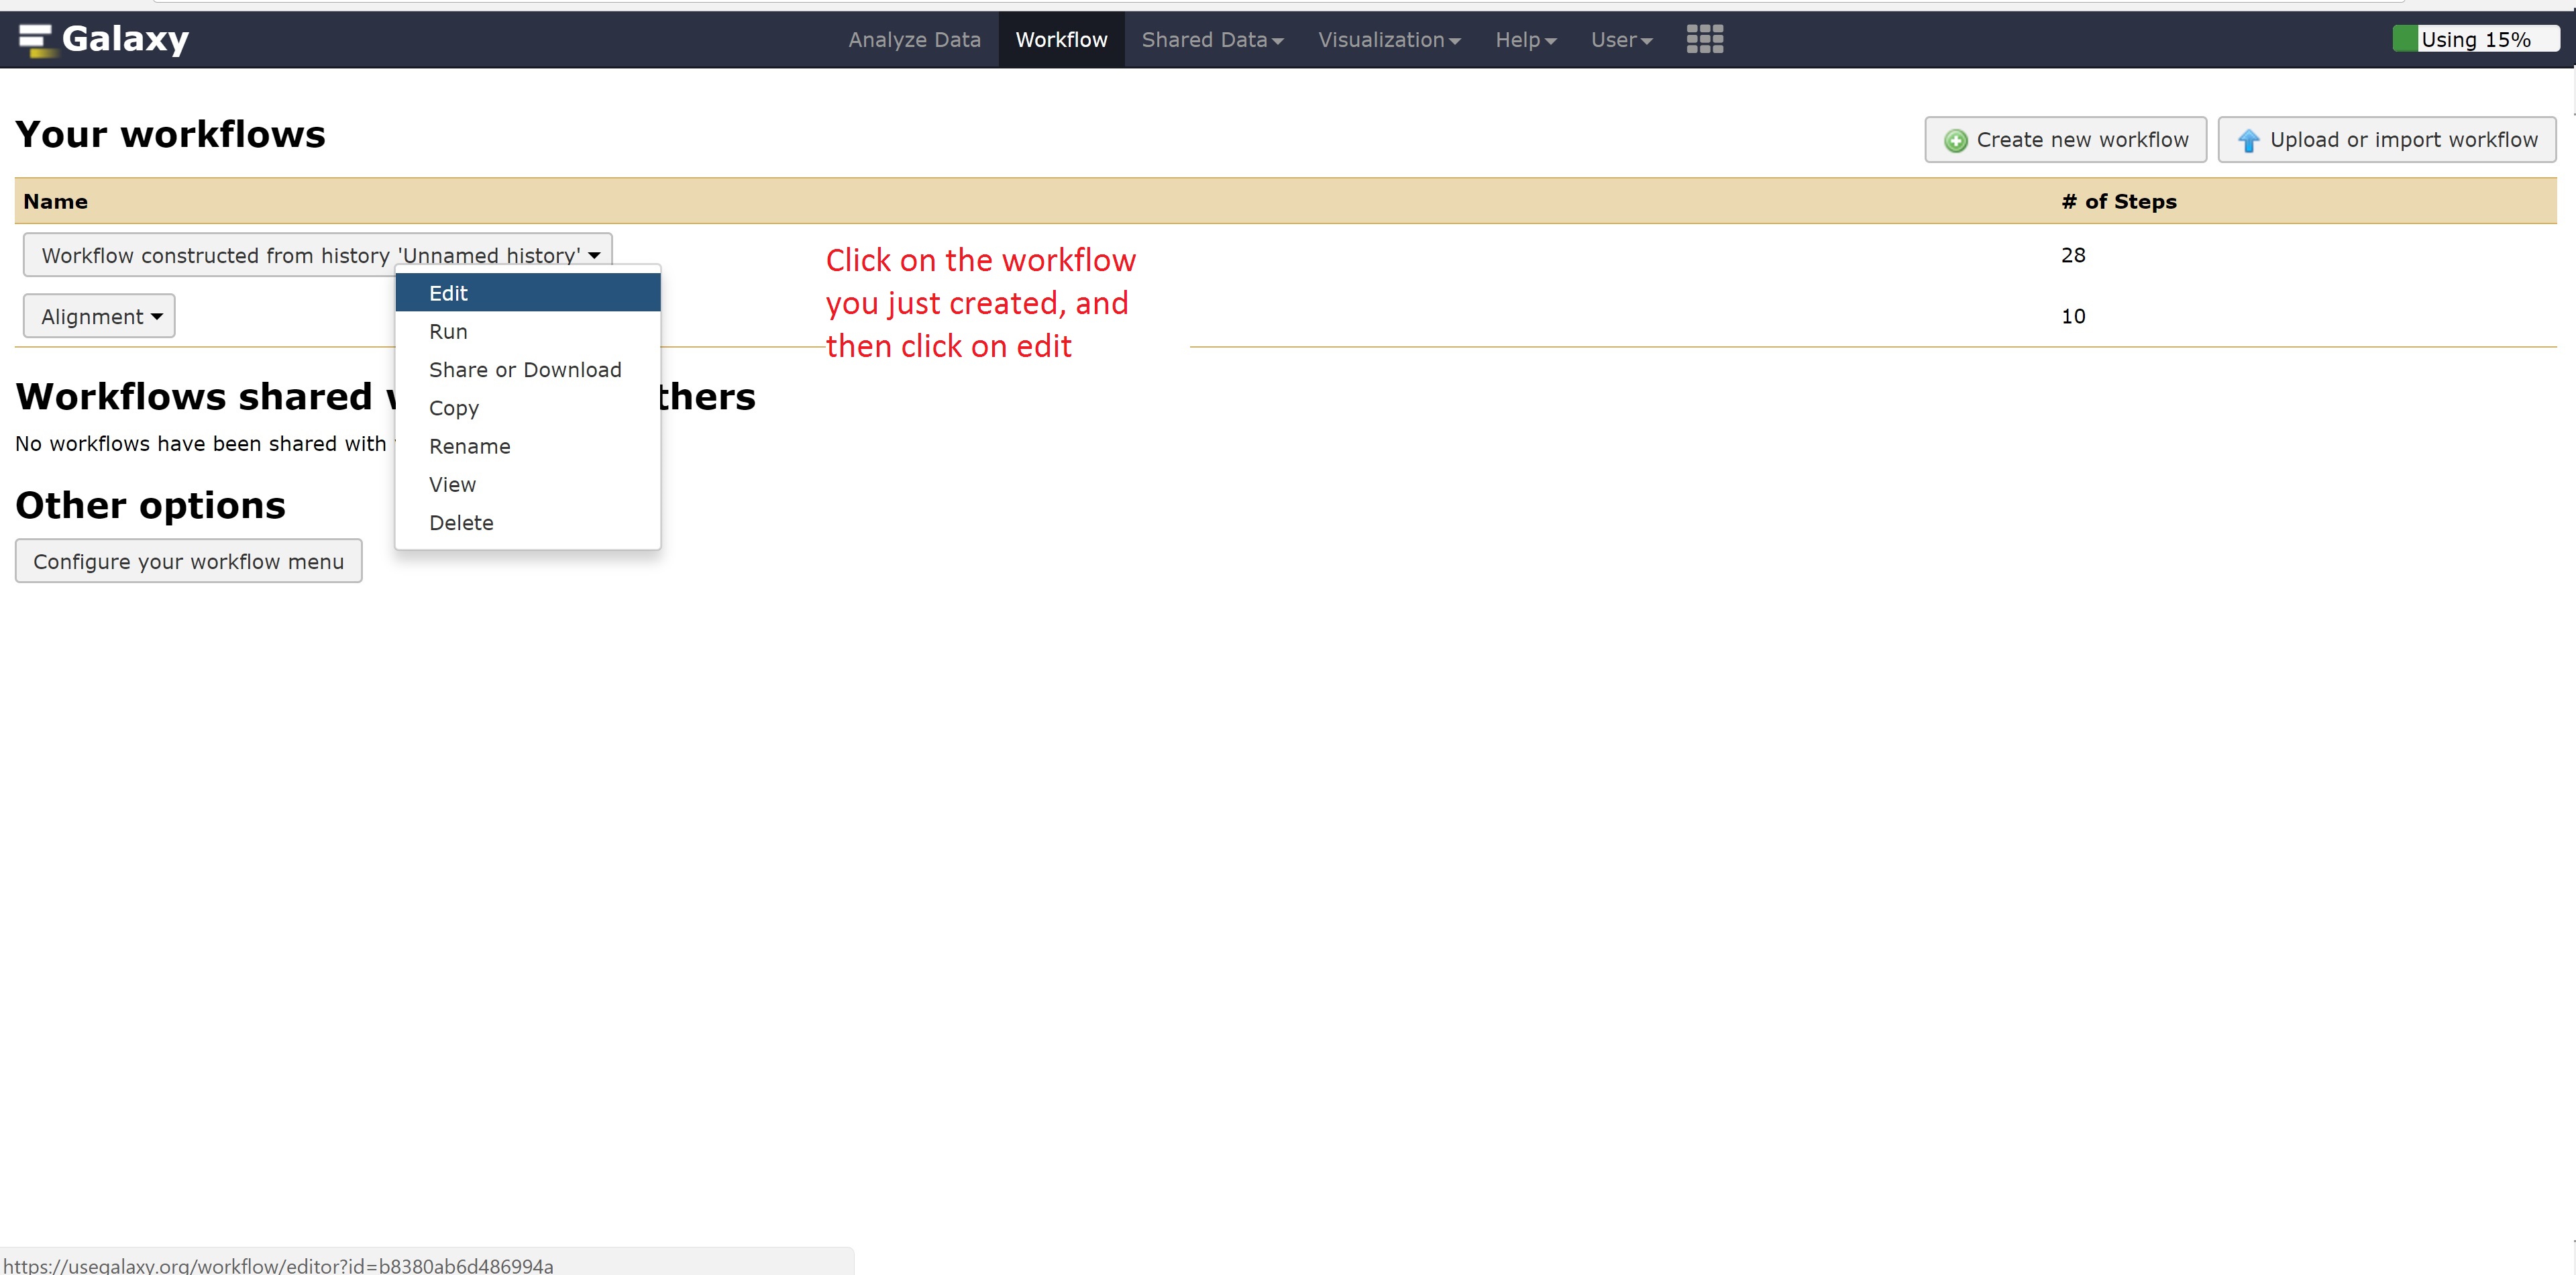
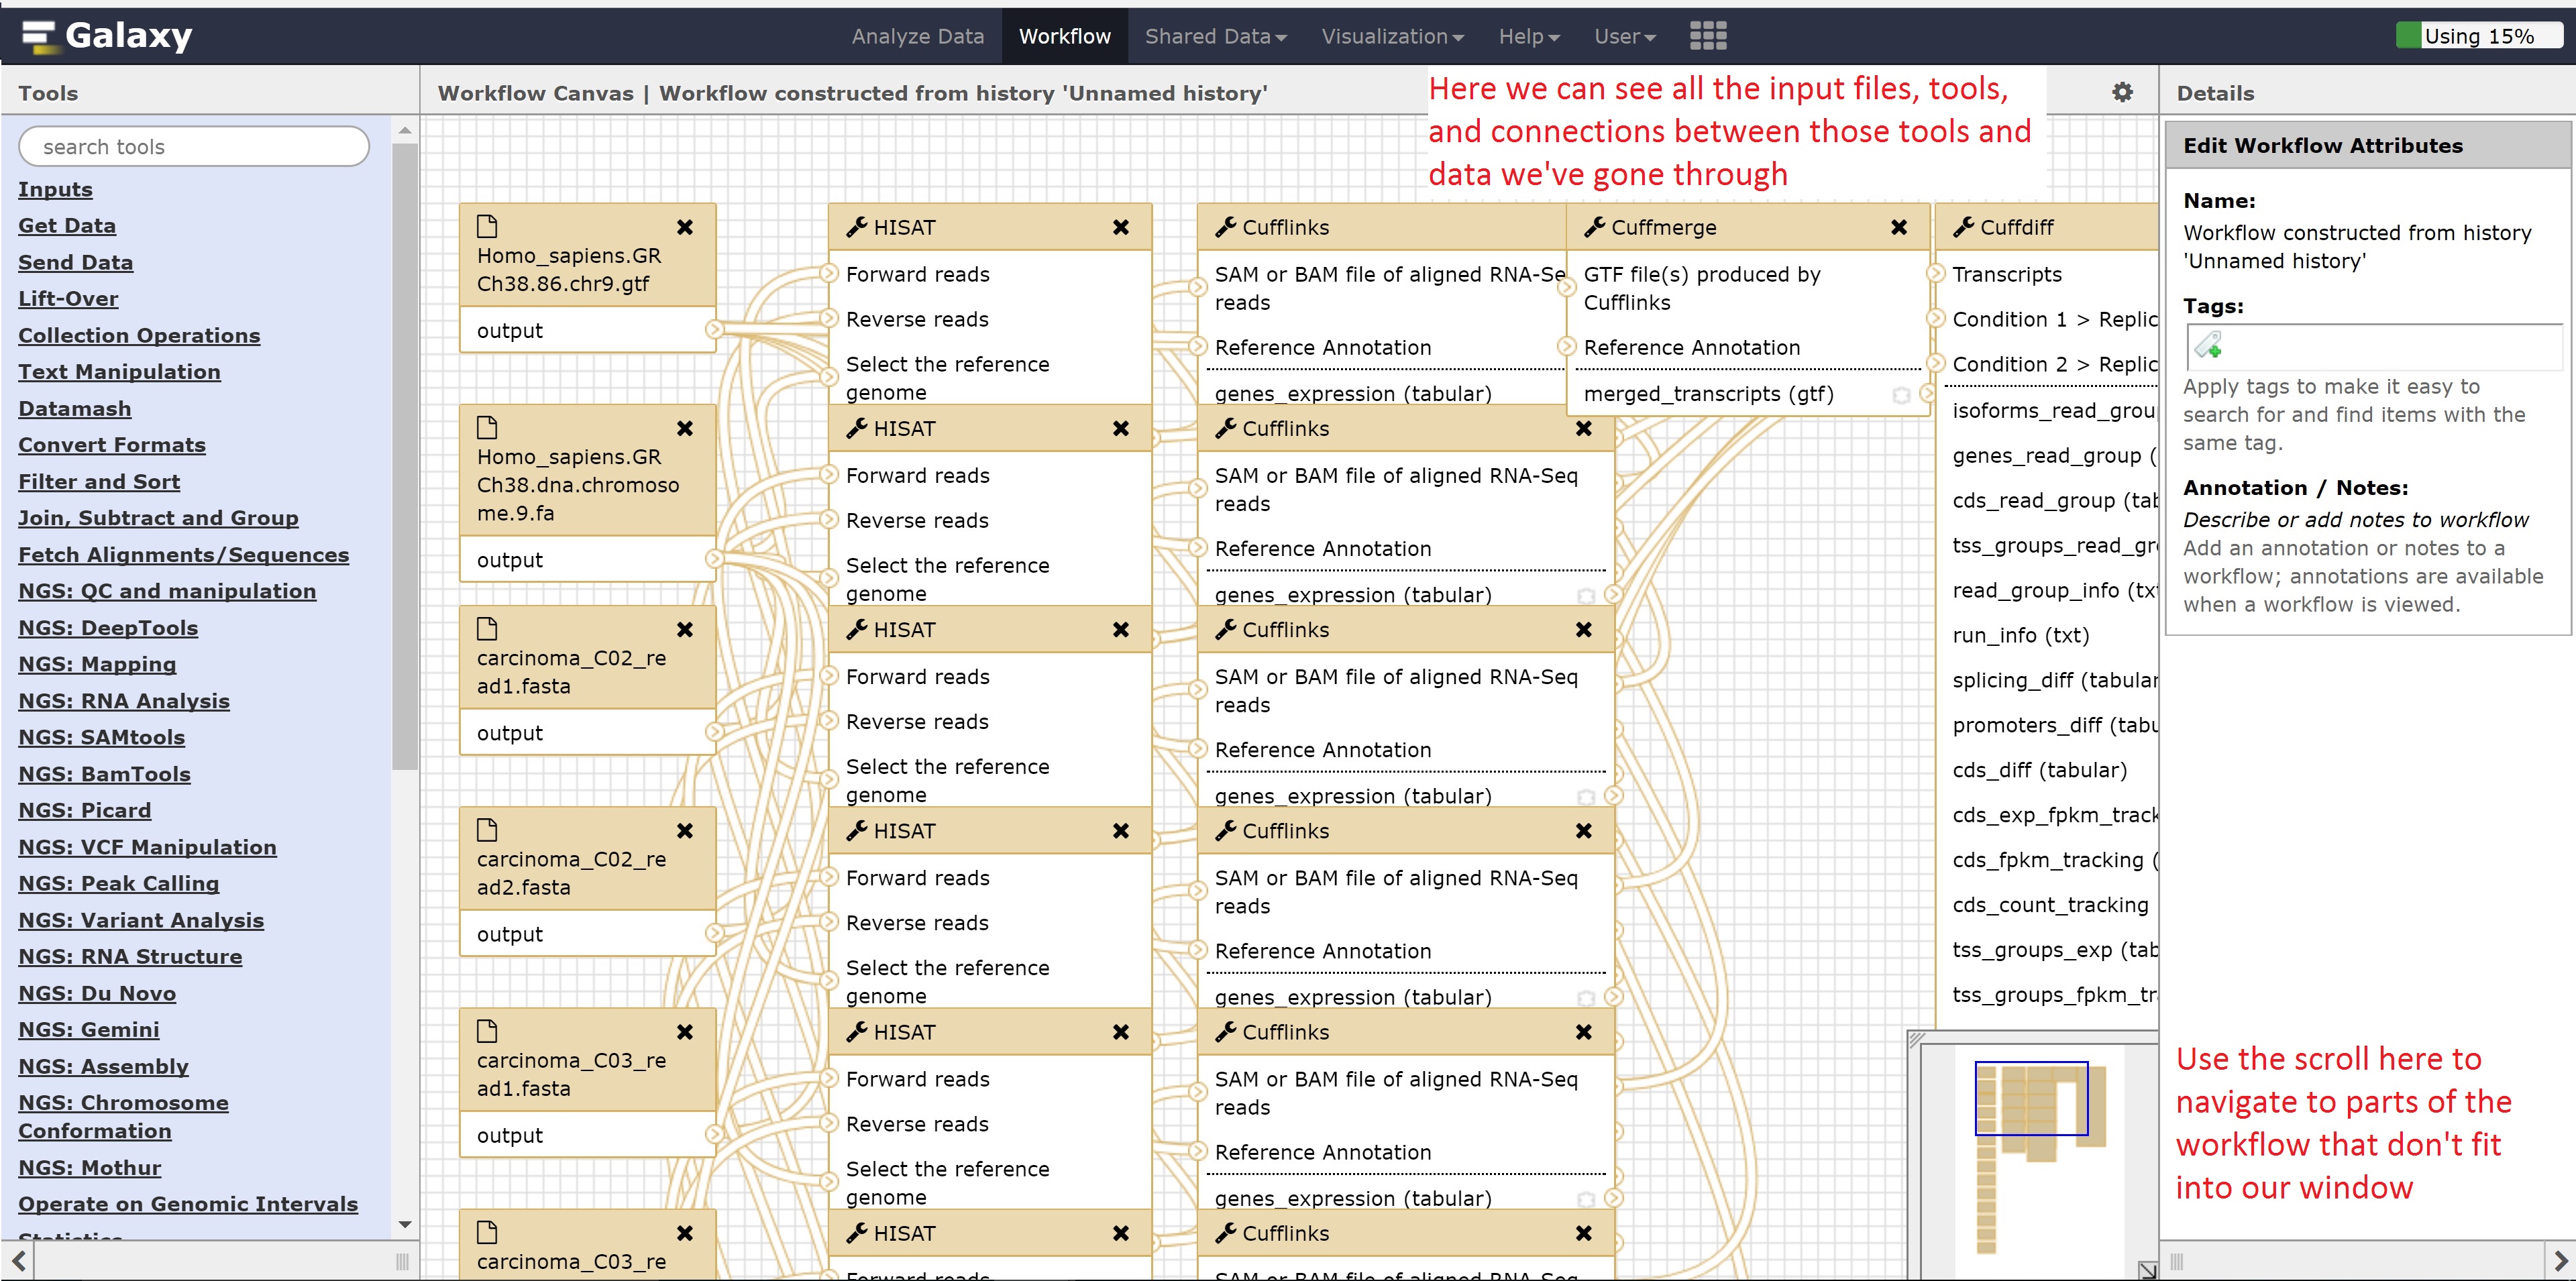
Finally, we’re going to extract our workflow to be able to save and rerun it at a later time. This also helps to visually see the steps that were taken and the connections between the programs.

This concludes the Galaxy tutorial. But this is still only an introduction - there’s plenty of other analysis you can perform using the Galaxy server so it is encouraged to test different workflows!